Get support for LiftMaster 3800

LiftMaster 3800 Support Question

LiftMaster 3800 Support Question

Find answers below for this question about LiftMaster 3800.
Need a LiftMaster 3800 manual? We have 1 online manual for this item!
Question posted by ruckustak on November 23rd, 2020

On The Sensors It Showing Two Wires Going Into The Quick Connect I Have Four Wir

how do I put the wires in for the sensor two sensors for wires

Current Answers

Answer #1: Posted by INIMITABLE on November 24th, 2020 6:00 AM
This answer was accepted by the poster of the original question.
INIMITABLE

Member since:
April 3rd, 2020

Points: 2,082,030
1,100
points
The transformer has 2 gray wires and 2 blue wires, the two gray wires connect to the connector on the logic board labeled P1. The two blue wires connect to the black and white wires coming from the power cord.

The motor has one big white wire that has 1 red and 1 black wire inside of it, and it connects to the connector on the logic board labeled P1 right next to the transformer wires.

Note: The plugs for the motor and the transformer share the same connector (P1) but the cables are keyed so you know in which direction the cables have to be inserted. Inserting the cables backwards into the connector can damage the board, connector, and can also affect the operation of the unit therefore you want to make sure the cables are inserted in the right direction.

The travel module has a wire harness that has 5 wires: 1 each of blue, black, yellow, orange, and red. The travel module wire harness connects from the travel module to the connector on the logic board labeled RPM P2.

On the logic board there will be a black and red wire that are soldered into the board and has a white plug at the end of the two wires. The white plug goes through a hole at the bottom of the red casing which is the connection for the battery backup. The plug can only go through the hole in one direction therefore if the plug is not going through the hole easily, rotate it until the plug inserts properly and with ease.

The power cord has 3 wires: green, white, and black wires. The black and white wires connect to the 2 blue wires on the transformer. The green wire is the ground wire and screws to the metal housing.


I hope this is helpful? PLEASE "ACCEPT" and mark it "HELPFUL" to complement my little effort. Hope to bring you more detailed answers

-INIMITABLE

Related LiftMaster 3800 Manual Pages

3800 Manual - Page 1

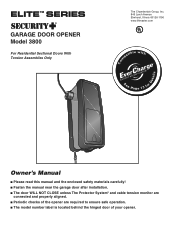
® GARAGE DOOR OPENER Model 3800 For Residential Sectional Doors With Torsion Assemblies Only Com Details The Chamberlain Group, Inc. 845 Larch Avenue Elmhurst, Illinois 60126-1196 www.liftmaster.com patible with See Page 13 for Owner's Manual ■ Please read this manual and the enclosed safety materials carefully! ■ Fasten the manual near the garage door after...
3800 Manual - Page 2

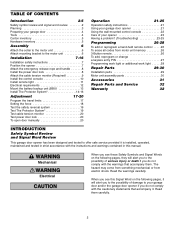
... 32 Warranty 32 INTRODUCTION Safety Symbol Review and Signal Word Review This garage door opener has been designed and tested to offer safe service provided it ....door lock 20 To open door manually 20 Operation 21-25 Operation safety instructions 21 Using your garage door opener 21 Using the wall-mounted control console 22 Care of your garage WARNING door and/or the garage door opener...
3800 Manual - Page 4

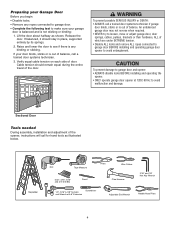
... tension. • Disable ALL locks and remove ALL ropes connected to garage door BEFORE installing and operating garage door WARNING opener to avoid malfunction and damage. CAUTION To prevent damage to garage door and opener: • ALWAYS disable locks BEFORE installing and operating the opener. • ONLY operate garage door opener at 120V, 60 Hz to avoid entanglement. Stepladder 12...
3800 Manual - Page 5

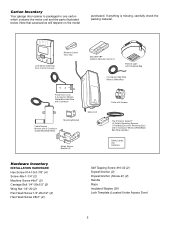
... below. Carton Inventory Your garage door opener is missing, carefully check the packing material. LOCK LIGHT LCD Motion Detecting Door Control Console Remote Control Visor Clip SECURITY✚® 3-Button Remote Control (1) Remote Light with Hardware Bag 2-Conductor Bell Wire White & White/Red Power Door Lock 2-Conductor White & White/Black Bell Wire with Connector Cable Tension...
3800 Manual - Page 6

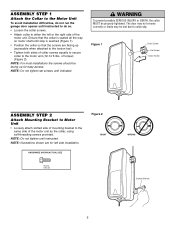
...Figure 1). • Position the collar so that the collar is seated all the way on motor shaft until indicated. The door may not reverse correctly or limits may be properly tightened. NOTE: Illustrations shown are facing up for left or the right... 6 ASSEMBLY STEP 1 Attach the Collar to the Motor Unit To avoid installation difficulties, do not run the garage door opener until instructed.
3800 Manual - Page 7

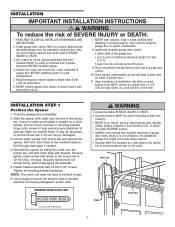
.... 5 Mount emergency release handle no higher than 6 feet (1.83 m) above floor. 6. Install garage door opener ONLY on wall next to power source until pilot holes align with 14-10x1-7/8" screws. NEVER connect garage door opener to garage door control. 10. Check to loosen, move or adjust garage door, springs, cables, pulleys, brackets or their hardware, ALL of which are under EXTREME...
3800 Manual - Page 9

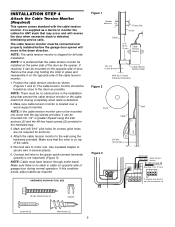
... tension monitor is shipped for left side installation. Run bell wire to the wall using the wall anchors (2) and the #8 hex head screws (2) provided in the hardware bag. 3. NOTE: Cable must be connected and properly installed before the garage door opener will reverse the door when excessive slack is no obstructions in the down direction. NOTE...
3800 Manual - Page 10

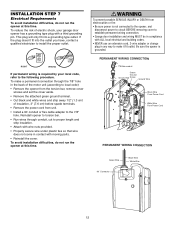
...care to secure wire in sight until the sensor beams are desired to operate the same garage door opener, it is not connected BEFORE installing control console. • Connect ONLY to ...gang box (Figure 1). Connect bell wire to the quick-connect terminals on back of door and door hardware. Fasten with control console push buttons or remote controls. • Activate door ONLY when it may...
3800 Manual - Page 12

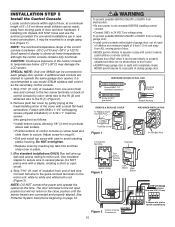
... by your garage door opener has a grounding type plug with moving parts. • Reinstall the cover. If the plug doesn't fit into a grounding type outlet. To make it fit outlet. Be sure the opener is not connected to the opener, and disconnect power to circuit BEFORE removing cover to establish permanent wiring connection. • Garage door installation and wiring MUST be...
3800 Manual - Page 14

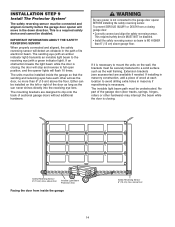
... is necessary to mount the units on the left or right of its electronic beam. Safety Reversing Sensor 6" (15 cm) max. INSTALLATION STEP 9 Install The Protector System® The safety reversing sensor must be connected and aligned correctly before the garage door opener will flash 10 times. If an obstruction breaks the light beam while the...
3800 Manual - Page 16

..., dim, or flickering (and the invisible light beam path is not obstructed), alignment is already open wire to Quick-Connect Terminals Sensor Connections WHT/RED WHT WHT/BLK WHT To Control Console Quick-Connect Terminals Power Door Lock Safety ReSvenrssionrg Sensor Safety Reversing Sensor Sensor Invisible Light Beam Protection Area 16 Lock in place. • Loosen the receiving eye wing...
3800 Manual - Page 19

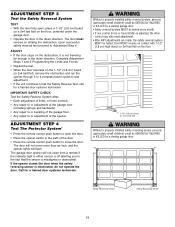
... one control (force or travel cycles to test adjustment. • If the unit continues to fail the Safety Reverse Test, call for a trained door systems technician. The garage door opener will flash. If the opener closes the door when the safety reversing sensor is off (alerting you to close from a remote if the indicator light in either...
3800 Manual - Page 21

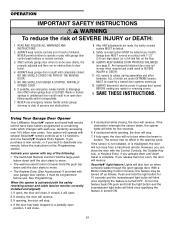
... the obstruction interrupts the sensor beam, the opener lights will reverse. If the sensor is not installed, or is turned ON. 21 ALWAYS keep garage door in the opening cycle. If obstructed while closing , the door will blink once signifying the feature is misaligned, the door will reverse. NO ONE SHOULD GO UNDER A STOPPED, PARTIALLY OPENED DOOR. 6. If you purchase a new...
3800 Manual - Page 24

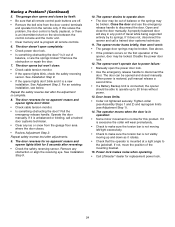
... after reversing: • Check the safety reversing sensor. Having a Problem? (Continued) 5. See Installation Step 9. • If the opener lights don't blink and it out of balance, or are off. • Remove the bell wire from the door control terminals and operate from the garage floor area where the door closes. • Review Adjustment Step 2. Pull the...
3800 Manual - Page 25

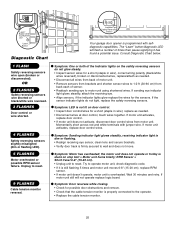
... hums briefly; If motor unit activates, replace door control. • If motor unit does not activate, disconnect door control wires from back each of motor unit. • Remove sensors from brackets and shorten sensor wires to wall and does not move. Symptom: Motor has overheated; Installed Safety Reversing Sensor Your garage door opener is firmly secured to 1-2 ft (30-60...
3800 Manual - Page 26

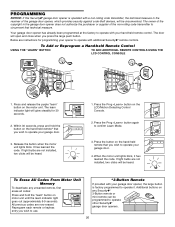
... remote or mini-remote can be heard. All previous codes are not installed, two clicks will be programmed to operate other Security✚® garage door openers. 26 Your garage door opener has already been programmed at the factory to operate with additional Security✚® remote controls. Press and release the purple "learn " button on...
3800 Manual - Page 27

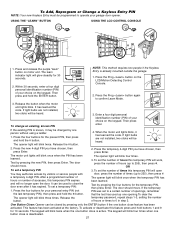
... light bulbs are not installed, two clicks will be closed by pressing only the ENTER button if the one opening.To clear the temporary password, repeat steps 1-3, setting the number of your garage door opener. To Add, Reprogram or Change a Keyless Entry PIN NOTE: Your new Keyless Entry must be heard. Then press and...
3800 Manual - Page 28

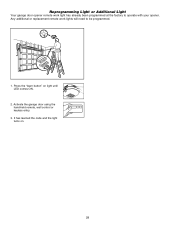
... the hand-held remote, wall control or keyless entry. 3. Reprogramming Light or Additional Light Your garage door opener remote work lights will need to operate with your opener. It has learned the code and the light turns on light until LED comes ON. 2. Any additional or replacement remote work light has already been ...
3800 Manual - Page 31

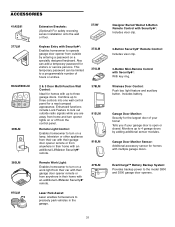
...916LM Garage Door Monitor Sensor: Additional accessory sensor for homes with an additional LiftMaster Security✚® remote. 378LM Wireless Door Control: Push bar, light feature and auxiliary button. LOCK LIGHT 915LM CLOSED OPEN Garage Door Monitor: Security for visitors or service persons. Remote Light Control: Enables homeowner to the model 3800 and 3500 garage door openers...
3800 Manual - Page 32

... NO CIRCUMSTANCES SHALL SELLER BE LIABLE FOR CONSEQUENTIAL, INCIDENTAL OR SPECIAL DAMAGES ARISING IN CONNECTION WITH USE, OR INABILITY TO USE, THIS PRODUCT. This limited warranty gives you ... Tucson, Arizona 85706 SERVICE INFORMATION TOLL FREE NUMBER: 1-800-528-9131 LIFTMASTER® GARAGE DOOR OPENER FIVE-YEAR LIMITED WARRANTY LIFETIME MOTOR LIMITED WARRANTY The Chamberlain Group, Inc. ("Seller") ...

Similar Questions

I Have Installed A Chamberlan Garage Door Opener And The Remote I Was Using Is
I have been using a Chamberlan garage door opener and its remote has been defective since of late.Pl...
(Posted by donweera42 8 months ago)
Garage Door Opens After Shutting.
My Lift master 8550 inside keypad is Inside wall pad is model #880LM. outside keypad Model # is 877M...
(Posted by BONNIECA92 2 years ago)
Cable Off Drums
Door is about half way up-- Cable is offdrums on both sides i pulled ermergency cable but can not ...
(Posted by ottocm 11 years ago)
Ask a New Question
Use the box below to post a new question about this LiftMaster product .
Points & Prizes
  • You can earn points for nearly everything you do on HelpOwl.com
  • You can trade in those points for gift cards at leading retailers such as Amazon.com and Walmart
  • It's that simple!
See How it Works
Create a Free Account

LiftMaster Manuals

Find free LiftMaster 3800 manuals and user guides available at ManualOwl.com. Try out our unique manual viewer allowing you to interact with manuals from directly within your browser!

LiftMaster Reviews

View thousands of LiftMaster user reviews and customer ratings available at ReviewOwl.com.

Contact Information

Complete LiftMaster customer service contact information including steps to reach representatives, hours of operation, customer support links and more from ContactHelp.com.

Scoreboard Ratings

See detailed LiftMaster customer service rankings, employee comments and much more from our sister site.