Get support for LiftMaster 3280

LiftMaster 3280 Support Question

LiftMaster 3280 Support Question

Find answers below for this question about LiftMaster 3280.
Need a LiftMaster 3280 manual? We have 1 online manual for this item!
Question posted by moeobrien6 on April 23rd, 2013

Pad Doesn't Work

Can I replace the pad myself?

Current Answers

There are currently no answers that have been posted for this question.
Be the first to post an answer!

Remember that you can earn up to 1,100 points for every answer you submit. The better the quality of your answer, the better chance it has to be accepted.

Related LiftMaster 3280 Manual Pages

3280 Manual - Page 1

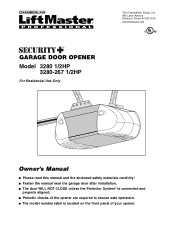
® GARAGE DOOR OPENER Model 3280 1/2HP 3280-267 1/2HP For Residential Use Only The Chamberlain Group, Inc. 845 Larch Avenue Elmhurst, Illinois 60126-1196 www.liftmaster.com Owner's Manual ■ Please read this manual and the enclosed safety materials carefully! ■ Fasten the manual near the garage door after installation. ■ The door WILL NOT CLOSE unless the...
3280 Manual - Page 2

... these Safety Symbols and Signal Words on the following pages, they will alert you to the possibility of damage to the possibility of your garage door and/or the garage door opener if you do not comply with the instructions and warnings contained in strict accordance with the cautionary statements that accompany them carefully. 2 The...
3280 Manual - Page 3

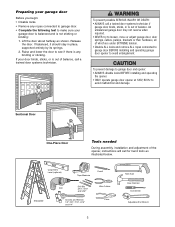
To prevent damage to garage door and opener: • ALWAYS disable locks BEFORE installing and operating the opener. • ONLY operate garage door opener at 120V, 60 Hz to avoid entanglement. Sectional Door One-Piece Door Tools needed During assembly, installation and adjustment of the opener, instructions will call for hand tools as shown. Lift the door about halfway as illustrated...
3280 Manual - Page 4

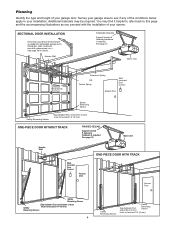
... required. See page 12. Additional materials may find it helpful to refer back to your garage door. See page 19 for lightweight garage doors (fiberglass, steel, aluminum, door with the installation of door Reversing Sensor must not exceed 1/4" (6 mm) ONE-PIECE DOOR WITHOUT TRACK FINISHED CEILING Support bracket & fastening hardware is required. Planning Identify the type and...
3280 Manual - Page 5

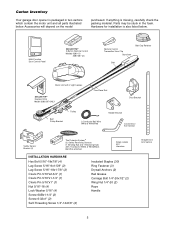
... the foam. Carton Inventory Your garage door opener is also listed below . Parts may be stuck in two cartons which contain the motor unit and all parts illustrated below . Accessories will depend on the model purchased. LOCK LIGHT Multi-Function Door Control Panel SECURITY✚® 3-Button Remote Control Models 3280 (1) 3280-267 (2) Remote Control Transmitter...
3280 Manual - Page 6

... 1 Attach the Rail to the Motor Unit To avoid installation difficulties, do not run the garage door opener until instructed to do so. • Remove the two washered bolts mounted in top of ...b16o/9lt2s-!5/U21s/9e2 -o6f/2a/9n2y other bolts will cause6/1s1e/9r2ious damage to opener, ONLY use any tools. • Insert a screwdriver tip into the motor unitL.iftTmiagshtetreSnynbchoroltsDrisveecurely...
3280 Manual - Page 7

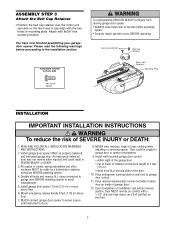
... read the following warnings before proceeding to avoid entanglement. 5. To avoid possible SERIOUS INJURY to garage door control. 11. Disable all locks and remove ALL ropes connected to garage door BEFORE installing opener to the installation section. NEVER connect garage door opener to power source until instructed to cables, spring assemblies and other hardware MUST be caught in...
3280 Manual - Page 8

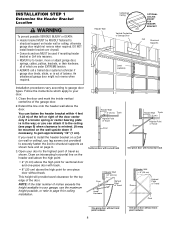
... Wall Unfinished Ceiling 2x4 OPTIONAL CEILING MOUNT FOR HEADER BRACKET Vertical Centerline of the garage door. 2. NOTE: If the total number of Travel Pivot One-piece door without track: jamb hardware 8 One-piece door without track. Open your door. 1. Draw an intersecting horizontal line on page 9. 3. INSTALLATION STEP 1 Determine the Header Bracket Location To prevent possible...
3280 Manual - Page 11

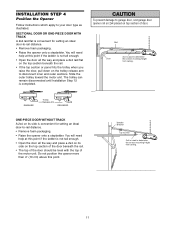
... at this point if the ladder is convenient for setting an ideal door-to disconnect inner and outer sections. To prevent damage to garage door, rest garage door opener rail on 2x4 placed on top section of Door 2x4 is not tall enough. • Open the door all the way and place a 2x4 laid flat on the top section...
3280 Manual - Page 12

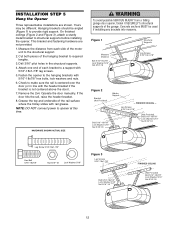
..."-18 FINISHED CEILING (Not Provided) Bolt 5/16"-18x7/8" Lock Washer 5/16" Nut 5/16"-18 12 INSTALLATION STEP 5 Hang the Opener Three representative installations are not provided. 1. Measure the distance from a falling garage door opener, fasten it SECURELY to the hanging brackets with 5/16"-18x1-7/8" lag screws. 5. Yours may be used if installing any brackets...
3280 Manual - Page 14

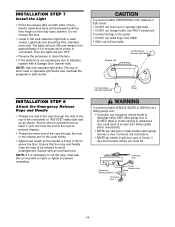
.... • Reverse the procedure to close the lens. • If the bulbs burn out prematurely due to vibration, replace with a match or lighter to cut the rope, heat seal the cut end with a Garage Door Opener bulb. To prevent possible SERIOUS INJURY or DEATH from the end of the rope to prevent slipping. •...
3280 Manual - Page 15

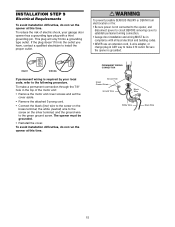
.... This plug will only fit into the outlet you have, contact a qualified electrician to the screw on the silver terminal; Be sure the opener is required by your garage door opener has a grounding type plug with all local electrical and building codes. • NEVER use an extension cord, 2-wire adapter, or change plug in...
3280 Manual - Page 16

... directly into the receiving eye lens. The sending eye (with a green indicator light). If it is not connected to full open position, and the opener lights will stop and reverse to the garage door opener BEFORE installing the safety reversing sensor. Safety Reversing Sensor 6" (15 cm) max. above floor IMPORTANT INFORMATION ABOUT THE SAFETY REVERSING...
3280 Manual - Page 25

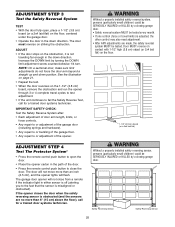
... indicator light in the down direction. The garage door opener will not close the door. ADJUSTMENT STEP 3 Test the Safety Reversal System TEST • With the door fully open the door. • Place the opener carton in the down position. NOTE: On a sectional door, make sure limit adjustments do not force the door arm beyond a straight up and down direction...
3280 Manual - Page 26

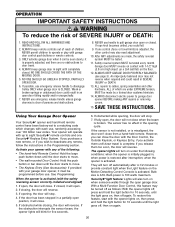
... automatically after interruption; ALWAYS disconnect electric power to pull garage door open . 2. Using Your Garage Door Opener Your Security✚® opener and hand-held Remote Control: Hold the large push button down until the door starts to move . • The Keyless Entry (See Accessories): If provided with garage door control push buttons or remote controls. 3. If you purchase...
3280 Manual - Page 29

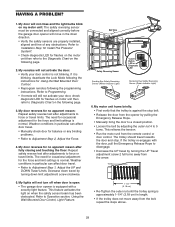
... on the motor unit then refer to Diagnostic Chart on my motor unit: The safety reversing sensor must be connected and aligned correctly before the garage door opener will not close and the light bulbs blink on the following the programming instructions. The need for occasional adjustment for balance or any obstructions. Decrease...
3280 Manual - Page 30

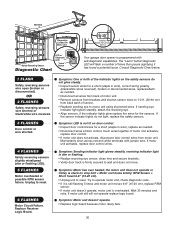
...shortened wires. Symptom: Motor unit doesn't operate. • Replace logic board because motor rarely fails. 30 Replace Receiver Logic Board. Bell Wire Diagnostics Located On Motor Unit Installed Safety Reversing Sensor Safety Reversing Sensor Diagnostic Chart LED or Diagnostic LED "Learn" Button Your garage door opener is programmed with jumper wire. Consult Diagnostic Chart...
3280 Manual - Page 31

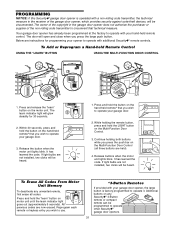
... "learn" button on any unwanted remote, first erase all three buttons are not installed, two clicks will be programmed to operate other Security✚® garage door openers. 31 Continue holding the remote button, press and hold the button on the motor unit. If light bulbs are now erased. All previous codes are...
3280 Manual - Page 32

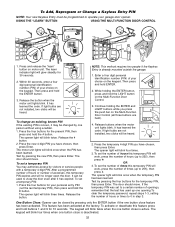
... one button close is known, it has expired. To set to a certain number of your garage door opener. Release buttons when the motor unit lights blink. The learn " button on the keypad. Release... To set the number of hours (up to 255), then press ✽. The keypad will work , press the number of times this temporary PIN expires and will blink once when the PIN ...
3280 Manual - Page 35

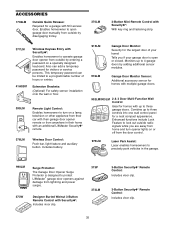
... from their car with their garage door opener remote or from anywhere in the garage. 990LM 373W Surge Protector: The Garage Door Opener Surge Protector is open garage door manually from outside radio signals...the wall or floor. 395LM Remote Light Control: Enables homeowner to operate garage door opener from outside by disengaging trolley. 370LM 3-Button Mini-Remote Control with Security...

Similar Questions

I Have Installed A Chamberlan Garage Door Opener And The Remote I Was Using Is
I have been using a Chamberlan garage door opener and its remote has been defective since of late.Pl...
(Posted by donweera42 8 months ago)
Garage Door Opens After Shutting.
My Lift master 8550 inside keypad is Inside wall pad is model #880LM. outside keypad Model # is 877M...
(Posted by BONNIECA92 2 years ago)
Changing Code On The Liftmaster Garage Door Opener
Someone in our area has the same code . We need to change the code on the liftmaster and them recode...
(Posted by reptak 9 years ago)
Ask a New Question
Use the box below to post a new question about this LiftMaster product .
Points & Prizes
  • You can earn points for nearly everything you do on HelpOwl.com
  • You can trade in those points for gift cards at leading retailers such as Amazon.com and Walmart
  • It's that simple!
See How it Works
Create a Free Account

LiftMaster Manuals

Find free LiftMaster 3280 manuals and user guides available at ManualOwl.com. Try out our unique manual viewer allowing you to interact with manuals from directly within your browser!

LiftMaster Reviews

View thousands of LiftMaster user reviews and customer ratings available at ReviewOwl.com.

Contact Information

Complete LiftMaster customer service contact information including steps to reach representatives, hours of operation, customer support links and more from ContactHelp.com.

Scoreboard Ratings

See detailed LiftMaster customer service rankings, employee comments and much more from our sister site.