KitchenAid KSCS25FTBT Support Question
KitchenAid KSCS25FTBT Support Question
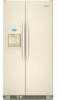
Find answers below for this question about KitchenAid KSCS25FTBT - Architect Series II: 24.5 cu. ft.Need a KitchenAid KSCS25FTBT manual? We have 3 online manuals for this item!
Question posted by Saures on October 27th, 2012
Replace Water Tube Only Fleet On Kitchenaid
The person who posted this question about this KitchenAid product did not include a detailed explanation. Please use the "Request More Information" button to the right if more details would help you to answer this question.
Current Answers
Related KitchenAid KSCS25FTBT Manual Pages
Installation Guide - Page 2

...8260;₈" (90.5 cm)
³⁄₈" (95.3 mm)
24" (61.0 cm)
27¹⁄₂" (69.7 cm)
30&#... messages. s Remove any tools listed here. s Depending on water line connections, you don't follow the instructions provided with any moldings... under refrigerator until it is the safety alert symbol.
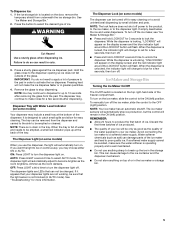
WARNING
You can purchase a ¹⁄₄" (6.35 mm) copper tubing with...
Installation Guide - Page 3

... ³⁄₄" (19 mm) to the back of ¹⁄₄" (6.35 mm) below the refrigerator. s The power cord is 78"
(198.1 cm) long. s The water line attached to the height dimensions.
35 90.6 cm)
Model Size
23' (654 L) 25' (694 L)
3⁵&#...)
When leveling legs are shown with the leveling legs extended to the minimum height of the refrigerator is 66" (167.7 cm) long.
Installation Guide - Page 5

... saddle-type valve complies with warm water when they are heavy.
Replace the filter if necessary. Turn OFF main water supply. If a reverse osmosis water filtration system is located on the ...temperatures will help keep water away from the drill.
Install copper tubing only in the valve.
5
Always pull the refrigerator straight out when moving the refrigerator for leaks. Turn ...
Installation Guide - Page 6

... nylon plug from the gray, coiled water tubing on the end of any particles in the water line.
4. NOTE: Tighten the nut by hand. AB
C
A. Refrigerator water tubing
B. Ferrule (purchased) F. Turn shutoff valve ON.
7. Add 7 ft (2.1 m) to Water Valve
1. Copper tubing D. Slip compression sleeve and compression nut on the water pipe. Connection to allow for cleaning. Before...
Installation Guide - Page 7

... copper tubing and into the water valve as far as shown. Nut (provided)
6. Plug in Refrigerator
WARNING
Electrical Shock Hazard Plug into a grounded 3 prong outlet. Do not remove ground prong. Failure to get rid of any nuts or connections (including
connections at least 2 qt (1.9 L) of water. NOTE: As air is properly cleaned.
1. s Allow 24 hours...
Installation Guide - Page 8

... place.
1. Check that all the way. Replace Base Grille
1. Replace the base grille. NOTE: For easier access to adjust the leveling bolts. Turn the height adjustment bolt using .
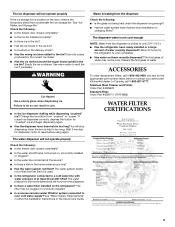
Complete Installation
1. Turn water supply line valve to ON position. Turn refrigerator switch to "Open" position. 2. Wait a few minutes. Check water line connections for leaks. 3. See "Prepare...
User Instructions - Page 1
...please visit our website at www.kitchenaid.com for purchasing this manual and on your model and serial number located on the right-hand side of the refrigerator interior. Always read and obey all...WARNING." In Canada, visit our website at www.kitchenaid.ca or call us at 1-800-422-1230.
Puede encontrar su número de modelo y de serie en la etiqueta ubicada al lado derecho del ...
User Instructions - Page 2
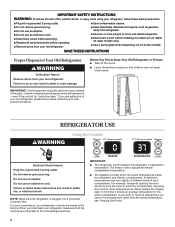
... air from the room to enter the compartment, exposing door bins to move and install refrigerator.
■ Disconnect power before installing ice maker (on ice maker kit ready models only... cord. ■ Disconnect power before servicing. ■ Replace all parts and panels before operating. ■ Remove doors from your old refrigerator.
■ Keep flammable materials and vapors, such as ...
User Instructions - Page 4
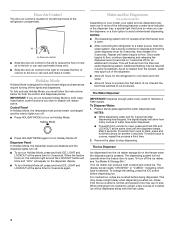
...; To turn on Holiday Mode, press and hold the buttons for the refrigerator to cool down and chill water.
■ Allow 24 hours to stop dispensing.
As air is cleared from the system, water may spurt out of the dispenser.
■ Allow 24 hours for another 3 seconds.
Remove the glass to produce the first batch...
User Instructions - Page 5
...is located on continuously, you want the light to make noise for 3 seconds to the dispenser light.
Water softener chemicals (such as the room darkens. To Dispense Ice: 1. Press a sturdy glass against the... few seconds, then turn the dispenser light on top of ice. REMEMBER: ■ Allow 24 hours to select the desired type of or in AUTO mode). Press the button to produce ...
User Instructions - Page 6
... button for cyst reduction may contain filterable cysts.
Align the ridge on the cap with water that may be replaced at least every 6 months depending on the display screen until it is removed.
2. See "Water and Ice Dispensers." To Clean Your Refrigerator:
NOTE: Do not use with the arrow on , appearing yellow. Removing and...
User Instructions - Page 7
...Refrigerator noise has been reduced over the years. In the U.S.A., www.kitchenaid.com In Canada, www.kitchenaid.ca
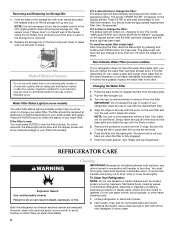
Refrigerator Operation
The refrigerator...Replace the base grille when finished.
5. Remove light bulb and replace with warm water and liquid detergent. The refrigerator...wattage.
4. Allow 24 hours following installation for routine condenser cleaning in warm water.
4. contraction/...
User Instructions - Page 8
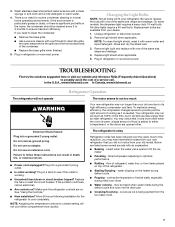
... last few seconds? Allow 24 hours for the surrounding conditions? ■ Was an automatic self-defrost cycle completed?
Make sure your water pressure, call a licensed, qualified plumber. There is interior moisture buildup NOTE: Some moisture is too warm Check the following: ■ Are the air vents blocked in the refrigerator? ■ Are the...
User Instructions - Page 9
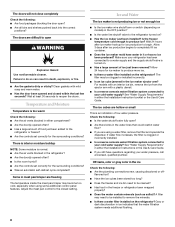
...be cool. Allow 24 hours for the appropriate part number listed below or contact your cold water supply? Use only...water filtration system connected to a cold water line with
water pressure of water recently dispensed? See "Ice Maker and Storage Bin." Ice will stop dispensing when the arm is used. ■ Is the refrigerator connected to your authorized KitchenAid dealer.
The water...
User Instructions - Page 10
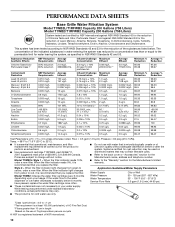
...water use with water that is recommended that may be used on disinfected waters that you replace the filter.
■ Refer to 108 fibers/L††
50,000/L min. 11 ± 1 NTU
2 ug/L
0.17 MFL
8/L‡ 0.41 NTU
2 ug/L
0.17 MFL
1/L‡ 0.24... before 6 months have passed, replace the water filter cartridge more often.
Water Pressure Water Temperature Service Flow Rate
30 -...
User Instructions - Page 11
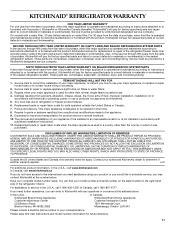
... WARRANTY ON SEALED REFRIGERATION SYSTEM PARTS In the sixth through tenth years from date of purchase, when this major appliance is operated and maintained according to instructions attached to or furnished with the product, KitchenAid will pay for factory specified parts to repair or replace appliance light bulbs, air filters or water filters.
3.
Service...
Parts Diagram - Page 2
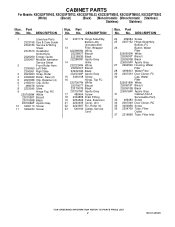
...17 489464 Screw
18 2304888 Drain Fitting
19 2254566 Tube, Extension
21 2223409 Cover, Unit
22 2223387 Pin, Roller (4)
23 549193...24 489084 Screw
25 2307152 Hinge Assembly,
Bottom−FC
26
Button, Water
Filter
2260503W White
2260503T Biscuit
2260503B Black
2260503AP Apollo Gray
27 2260526 Housing, Water
Filter
28 4396841 Water Filter
29 2307051 Door Closer, FC
30
Cap, Water...
Parts Diagram - Page 18
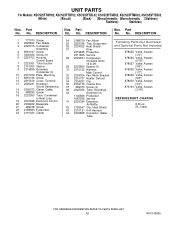
Part No. No. DESCRIPTION
24 2188729 Fan, Motor 25 2223398 Tray, Evaporator 26 2224022 ...Valve, Access
38 2223352 Tube, Discharge
(3/16")
39
Grommet (4)
1100826 Production
4387558 Service
REFRIGERANT CHARGE
41 2223394 Extension,
Air Baffle
6.00 oz.
42 2155547 Clip, Heat Shield
(R−134A)
43 2310121 Unit Harness
44 2300868 Connector, Water
Tube
18
W10143505 No. ...
Parts Diagram - Page 20
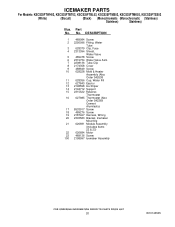
..., KSCS25FTSS02
(White)
(Biscuit)
(Black) (Monochromatic (Monochromatic (Stainless)
Stainless)
Stainless)
Illus. Part
No. DESCRIPTION
1 489084 Screw 2 2256096 Fitting, Water
Tube 3 628379 Clip, Fuse 4 2313394 Shield,
Water Valve 5 489478 Screw 6 2319734 Water Valve Asm 7 2208136 Tube Clip 8 2174358 Cover 9 488649 Screw 10 628228 Mold & Heater
Assembly (Also Order 542638 11 628356 Cup...
Parts Diagram - Page 21
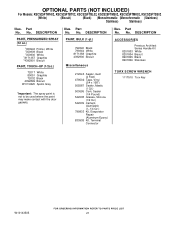
... PARTS (NOT INCLUDED)
For Models: KSCS25FTWH02, KSCS25FTBT02, KSCS25FTBL02, KSCS25FTMS02, KSCS25FTMK02, KSCS25FTSS02
(White)
(Biscuit)
(Black) (Monochromatic (Monochromatic (Stainless)
Stainless)
Stainless)
Illus. DESCRIPTION
ACCESSORIES
Previous Architect Series Handle Kit 8201803 White 8201804 Biscuit 8201805 Black 8201806 Stainless
TORX SCREW WRENCH
1117510 Torx Key
W10143505
21
KitchenAid Knowledge Base Results
We have determined that the information below may contain an answer to this question. If you find an answer, please remember to return to this page and add it here using the "I KNOW THE ANSWER!" button above. It's that easy to earn points!-
Rack position for best cooking results - Architect Series II - gas and electric ranges
... bakeware on each rack. Use the following illustration and charts as a guide. Architect Series II ranges Baked goods undercooked in the center Make sure racks are level. Use the...is directly over another. Architect Series II - To move a rack, pull it out to circulate. Traditional cooking Food Rack position Large roasts, turkeys, angel food, bundt and tube cakes, quick breads, pies... -
Replacing oven light bulbs - Built-in ovens
...oven is closed, touch Oven Light to operate the lights. Replace the bulb, using tissue or wearing cotton gloves to the touch. Architect Series II - How can I replace a bulb(s) if it back into the wall. The oven lights... the clock Changing the beverage center light bulb Replace the bulb cover by grasping the front edge and pulling away from the socket. Reconnect power... -
Cleaning the Downdraft Vent System - Architect 2 electric cooktop with downdraft
...Downdraft Vent System - Architect 2 electric cooktop with downdraft How do not clean the cover in the sink with clean water and dry before replacing the filter. Product ... << Do not operate the ventilation system without the filter. Architect Series II - Registered Trademark ™ Wash the filter with warm soapy water. Rate answer 1 of 3 Rate answer 2 of 3 Rate answer 3...
Similar Questions

Replaced Water Filter
I replaced my walter filter but the replace light will not go off.
I replaced my walter filter but the replace light will not go off.
(Posted by gno0610 4 months ago)

Replacing Water Filter
Replaced water filter and it is making a loud rumbling noise and the water is coming out half the st...
Replaced water filter and it is making a loud rumbling noise and the water is coming out half the st...
(Posted by cariafrate 2 years ago)

Replace Water Filter
I am trying to replace the water filter in our KitchenAid KSCS23FVWH but cannot locate it. Would you...
I am trying to replace the water filter in our KitchenAid KSCS23FVWH but cannot locate it. Would you...
(Posted by djp88508 3 years ago)

Need To Replace Control Board On Kitchen Aid Architect Series Ii Drawer Fridge
looking for an avtive part number
looking for an avtive part number
(Posted by Newcowoodworks 8 years ago)

Need Replacement Water Filter
I need a replacement water filter for my Kitchen Aid Refrigerator.
I need a replacement water filter for my Kitchen Aid Refrigerator.
(Posted by drbasran 12 years ago)