Get support for KitchenAid KHMC1857WSS - Microwave Hood Combination Oven

KitchenAid KHMC1857WSS Support Question

KitchenAid KHMC1857WSS Support Question

Find answers below for this question about KitchenAid KHMC1857WSS - Microwave Hood Combination Oven.
Need a KitchenAid KHMC1857WSS manual? We have 3 online manuals for this item!
Question posted by Klejo on March 2nd, 2013

Seems To Be Cooking At 50%,have Verified Power Is At 100%

The person who posted this question about this KitchenAid product did not include a detailed explanation. Please use the "Request More Information" button to the right if more details would help you to answer this question.

Current Answers

There are currently no answers that have been posted for this question.
Be the first to post an answer!

Remember that you can earn up to 1,100 points for every answer you submit. The better the quality of your answer, the better chance it has to be accepted.

Related KitchenAid KHMC1857WSS Manual Pages

Use & Care Guide - Page 1

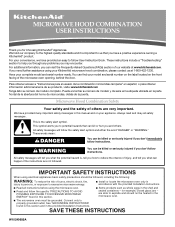
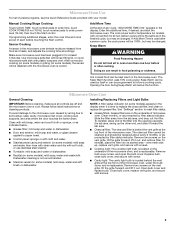
...assistance using the microwave oven. ■ Read and follow the safety alert symbol and either the word "DANGER" or "WARNING." You can find your KitchenAid microwave hood combination, please contact us... important safety messages in the shell and sealed containers - Have your appliance. Microwave Hood Combination Safety Your safety and the safety of injury, and tell you may encounter....
Use & Care Guide - Page 2

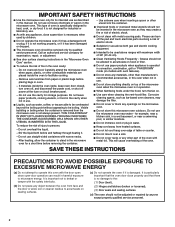
...or if it has been damaged or dropped. ■ The microwave oven should not be boiling. If materials inside the oven to facilitate cooking. - Do not overheat the liquid. - After heating, allow... under the hood, turn oven off, and disconnect the power cord, or shut off the pad and touch electrical parts involving a risk of the microwave oven when the microwave oven is important not...
Use & Care Guide - Page 3

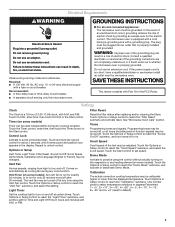
... Touch the Options or Setup control to avoid unintended start. Calibration The actual convection cooking temperature may be calibrated higher or lower than the displayed temperature. Failure to follow these... breaker. ■ A separate circuit serving only this microwave oven. Do not use an extension cord. If the power supply cord is properly installed and grounded. Control Lock Activate...
Use & Care Guide - Page 4

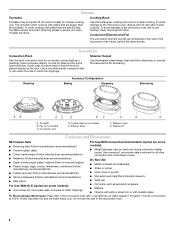
... rack for some models): ■ Use ovenproof, microwave-safe cookware to the microwave oven, always remove rack after 2-level cooking. Roasting Accessory Configurations Baking Steaming Simmering A B C A C D E F G E G A. Steamer insert G. Cooking Rack Use the rectangular cooking rack only for all other convection and combination cycles. ■ Melamine (Follow manufacturer...
Use & Care Guide - Page 5

... status. ■ Grease filters: Grease filters are off and the microwave oven is used by filter status indicator. The Keep Warm function uses 10% cook power. Sensor Cooking A sensor in the microwave oven. Manual Cooking/Stage Cooking Touch COOK TIME, touch number pads to enter time, touch COOK POWER (if not 100%), touch number pads to paper towel. ■ Control panel: sponge...
Use & Care Guide - Page 6

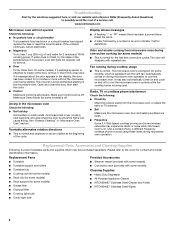
... be purchased separately. Radio, TV or cordless phone interference Check the following: ■ Proximity Move the receiver away from microwave oven during microwave oven operation. On some models) ■ This is on motor rotation at 100% cooking power. If water does not heat, try the solutions suggested here or visit our website and reference FAQs (Frequently Asked...
Use & Care Guide - Page 7

...■ Solid state touch control system parts SECOND THROUGH TENTH YEAR LIMITED WARRANTY On microwave ovens only, in the second through tenth years from date of purchase, when this major...information or to published user or operator instructions and/or installation instructions. 4. If outside the 50 United States and Canada, contact your major appliance is used for future reference. 7 For...
Dimension Guide - Page 1

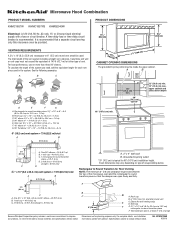
Microwave Hood Combination PRODUCT MODEL NUMBERS KHMC1857W KHMC1857XS KHMS2040W PRODUCT...m) A. 2" x 4" wall stud B. Elbow (for 66" (167.6 cm) installation height. Exact dimensions may vary depending on type of the microwave oven and the rectangular to Round Transition for each vent piece used . diameter round vent C. Instructions packed with a fuse or circuit breaker. See the ...
Installation Guide - Page 1

...Assembly 9 Install the Microwave Oven 9 Complete Installation 10 VENTING DESIGN SPECIFICATIONS 11 ASSISTANCE 12 Replacement Parts 12 Accessories 12 MICROWAVE HOOD COMBINATION SAFETY Your safety ... cooking products up to reduce the chance of your particular model may differ slightly from the illustration in this manual and on your appliance. Table of Contents MICROWAVE HOOD COMBINATION ...
Installation Guide - Page 2

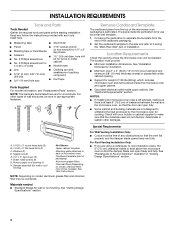
...combined. See "Rectangular to withstand the heat produced by the microwave oven for wall or roof venting. See User Instructions.) NOTE: Depending on model, charcoal filters may be installed. See "Installation Dimensions" illustration. ■ Minimum one 2" x 4" (50... ■ Standard fittings for cooking. NOTES: ■ If installing the microwave oven near a left sidewall, make...
Installation Guide - Page 3

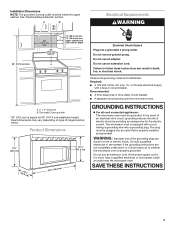
... side cabinet depth Electrical Shock Hazard Plug into an outlet that is too short, have a qualified electrician or serviceman install an outlet near the microwave oven. If the power supply cord is properly installed and grounded. Do not remove ground prong. Recommended: ■ A time-delay fuse or time-delay circuit breaker. ■ A separate...
Installation Guide - Page 4

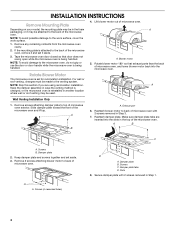
... in recessed holes) D A. For wall or roof venting, changes must be used. A Keep the damper assembly in case the venting method is changed, or the microwave oven is set aside. 3. A B A. Make sure damper plate tabs are using recirculation installation. Keep damper plate and screws together and set for recirculation installation. Slots...
Installation Guide - Page 5

... in the top of "Wall Venting Installation Only." Securely tighten screws. Make sure damper plate tabs are inserted into microwave oven. Lower blower motor back into the slots in Step 3 of the microwave oven. Reattach blower motor to the microwave oven. 7. NOTE: If blower motor is not positioned with flat sides facing the back of the...
Installation Guide - Page 6

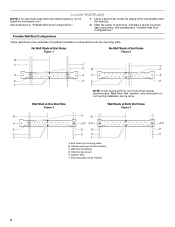
... Holes Figure 2 B C C C D B D A A A A E E E E F F NOTE: If wall stud is within 6" (15.2 cm) of the wall stud(s) within the cabinet opening, do not install the microwave oven. 1. Support tabs F. Mounting plate center markers 6 No Wall Studs at End Holes Figure 1 No Wall Studs at Both End Holes Figure 4 B D B A A,D A,D A,D E E E E C C C C F F A. End...
Installation Guide - Page 7

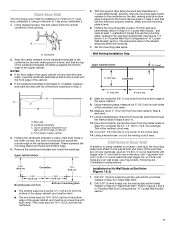
... (Figures 1 & 2) 1. Measure down 4" (10.2 cm) from the mark made in "Locate Wall Stud(s)" section. If the end holes are 3 installation configurations. Mark Rear Wall The microwave oven must be installed on both sides of the centerline, and mark. 10. A A. Cardboard template C. Remove the cardboard template and check the markings: Upper cabinet bottom...
Installation Guide - Page 8

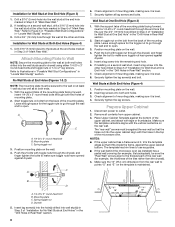
... insert a lag screw into the remaining end hole. 6. Position mounting plate on the wall. 4. Disconnect power to Figure 3 in "Possible Wall Stud Configurations" in Rear Wall" section. 7. Mounting plate C. Spring...wall covering (for example, tile backsplash), be against the bottom of the microwave oven. Remove all lag screws and bolts. Place Upper Cabinet Template against the rear...
Installation Guide - Page 9

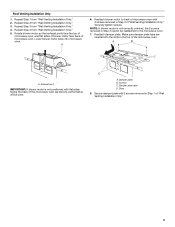
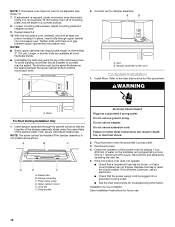
...) diameter hole at one corner of the upper cabinet. 5. NOTE: If upper cabinet is at the top, and the damper blade opens away from the microwave oven. B A A. Power supply cord bushing 6. These are for wall venting only) 1. For Roof Venting Installation Only 7. Cut 3/4" (19 mm) hole at the circular shaded area "G" on Upper...
Installation Guide - Page 10

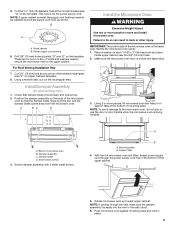
... or shorter than 3" (7.6 cm). Installation is required, rotate microwave oven downward. Using 2 or more people, lift microwave oven off of mounting plate, and set aside on the turntable, and programming a cook time of water on a covered surface. 8. Repeat steps 3-6. 10. Longer or shorter bolts are available at 100% power. Install filters. Insert damper assembly through upper cabinet...
Installation Guide - Page 11

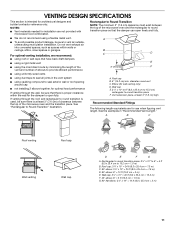
... to 15.2 cm = 1.5 m) B. A B C D E 3" (7.6 cm) F A. Vent extension piece, at least 3" (7.6 cm) of clearance between the top of the microwave oven and the transition piece. NOTES: ■ Vent materials needed for installation are not provided with microwave hood combination. ■ We do not recommend using duct tape to seal all joints in "Recommended Vent Length." Do not...
Installation Guide - Page 12

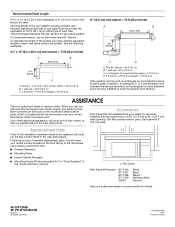
...Instructions. W10247296B SP PN W10345003B © 2010. To calculate the length of the microwave oven. Accessories Filler Panel Kits are available from sticking. Recommended Vent Length A 3¹&#...Printed in a 36" (91.4 cm) or 42" (106.7 cm) wide opening , behind the microwave oven door on the front facing of the installation hardware needs to use no more than three 90° elbows...

KitchenAid Knowledge Base Results

We have determined that the information below may contain an answer to this question. If you find an answer, please remember to return to this page and add it here using the "I KNOW THE ANSWER!" button above. It's that easy to earn points!

  • My microwave oven will not run
    ...100% cooking power. Extended warranty information - Firmly close door. See "Child Lock" section below . See "Assistance or service" section below . KitchenAid products Product Literature (Use & Care, Parts Lists, etc) My microwave oven...models) attached to  control unintended use aluminum foil in and microwave combination ovens Can I use of your Use and Care Guide. If ...
  • Replacing oven light bulbs - Built-in ovens
    ...Reconnect power. To replace oven light bulbs: Before replacing any bulbs, make sure the oven is opened . The oven lights...ovens When should the lights in my built-in and microwave combination ovens Changing the oven light bulb - On double oven models, both upper and lower lights should come on when the oven door is closed, touch Oven Light to handle the bulb. Replacing oven...
  • Whirlpool Recall Information
    ...;  Free Standing range, Double Oven And Oven Microwave Combination - United States Dishwasher - Copyright©2005 Whirlpool Corporation. All rights Reserved | KitchenAid ® Coffee Maker - Please click a product category for more information: Single Door, Frost-Free Freezers and Refrigerators - Dehumidifier -  Over The Range Microwave Hood Combination - 24-inch Washer and...

Similar Questions

Ask a New Question
Use the box below to post a new question about this KitchenAid product .
Points & Prizes
  • You can earn points for nearly everything you do on HelpOwl.com
  • You can trade in those points for gift cards at leading retailers such as Amazon.com and Walmart
  • It's that simple!
See How it Works
Create a Free Account

KitchenAid Manuals

Find free KitchenAid KHMC1857WSS - Microwave Hood Combination Oven manuals and user guides available at ManualOwl.com. Try out our unique manual viewer allowing you to interact with manuals from directly within your browser!

KitchenAid Reviews

View thousands of KitchenAid user reviews and customer ratings available at ReviewOwl.com.

Contact Information

Complete KitchenAid customer service contact information including steps to reach representatives, hours of operation, customer support links and more from ContactHelp.com.

Scoreboard Ratings

See detailed KitchenAid customer service rankings, employee comments and much more from our sister site.

KitchenAid Recalls

Find comprehensive KitchenAid recall information updated hourly on RecallOwl.com.