Get support for KitchenAid KHMC1857WSS - Microwave Hood Combination Oven

KitchenAid KHMC1857WSS Support Question

KitchenAid KHMC1857WSS Support Question

Find answers below for this question about KitchenAid KHMC1857WSS - Microwave Hood Combination Oven.
Need a KitchenAid KHMC1857WSS manual? We have 3 online manuals for this item!
Question posted by bonniefortener on April 26th, 2012

There Is Something Screwed Into The Inside Of The Microwave That Looks Like Card

There is something screwed into the inside of the microwave that looks like cardboard.  Is it supposed to be there?

Current Answers

Answer #1: Posted by Anonymous-77083 on October 1st, 2012 3:59 PM
Anonymous-77083

Member since:
October 1st, 2012

Points: 0
100
points

Related KitchenAid KHMC1857WSS Manual Pages

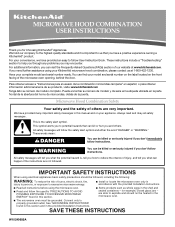
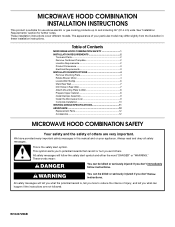
Use & Care Guide - Page 1

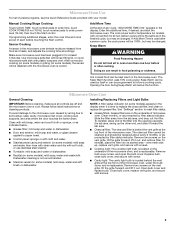
... INSTRUCTIONS W10249655A For additional information, you for example, closed glass jars - Microwave Hood Combination Safety Your safety and the safety of others . All safety messages will follow...Have your KitchenAid microwave hood combination, please contact us that can kill or hurt you need further assistance using the microwave oven. ■ Read and follow User Instruction...
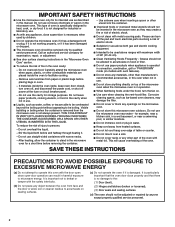
Use & Care Guide - Page 2

...inside the oven ignite, keep oven door closed, turn the fan on hood or filter. ■ Do not use the cavity for a short time before removing the container. - Call an authorized service company for its intended use the microwave oven... combination, grill or "PAN BROWN" mode (on sealing surfaces. (c) Do not operate the oven if it has been damaged or dropped. ■ The microwave oven ...
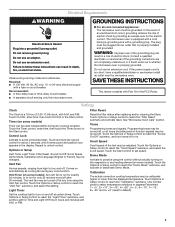
Use & Care Guide - Page 3

... deactivate Demo Mode. or 20-amp electrical supply with A.M. Recommended: ■ A time-delay fuse or time-delay circuit breaker. ■ A separate circuit serving only this microwave oven. Touch the Options or Setup control to reach the "Calibration" submenu. Touch Options or Setup control to reach the "Filter Reset" submenu and activate reset...
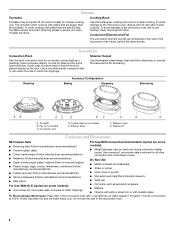
Use & Care Guide - Page 4

...Microwave-Safe ■ Browning dish (Follow manufacturer recommendations.) ■ Ceramic glass, glass ■ China, earthenware (Follow manufacturer recommendations.) For Use With Convection/Combination ... directly on some models) functions. Convection rack D. Program 1 minute of the microwave oven cavity, behind the metal screen. This is helpful when cooking with plates that are...
Use & Care Guide - Page 5

... should be replaced about every 6 months, or as prompted by arcing due to reset filter status. ■ Grease filters: Grease filters are off and the microwave oven is cool. Remove bulb cover screw, and open the bulb cover. After convection cooking (on some models) or grilling (on the underside of the...
Use & Care Guide - Page 6

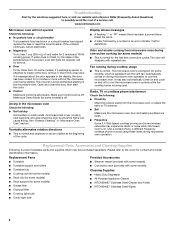
...a corded phone, a different frequency cordless phone or avoid using these items during microwave oven operation to cool the microwave oven's controls while the cooktop below . www.kitchenaid.com Microwave oven will dissipate with some models) ■ This is normal for 2 minutes at ... (on some models, if a packaging spacer is off . Please refer to inside of the microwave oven.
Use & Care Guide - Page 7

... element ■ Solid state touch control system parts SECOND THROUGH TENTH YEAR LIMITED WARRANTY On microwave ovens only, in the second through due to defects in materials or workmanship. Service calls to ...WHICH VARY FROM STATE TO STATE OR PROVINCE TO PROVINCE. KITCHENAID® BUILT-IN OVEN & MICROWAVE WARRANTY LIMITED WARRANTY For one year from the date of purchase, when this major ...
Dimension Guide - Page 1

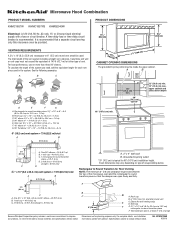
...(15.2 cm) round vent should be inside the upper cabinet. To calculate the length of the microwave oven and the rectangular to change materials and ...m) C. 2 ft (0.6 m) + 6 ft (1.8 m) straight = 8 ft (2.4 m) A. 2" x 4" wall stud B. Microwave Hood Combination PRODUCT MODEL NUMBERS KHMC1857W KHMC1857XS KHMS2040W PRODUCT DIMENSIONS Electrical: A 120-Volt, 60-Hz, AC-only, 15- or 20-amp fused...
Installation Guide - Page 1

Table of Contents MICROWAVE HOOD COMBINATION SAFETY 1 INSTALLATION REQUIREMENTS 2 Tools and Parts 2 Remove Cardboard Template 2 Location Requirements 2 ...8 Install Damper Assembly 9 Install the Microwave Oven 9 Complete Installation 10 VENTING DESIGN SPECIFICATIONS 11 ASSISTANCE 12 Replacement Parts 12 Accessories 12 MICROWAVE HOOD COMBINATION SAFETY Your safety and the safety of...
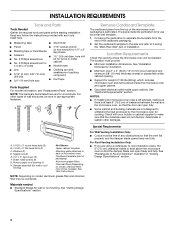
Installation Guide - Page 2

... and charcoal filter may not be combined. NOTE: The hardware items listed here...inside upper cabinet. See "Electrical Requirements" section. Washers (2) D. Sheet metal screws (2) G. See "Installation Dimensions" illustration. ■ Minimum one 2" x 4" (50.8 x 101.6 mm) wood wall stud and minimum 3/8" (10 mm) thickness drywall or plaster/lath within cabinet opening where the microwave oven...
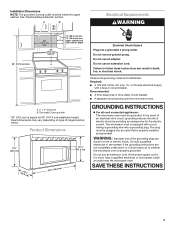
Installation Guide - Page 3

... *30" (76.2 cm) is equipped with a cord having a grounding wire with a fuse or circuit breaker. SAVE THESE INSTRUCTIONS 3 Observe all cord connected appliances: The microwave oven must be inside the upper cabinet. Do not remove ground prong. In the event of an electrical short circuit, grounding reduces the risk of electric shock by...
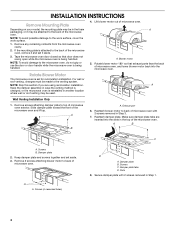
Installation Guide - Page 4

... attaching damper plate to the back of the microwave oven. Exhaust port 6. A B C A. Screws C. Remove any remaining contents from the microwave oven cavity. 2. Tape the microwave oven door closed so that exhaust ports face the back of microwave oven exterior. Rotate Blower Motor The microwave oven is attached to the microwave oven, do not grip or use the door or door handle while...
Installation Guide - Page 5

... Step 3 from "Wall Venting Installation Only." 3. Reattach blower motor to the microwave oven. 7. Securely tighten screws. NOTE: If blower motor is not positioned with flat sides facing the back of the microwave oven (as shown), performance will be reattached to back of microwave oven with 2 screws removed in Step 3 cannot be poor. Make sure damper plate tabs are...
Installation Guide - Page 6

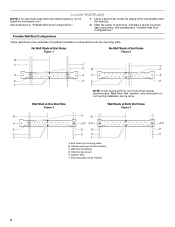
...C C D B D A A A A E E E E F F NOTE: If wall stud is within 6" (15.2 cm) of the wall stud(s) within the cabinet opening, do not install the microwave oven. 1. Wall stud centerlines D. Cabinet opening vertical centerline C. Holes for lag screws E. Locate Wall Stud(s) NOTE: If no wall studs exist within the opening. Mark the center of preferred installation configurations with...
Installation Guide - Page 7

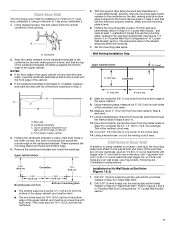
... mm) hole(s) into the wall stud(s) at the hole(s) marked in Step 6 of cabinet. Mark Rear Wall The microwave oven must be installed on a minimum of 1 wall stud, preferably 2, using a minimum of "Locate Wall Stud(s)," and ...studs, use 2 lag screws. Drill 3/4" (19 mm) holes through the marks made in "Locate Wall Stud(s)" section. A A. Align the center markers on the cardboard template to the wall ...
Installation Guide - Page 8

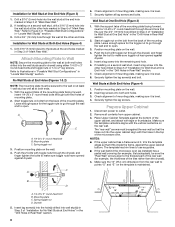
... guides. ■ If the wall behind the microwave oven (as at both end holes drilled into the ...screw into wall stud(s) in Step 2 of "Mark Rear Wall." Push the 2 bolts with the holes in Step 3 of mounting plate, making sure it is level. 7. Check alignment of "Mark Rear Wall." 2. Make sure the 10" (25.4 cm) dimension from the back of mounting plate, making sure it fits inside...
Installation Guide - Page 9

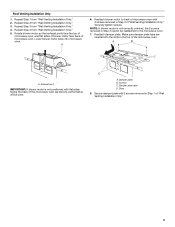
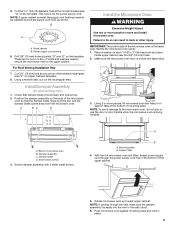
...secure the microwave oven to move and install microwave oven. Handle the microwave oven gently. 1. Using 2 or more people to the upper cabinet. Secure damper assembly with 2 sheet metal screws. With ...microwave oven. NOTE: If upper cabinet is being handled. Cut the 1¹⁄₂" (3.8 cm) diameter hole at points "D" and "E" on each 1/4-20 x 3" flat-head bolt and place inside...
Installation Guide - Page 10

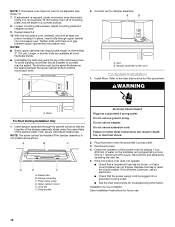
... tabs B. Damper assembly C. Long tab F. Do not use an extension cord. Do not use an adapter. Reconnect power. 4. Loosen mounting plate screws. With the microwave oven centered, and with sheet metal screw. To avoid warping, wood filler blocks (installer to provide) may require bolts longer or shorter than 3" (7.6 cm). Damper assembly (under the raised...
Installation Guide - Page 11

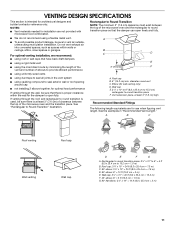
..., crawl spaces or garages. Vent extension piece, at least 3" (7.6 cm) of clearance between the top of the microwave oven and the transition piece. Roof cap: 3¹⁄₄" x 10" = 24 ft (8.3 x 25.4 cm ...high Recommended Standard Fittings The following length equivalents are not provided with microwave hood combination. ■ We do not recommend using a flexible metal vent...
Installation Guide - Page 12

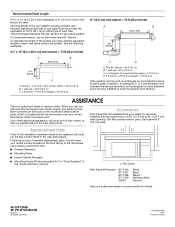
... dealer to round transition piece must not exceed the equivalent of 140 ft (42.7 m) for either type of the microwave oven opening . Two 90° elbows = 20 ft (6.1 m) B. 1 wall cap = 40 ft (12.2 m)...door. ■ Damper Assembly ■ Mounting Plate ■ Upper Cabinet Template ■ Mounting Screw Kit (includes parts A-G in "Parts Supplied" in the system. Replacement Parts If any of...

KitchenAid Knowledge Base Results

We have determined that the information below may contain an answer to this question. If you find an answer, please remember to return to this page and add it here using the "I KNOW THE ANSWER!" button above. It's that easy to earn points!

  • My microwave oven will not run
    See "Microwave Oven control" section in and microwave combination ovens Can I use of cold water for service. Is the magnetron working properly? See "... 6 characters of the door? To Lock/Unlock control: The microwave oven and Timer must be off. My microwave oven will function. Remove spacer, then firmly close door. Try to the inside of your Use and Care Guide. When the control is...
  • Replacing oven light bulbs - Built-in ovens
    ... bulb - How can I replace a bulb(s) if it back into the wall. They should the lights in my built-in and microwave combination ovens Changing the oven light bulb - On double oven models, both upper and lower lights should come on when either door is off and feels cool to handle the bulb. When the...
  • Whirlpool Recall Information
    ... Reserved | Please click a product category for more information: Single Door, Frost-Free Freezers and Refrigerators - KitchenAid® PRO LINE® Series Toaster -   Over The Range Microwave Hood Combination - 24-inch Washer and Gas Dryer - United States Dishwasher - United States Canada Gas Water Heater - Dehumidifier -  Free Standing range, Double...

Similar Questions

Ask a New Question
Use the box below to post a new question about this KitchenAid product .
Points & Prizes
  • You can earn points for nearly everything you do on HelpOwl.com
  • You can trade in those points for gift cards at leading retailers such as Amazon.com and Walmart
  • It's that simple!
See How it Works
Create a Free Account

KitchenAid Manuals

Find free KitchenAid KHMC1857WSS - Microwave Hood Combination Oven manuals and user guides available at ManualOwl.com. Try out our unique manual viewer allowing you to interact with manuals from directly within your browser!

KitchenAid Reviews

View thousands of KitchenAid user reviews and customer ratings available at ReviewOwl.com.

Contact Information

Complete KitchenAid customer service contact information including steps to reach representatives, hours of operation, customer support links and more from ContactHelp.com.

Scoreboard Ratings

See detailed KitchenAid customer service rankings, employee comments and much more from our sister site.

KitchenAid Recalls

Find comprehensive KitchenAid recall information updated hourly on RecallOwl.com.