KitchenAid KEMS308SSS Support Question
KitchenAid KEMS308SSS Support Question
Find answers below for this question about KitchenAid KEMS308SSS - 30"BI M/W COMBO OVEN SS KITCHE.Need a KitchenAid KEMS308SSS manual? We have 4 online manuals for this item!
Question posted by tommcelligott on December 19th, 2011
Microwave Oven Door
Our Microwave overn door keeps fogging up and it now takes several minutes to cool down. It seems like the door needs to be replaced. We purchased the oven almost 4 years ago. Is this covered under warranty?
Current Answers
Related KitchenAid KEMS308SSS Manual Pages
Use & Care Guide - Page 4
... equipment grounding terminal or lead on sealing surfaces.
(c) Do not operate the oven if it .
- GROUNDING INSTRUCTIONS
For a permanently connected microwave oven:
The microwave oven must be connected to a grounded, metallic, permanent wiring system, or an equipment grounding conductor should ignite, keep oven door closed, turn oven off, and disconnect the power cord, or shut off power at the...
Use & Care Guide - Page 5
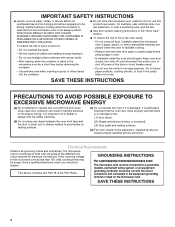
...oven mitts or pot holders when handling. s The crisper pan is designed specifically for this oven. s See "Assistance or Service" section to reorder. The microwave oven you have purchased... not place popcorn bags on the microwave oven. Always use the turntable as a support for microwave use the turntable. Broil element (can be lowered)
E. Door safety lock system
I B
C,D
...
Use & Care Guide - Page 7

...power D. Clock set /start R. Cook time C. Crisping
G. Clock set /start O. Options Q. Microwave oven display H. Start/add a minute/control lock K. Microwave cooking power I. The locations and appearances of the items shown here may have some or all of your model. Microwave soften/melt L. Microwave off J. The oven you have purchased may not match those of the items listed.
Use & Care Guide - Page 8
... or more of day/timer display
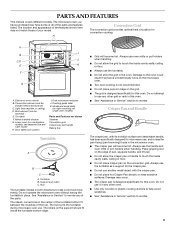
Upper Microwave Oven Display (combination oven models) A. See the code charts in the display.
Add a Minute Touching Start/Add a Minute when the microwave oven is preset unlocked, but can be entered by opening the door, touching Start/Add a Minute after a power failure, if set after the door is not in use of day or...
Use & Care Guide - Page 10
...cooking process.
Do not use the microwave oven for 5 minutes. Cover poached eggs and allow children to ... microwave oven door. Heavy, dense foods, such as chicken wings, leg tips and fish tail.
When microwave ...Microwaves are attracted to and absorbed by the natural conduction of the recommended cook time, potatoes should be turned back at once, the longer the cook time needed...
Use & Care Guide - Page 12
... Sensor Cook function is opened during a sensor function the microwave oven will turn off automatically and "cooking complete" will appear once activated on the oven display. If the microwave oven door is used with ½ tsp (3 mL) of time to cook.
Touch START. Touching Start/Add a Minute while the microwave oven is used in Custom Reheat (dinner plate) and...
Use & Care Guide - Page 14
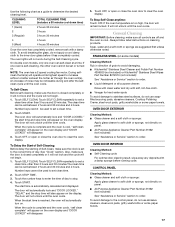
... repeatedly to defrost by using 30% cook power.
Custom Defrost
The Custom Defrost feature can be used, or the microwave oven can be touched twice.
...oven will shut off automatically and "defrost complete" will sound every minute.
5. If enabled end-of "Custom Defrost" section for more even defrosting.
The upper oven display will sound every minute.
7. Touch OFF or open the door...
Use & Care Guide - Page 16
... other microwave oven or in the microwave oven.
Use the following chart as it becomes very hot quickly and could melt the utensils.
To Keep Food Warm: 1.
Touch the number keys to 99 minutes and 99 seconds. 3. The upper oven display will sound every minute.
5.
Touch OFF or open the door to grasp and remove the pan from the oven.
s Cover...
Use & Care Guide - Page 18
...;F (77°C), "Lo" will sound every minute.
9. If enabled end-of-cycle tones will sound, then reminder tones will be replaced by the increasing temperature.
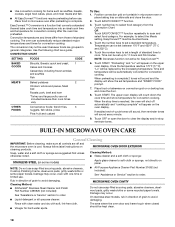
Damage may occur, even with soft, lint-free cloth. MICROWAVE OVEN CAVITY
Do not use . s Vinegar for EasyConvect™.
6. The area where the oven door and frame touch when closed should...
Use & Care Guide - Page 20
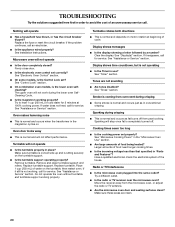
... support. Replace turntable. Do not operate the oven without turntable and turntable support working properly? Display shows messages
s Is the display showing a letter followed by a number? Display shows time countdown, but is the Control Lock set? See "Timer" section. See "Tones" section.
See "Microwave Cooking Power" in "Parts and Features"?
s Are the microwave oven door and...
Use & Care Guide - Page 22
... system parts
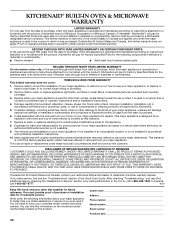
SECOND THROUGH TENTH YEAR LIMITED WARRANTY On microwave ovens only, in accordance with the removal from defects in -warranty service. Proof of purchase.
6. Cosmetic damage, including scratches, dents, chips or other than normal, single-family household use of the Use & Care Guide.
This limited warranty does not cover:
ITEMS EXCLUDED FROM WARRANTY
1. You...
Use & Care Guide - Page 4
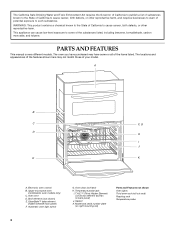
... requires businesses to warn of potential exposure to such substances. The oven you have purchased may not match those of your model. The locations and appearances ..., and toluene. Oven vent D. Temperature probe jack
I J
E
K
A. Gasket
K. PARTS AND FEATURES
This manual covers different models.
Broil elements (not shown)
E. Automatic oven light switch
G. Oven door lock latch
H. This...
Use & Care Guide - Page 5

... Self-clean I
J KL
F. Clock set/start time. Upper microwave oven display
A
B
A
B
TIMER
% OZ FC LBS POWER
MAXIMUM TIME REMAINING
Lower Oven Display (combination oven models) A. Oven light H. If "Err" appears on the lower oven display as a reminder. See the "Assistance or Service" section. The oven you have purchased may not match those of day, timer display
Display...
Use & Care Guide - Page 10
...covering lower oven vent will cycle on and off approximately 30 seconds after the door is not supplied with this appliance. ■ Insert the thermometer into the meat ½" (1.3 cm) more and read again. If the oven door....
■ May need to enter a temperature other than 350°F (177°C).
The tip of poultry. Upper microwave oven B. Lower oven D. Broil elements B....
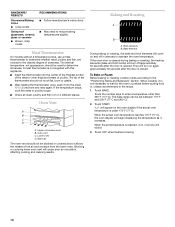
Use & Care Guide - Page 17
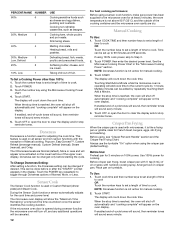
... hours and 30 minutes and 4 hours. STAINLESS STEEL (on the oven display and "DOOR LOCKED" will automatically lock and "DOOR LOCKED," "DELAY," and the stop .
4. CLEANING LEVEL
TOTAL CLEANING TIME (includes a 30 minute cool down time)
1 (Quick)
2 hours 30 minutes
2
3 hours
3 (Regular) 4
3 hours 30 minutes 4 hours
5 (Maxi)
4 hours 30 minutes
Once the oven has completely cooled, remove ash...
Use & Care Guide - Page 21
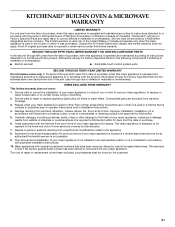
...stainless steel oven cavity/inner door if the part rusts through tenth years from date of purchase, when ...30 days from the date of purchase.
6. The cost of repair or replacement under this limited warranty. ITEMS EXCLUDED FROM WARRANTY
This limited warranty does not cover:
1. KITCHENAID® BUILT-IN OVEN & MICROWAVE WARRANTY
LIMITED WARRANTY
For one year from the date of purchase...
Dimension Guide - Page 1
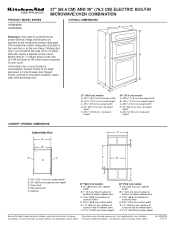
...) max. bottom of
cutout to top of cabinet door
F. 41¹⁄₄" (104.8 cm) cutout height
30" (76.2 cm) models
A. 30" (76.2 cm) min.
®
PRODUCT MODEL SERIES KEMS308S KEMS378S
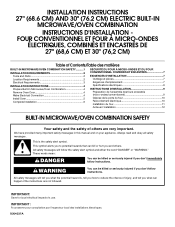
27" (68.6 CM) AND 30" (76.2 CM) ELECTRIC BUILT-IN MICROWAVE/OVEN COMBINATION
OVERALL DIMENSIONS
A
Electrical: Oven must be connected to the proper electrical voltage and...
Installation Guide - Page 1
...(68,6 CM) ET 30" (76,2 CM)
Table of Contents/Table des matières
BUILT-IN MICROWAVE/OVEN COMBINATION SAFETY...........1
INSTALLATION REQUIREMENTS 2 Tools and Parts 2 Location Requirements 2 Electrical Requirements 3
INSTALLATION INSTRUCTIONS 4 Prepare Built-In Microwave/Oven Combination 4 Remove Oven Door 4 Make Electrical Connection 4 Install Oven 5 Complete Installation 6
SÉ...
Installation Guide - Page 4
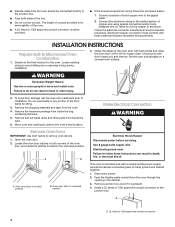
...not cut the conduit. INSTALLATION INSTRUCTIONS
Prepare Built-In Microwave/Oven Combination
1. Remove Oven Door
IMPORTANT: Use both hands and close the oven door until it is for serviceability of the front frame...A. Feed the flexible cable conduit from the oven. 4. Decide on a covered work surface. Disconnect power. 2. Set the oven door(s) aside on the final location for joining ...
Installation Guide - Page 6
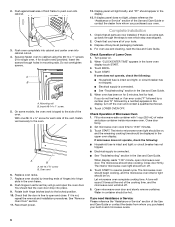
.... If you purchased your oven. Fill a microwave-safe container with 1 cup (250 mL) of hinges into place. 9. Close door firmly. 2. Touch START. The interior microwave oven light should turn off .
4. When display reads "1:00" minute, open microwave oven door. The microwave should feel the oven door drop into hinge
slots in and microwave ovens.
6 Close door firmly. The interior...
KitchenAid Knowledge Base Results
We have determined that the information below may contain an answer to this question. If you find an answer, please remember to return to this page and add it here using the "I KNOW THE ANSWER!" button above. It's that easy to earn points!-
Setting the Self-Clean cycle
...-Clean, make sure the clock is reached. Air must be set a clean time other than 3 hours 30 minutes, press Self Clean until the oven cools. The oven light will not work during the Self-Cleaning cycle. Press Start. The door will appear on the display. To delay the start of day to certain birds. "Delay" will... -
Changing/replacing the water filter - Side by side refrigerator
... that have expanded during use. Or, you need a Use and Care Guide, enter your Use and Care Guide for replacement filter information. Style 1 Filter Animation - Do not discard the cap. Take the new cartridge out of its packaging and remove the protective cover from the filter. Rotate the cartridge cap clockwise... -
Changing the oven light bulb - Architect Series II - gas and electric ranges
... power. The bulb lights when the oven door is a standard 15-watt appliance bulb. Plug in the oven? Unplug range or disconnect power. To purchase the bulb, call 1-800-334-6889 and ask for Part No. 311255. Turn the glass bulb cover in the back of the oven counterclockwise to remove it from the socket...
Similar Questions

Kitchenaid Kco222ob Toaster Oven Door Won't Stay Shut.
KitchenAid KCO222OB toaster oven door will not stay shut. Spring or lock mechanism is broken.
KitchenAid KCO222OB toaster oven door will not stay shut. Spring or lock mechanism is broken.
(Posted by amoahr 9 years ago)

Kitchenaid Superba Microwave Oven Combo Manual Oven Door Wont Close
(Posted by unmadfor 10 years ago)

Removing Oven Door To Replace Cracked Inner Glass Oven Is Probably At Least 1
(Posted by tommyconnelly 10 years ago)
Oven Door Adjustment
My Superba conventional door, the bottom door on my dual oven, does not close all the way. How do I ...
My Superba conventional door, the bottom door on my dual oven, does not close all the way. How do I ...
(Posted by Mikenann 12 years ago)

How To Remove Oven Door Of Lower Oven Of An Electric Double Oven Kitchenaid
KitchenAid Superba KEMS308SSS electric double wall oven (microwave on top, convection selfclean in b...
KitchenAid Superba KEMS308SSS electric double wall oven (microwave on top, convection selfclean in b...
(Posted by elawyer8 13 years ago)