Get support for KitchenAid KCMS2255BSS

KitchenAid KCMS2255BSS Support Question

KitchenAid KCMS2255BSS Support Question

Find answers below for this question about KitchenAid KCMS2255BSS.
Need a KitchenAid KCMS2255BSS manual? We have 4 online manuals for this item!
Question posted by jfconlledo on October 29th, 2021

I Want To Know If The Front Door Is Available, Mine Was Damaged Aun Don't Want T

The person who posted this question about this KitchenAid product did not include a detailed explanation. Please use the "Request More Information" button to the right if more details would help you to answer this question.

Current Answers

Answer #1: Posted by SonuKumar on October 29th, 2021 10:39 PM
This answer was accepted by the poster of the original question.
SonuKumar

Member since:
May 9th, 2021

Points: 16,639,160

Related KitchenAid KCMS2255BSS Manual Pages

Installation Guide - Page 1

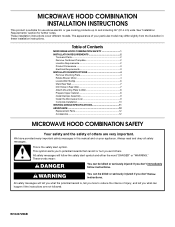
...kill or hurt you don't immediately follow instructions. The appearance of Contents MICROWAVE HOOD COMBINATION SAFETY 1 INSTALLATION REQUIREMENTS 2 Tools and Parts 2 Remove Cardboard... Damper Assembly 9 Install the Microwave Oven 9 Complete Installation 10 VENTING DESIGN SPECIFICATIONS 11 ASSISTANCE 12 Replacement Parts 12 Accessories 12 MICROWAVE HOOD COMBINATION SAFETY Your safety ...
Installation Guide - Page 2

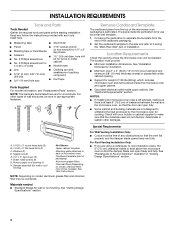
... to exist above the microwave oven so that the door can open fully. ...■ Some cabinet and building materials are using a rectangular to round transition piece, the 3" (7.6 cm) clearance needs to make sure there is at least 6" (15.2 cm) of clearance between the wall and the microwave oven, so that the damper blade can open freely and fully. For other damages...
Installation Guide - Page 3

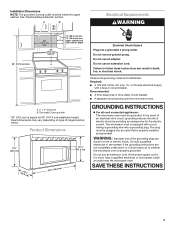
...; A 120 Volt, 60 Hz, AC only, 15- WARNING: Improper use an adapter. Do not remove ground prong. Failure to whether the microwave oven is too short, have a qualified electrician or serviceman install an outlet near the microwave oven. Recommended: ■ A time-delay fuse or time-delay circuit breaker. ■ A separate circuit serving only this...
Installation Guide - Page 4

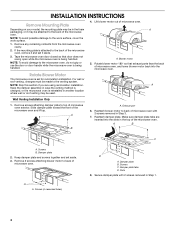
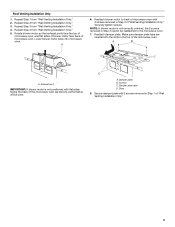
... damage to the back of the microwave oven. NOTE: Skip this section if you are inserted into the microwave oven. A B A. Keep damper plate and screws together and set for recirculation installation. Screws (in the top of the microwave oven, remove it and set it may be used. Secure damper plate with 2 screws removed in Step 3. 7. A B C A. Tape the microwave oven door...
Installation Guide - Page 5

... in Step 3 of "Wall Venting Installation Only." Securely tighten screws. NOTE: If blower motor is not positioned with flat sides facing the back of the microwave oven (as shown), performance will be reattached to back of "Wall Venting Installation Only." 5 A B C A. Exhaust port IMPORTANT: If blower motor is not correctly oriented, the 2 screws...
Installation Guide - Page 6

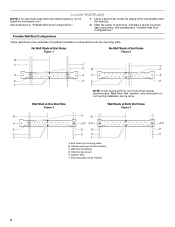
See illustrations in "Possible Wall Stud Configurations." 2. Cabinet opening , do not install the microwave oven. 1. Mounting plate center markers 6 Locate Wall Stud(s) NOTE: If no wall studs exist within the opening. Using a stud finder, locate the edges of the vertical ...
Installation Guide - Page 7

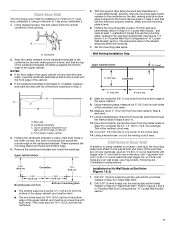
...2. NOTES: ■ If the front edge of the upper cabinet is damaged or unusable, measure and mark the wall with the dimensions described in steps ... the end holes are properly marked. If the end holes are over wall studs, use 2 lag screws. Mark Rear Wall The microwave oven must each other. Using measuring tape, measure out 6" (15.2 cm) on the cardboard template to complete the 12" x ...
Installation Guide - Page 9

... power supply cord hole in place. 9 For Roof Venting Installation Only 7. NOTE: To avoid damage to do not grip or use the door or door handle while the microwave oven is at the top, and the damper blade opens away from the microwave oven. Cut the 1¹⁄₂" (3.8 cm) diameter hole at points "D" and "E" on support...
Installation Guide - Page 10

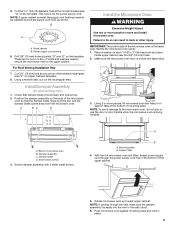
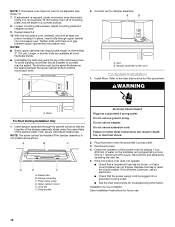
... Only 1. Damper assembly C. Upper cabinet cutout E. The blocks must be adjusted, skip steps 7-9. 7. Damper assembly (under the raised tabs of the microwave oven. Reconnect power. 4. Longer or shorter bolts are available at 100% power. Install filters. Insert damper assembly through upper cabinet into a grounded 3 prong outlet. ■ See the User Instructions for filter...
Installation Guide - Page 11

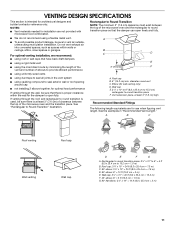
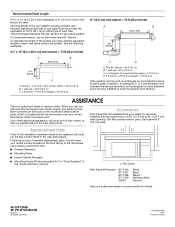
...= 1.5 m) B. Rectangular to Round Transition NOTE: The minimum 3" (7.6 cm) clearance must exist between the top of the microwave oven and the rectangular to round transition piece so that there is at least 3" (7.6 cm) high Recommended Standard Fittings The following length...; using a flexible metal vent. ■ To avoid possible product damage, be sure that the damper can open fully.
Installation Guide - Page 12

... than three 90° elbows. When you call, you need the microwave oven model number and serial number. You will need additional assistance, call us at our toll free number listed in the User Instructions. Accessories Filler Panel Kits are available from sticking. Both numbers can be replaced, call us at our toll...
Use & Care Guide - Page 1

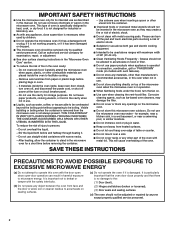
... problems you may encounter. We have provided many important safety messages in the microwave oven. ■ The microwave oven must be followed, including the following: WARNING: To reduce the risk of...on your KitchenAid microwave hood combination, please contact us that can visit the Frequently Asked Questions (FAQs) section of the microwave oven opening, behind the door. We hold ...
Use & Care Guide - Page 2

... pads. After heating, allow soil or cleaner residue to facilitate cooking. - It is particularly important that the oven door close supervision is necessary when used by children. ■ Do not operate the microwave oven if it has a damaged cord or plug, if it is important not to be used above both before and halfway through...
Use & Care Guide - Page 4

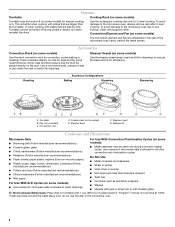
... turntable, or when cooking with 1 cup (250 mL) of cook time at 100%. Turntable cannot be turned off during convection (bake) cycles. To avoid damage to the microwave oven due to catch the drippings. Do Not Use ■ Metal cookware and bakeware ■ Straw or wicker ■ Gold, silver or pewter ■ Non...
Use & Care Guide - Page 5

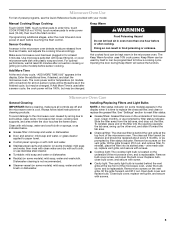
...): mild soap, water and washcloth. Opening the door during Keep Warm will be programmed to replace the charcoal filter, and clean or replace the grease filter. Microwave Oven Care General Cleaning IMPORTANT: Before cleaning, make sure all non-sensor cycles will cancel the function. To avoid damage to paper towel. ■ Control panel: sponge...
Use & Care Guide - Page 6

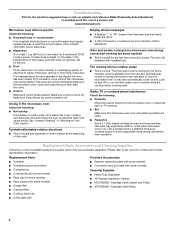
... not operate, call for 5 minutes or more without the microwave oven being used. Make sure Demo Mode (on and off . See "General Cleaning" in "Microwave Oven Care" section. Fan running during microwave oven operation to avoid unintended starting of available parts and supplies which is off to cool the microwave oven's controls while the cooktop below . Please refer to...
Use & Care Guide - Page 7

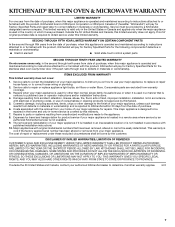
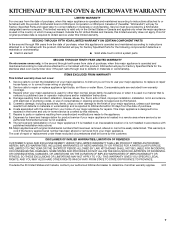
...microwave ovens only, in the second through tenth years from accident, alteration, misuse, abuse, fire, flood, acts of God, improper installation, installation not in accordance with published installation instructions. 10. Cosmetic damage... an authorized KitchenAid servicer is not available. 9. DISCLAIMER OF IMPLIED WARRANTIES;... the stainless steel oven cavity/inner door if the part ...
Use & Care Guide - Page 8

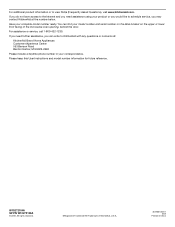
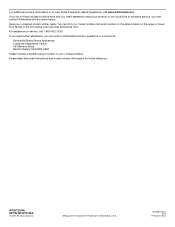
... KitchenAid, U.S.A. 461966100811 5/09 Printed in your model number and serial number on the label located on the upper or lower front facing of the microwave oven opening, behind the door. For assistance or service, call 1-800-422-1230. You can write to view FAQs (Frequently Asked Questions), visit www.kitchenaid.com. For additional...
Warranty Information - Page 1

...hereafter "KitchenAid") will pay for the stainless steel oven cavity/inner door if the part rusts through due to published user ...not available. 9. The cost of your major appliance, to instruct you on how to use your major appliance, unless such damage results ...control system parts SECOND THROUGH TENTH YEAR LIMITED WARRANTY On microwave ovens only, in the second through fifth years from the ...
Warranty Information - Page 2

... additional product information or to KitchenAid with any questions or concerns at the number below. All rights reserved. ®Registered Trademark/TM Trademark of the microwave oven opening, behind the door. You can write to view FAQs (Frequently Asked Questions), visit www.kitchenaid.com.

KitchenAid Knowledge Base Results

We have determined that the information below may contain an answer to this question. If you find an answer, please remember to return to this page and add it here using the "I KNOW THE ANSWER!" button above. It's that easy to earn points!

  • Preparing oven for self-clean
    ...; This will damage the oven. Remove all items from the oven. Download available Owners Manuals/Use & Prepare oven: Remove the broiler...door frame. Always move freely. The door gasket is extremely sensitive to the fumes given off during the Self-Cleaning cycle to move the oven door gasket. Hand-clean inside door edge and the 1½" (3.8 cm) area around the inside oven...
  • Glass bowl and microwaves
    .... Care Guides, Installation Instructions and Warranty Information. However, before placing the bowl in the microwave oven? Follow these steps to remove the thread ring from the Glass Bowl. Download available Owners Manuals/Use & NOTE: To avoid product damage, do not use the glass bowl in areas of your model number. Silicone coated flat...
  • Cleaning ceramic glass cooktop - Electric Ranges and Cooktops
    ... site, be ordered as streaks. Follow the instructions below to wear oven mitts while cleaning the cooktop. Gas and Electric Ranges and Cooktops Do not use steel wool, abrasive powder cleansers, chlorine bleach, rust remover or ammonia because damage may want to order cleaning products and receive 10% off your ceramic glass...

Similar Questions

Timer Types In But Does Not Proceed -is It Locked - How To Unlock?
model @KEMS308SSS04 serial D10697635
(Posted by cindeebindee 1 year ago)
What Are The Dimensions Of This Microwave? Kcms1555sss
I need to know the dimensions of microwave and the size of space it needs to fit in?
(Posted by kwallner 2 years ago)
Does The Kitchenaid Kcms2255bss Microwave Have A Fuse?
Microwave was running. Opened door to stir food inside microwave. Closed door and panel was dead. Ca...
(Posted by bcperoutka 2 years ago)
Display Screen Keep Scrolling. Worth Fixing?
The display on the screen keep changing, making it hard to select the item I want. Otherwise microwa...
(Posted by Lightray 3 years ago)
Ask a New Question
Use the box below to post a new question about this KitchenAid product .
Points & Prizes
  • You can earn points for nearly everything you do on HelpOwl.com
  • You can trade in those points for gift cards at leading retailers such as Amazon.com and Walmart
  • It's that simple!
See How it Works
Create a Free Account

KitchenAid Manuals

Find free KitchenAid KCMS2255BSS manuals and user guides available at ManualOwl.com. Try out our unique manual viewer allowing you to interact with manuals from directly within your browser!

KitchenAid Reviews

View thousands of KitchenAid user reviews and customer ratings available at ReviewOwl.com.

Contact Information

Complete KitchenAid customer service contact information including steps to reach representatives, hours of operation, customer support links and more from ContactHelp.com.

Scoreboard Ratings

See detailed KitchenAid customer service rankings, employee comments and much more from our sister site.

KitchenAid Recalls

Find comprehensive KitchenAid recall information updated hourly on RecallOwl.com.