Get support for HP Photosmart 7510

HP Photosmart 7510 Support Question

HP Photosmart 7510 Support Question

Find answers below for this question about HP Photosmart 7510.
Need a HP Photosmart 7510 manual? We have 2 online manuals for this item!
Question posted by bells on August 15th, 2012

How Do You Make It Scan

The person who posted this question about this HP product did not include a detailed explanation. Please use the "Request More Information" button to the right if more details would help you to answer this question.

Current Answers

Answer #1: Posted by rachelsurvey on August 15th, 2012 9:48 AM
rachelsurvey

Member since:
August 15th, 2012

Points: 33,740
100
points
Step 1: You have to find a good Framegrab that is suited for tracing. I picked the one on the left as an example (click it to see in full).

Tip : make sure the top of the head of the character is on it, no one likes a half scan. And it's hard to add the missing part yourself.

Over years of trying to make scans I have gone through many and many methods. Some are easier but they give results that are not as satisfying as the harder ones. But once you got the technique, the one I use myself is even faster.

Step 2: Open Adobe Illustrator , I advice you to use 9.0 the same as I used cause it will be easier to understand the Tuturial. Click  and then  (for those fast keyboard freaks among you CTRL-N). Ok now we have the main page where everything will be about. When this page comes up you click  again and then you pick Place. You will get a file select window, there you get the file. (in my example it's pic00352.jpg and stored in C:\images\framegrabs\) and your screen should look like the image on the right . 

OK now you're almost ready to go, but before we can go to the process we call tracing, there is still one step you have to go through.

Optional Step: click the image, then go to the transparency window. Go to where it says : Opacity : 100, change that number to let's say like 70 (Like I do, you'll see the point afterwards, if you are more comfortable with other values, go right ahead)

Step 3: Ok this step is important, go to the layers window. Click on the open box next to the eye by layer 1. This will lock the layer so you don't work over the original image. Then click on the little icon next to the trashcan. It will say 'create new layer' when you hover over it and then click it, this will create a new layer which will be the working layer.

I'm sure some of you are thinking : this has nothing to do with scanning, well no :) But you'll see what magic we can do next to make the image a real scan, by the process we call 'tracing'. You with me? No? Well you'll be after I explain you.

Step 4: First thing you have to do is prepare a brush for drawing, the size depends on what you like the best, I always use size 1, but maybe you'll like a bit thicker scans and you can try 2. But in this example we'll pick '1'. Click the icon next to the trash can. You'll get a window, select New Calligraphic Brush and press OK. Another window will appear, to make things easy I'm not going to explain everything what's in there, so just pick your diameter and press ok (1pt in this example)

Step 5: Zoom into the image to a level where you can feel comfortable with, I always use 400% or 300%, just see which one gives you the best view on details. Then select the pen tool .

Go to one of the outlines of the scans are the bottom and click it with the pen tool, then click somewhere else very close to that point so it connects those points with a straight line. Keep doing this until you got the whole part of the body, then click somewhere on the toolbar and then click the pen tool again to do the next part of the body. You probably will notice that this doesn't look as smooth as my scans do, well there is a method to make things looks smooth.

If you want things to look smoother, you have to click with the pen tool on one part of the outline of the scan and then somwhere else a bit further, like shown on the left. The trick is not to let go after you selected the 2nd point but move your mouse till the line has the shape of the outline. This process needs alot of practice, and might be a bit hard at first, but once you know how it works, it's very useful and it results in top quality scans.

Now it's your turn to trace the entire scan like I explained, if you don't manage to do the Smooth method try outlining the scan with lines, like I explained before the smooth method. 

TIP : Don't worry if your scan doesn't look 100% like the framegrab when using the smooth method, the smoother the scan the better it is. It's not always possible to outline perfectly, and no one will notice anyway.

Ok, the tracing is complete, right? If it's not I recommend you to redo the process or look at the .ai file of my one, maybe you'll get it by studying mine. Ok, it doesn't look like a scan yet, right? Well go to the 'Layers Window' and click the eye next to the first layer (the background layer). And the background layer will disappear. Now click  and then Export. Choose BMP as your extension and give it a name of the scan. A window will appear, choose High Resolution and then OK 2 times. The file is now ready to be colored in any good graphic editor (ie. Adobe Photoshop, PSP) and this concludes our tutorial. I will soon do a tutorial about the coloring phase and shading soon.


Related HP Photosmart 7510 Manual Pages

Reference Guide - Page 1

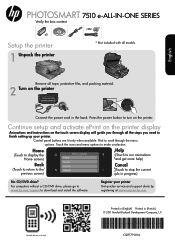
PHOTOSMART 7510 e-ALL-IN-ONE SERIES Verify the box content
Reference Guide - Page 2

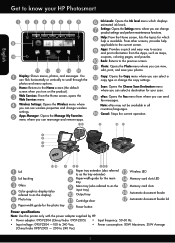
...way to access and print information from where you can rearrange and remove apps. Scan: Opens the Choose Scan Destination menu where you can flick horizontally or vertically to the previous screen. eFax... Photo: Opens the Photo menu where you can view, edit, print, and save your HP Photosmart 5 Display: Shows menus, photos, and messages. English Get to the current screen. Ink Levels:...
Reference Guide - Page 3

...; When installing new cartridges, remove the piece of the lid clean. Specify 2-sided option - To scan to a computer, select the computer, and then select a scan type to start the scan. •• If your computer is not listed, make sure the printer is left in the automatic document feeder (print-side up ). 2. Touch View...
Reference Guide - Page 4

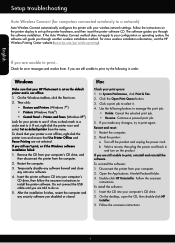
... To check that your HP Photosmart is set up the printer hardware... and reinstall the software. Use the following in order: Windows Make sure that Use Printer Offline and Pause Printing are unable to ...made any changes, try the following buttons to it . 4. Then click: •• Devices and Printers (Windows 7®) •• Printers (Windows Vista®) ••...
Reference Guide - Page 5

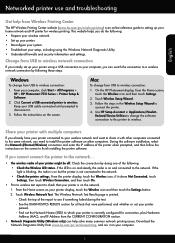
...the instructions on but the printer is printed. -- Follow the steps in Applications/HewlettPackard/Device Utilities to change the software connection to this printer to wireless. From the Home screen ... prompted to disconnect it on your computer, click Start > All Programs > HP > HP Photosmart 7510 Series > Printer Setup & Software. 2. If you already have your printer connected to your ...
Reference Guide - Page 6

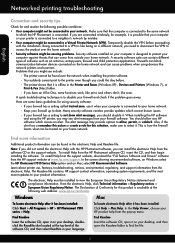
Make sure that your computer or your printer is connected. Temporarily disable the VPN before . -- Firewalls can block communication between devices... been installed: Click Start > All Programs > HP > HP Photosmart 7510 series > Help. The electronic Help must be installed to a ...this action or create a rule for this product is like scan. To install Help from the pop-up to date. The...
User Guide - Page 3

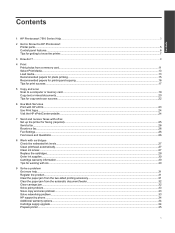
Contents Contents 1 HP Photosmart 7510 Series Help...3 2 Get to Know the HP Photosmart Printer parts...5 Control panel features...6 Tips for getting to know the printer...7 3 How do ... automatic document feeder 32 Clear carriage jam...32 Solve print problem...33 Solve copy and scan problem...33 Solve networking problem...33 HP support by phone...34 Additional warranty options...34 Cartridge supply upgrade......
User Guide - Page 5

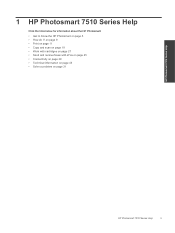
... page 11 • Copy and scan on page 19 • Work with cartridges on page 27 • Send and receive faxes with eFax on page 25 • Connectivity on page 39 • Technical information on page 43 • Solve a problem on page 5 • How do I? 1 HP Photosmart 7510 Series Help Click the links...
User Guide - Page 9

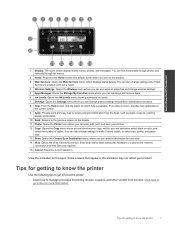
... horizontally through photos and vertically through list menus. 2 Home: Returns to Know the HP Photosmart 1 Display: The touch screen display shows menus, photos, and messages. Tips for which ... and select the number of copies. Click here to make 2-sided copies, or select size, quality, and paper type. 13 Scan: Opens the Choose Scan Destination menu, where you can change product settings and ...
User Guide - Page 24

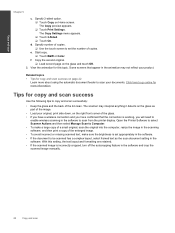
... the touch screen to set appropriately in the software. • If the document to be scanned has a complex layout, select framed text as part of the enlarged image. • To avoid incorrect or missing scanned text, make sure the brightness is incorrectly cropped, turn off the autocropping feature in the animation may interpret...
User Guide - Page 26

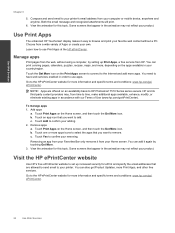
...on the apps available in accordance with our Terms of Apps or create your computer or mobile device, anywhere and anytime. Learn how to set up Print Apps, a free service from your ...to confirm your Home screen. Touch Yes to HP Photosmart 7510 Series series owners. Use Print Apps The enhanced HP Touchsmart display makes it again by setting up increased security for more ...
User Guide - Page 27

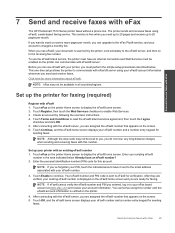
...the printer. 4. Enter the personal identification number (PIN) code for this number until the eFax® account information is scanned by following the onscreen instructions. 4. Touch Enable to read the eFax® brand services agreement, then touch the I...for more pages per month. Send and receive faxes with eFax The HP Photosmart 7510 Series printer faxes without a phone line.
User Guide - Page 33

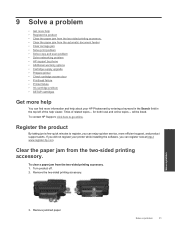
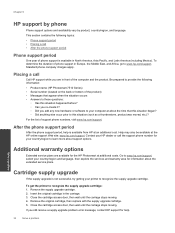
If you did not register your HP Photosmart by phone • Additional warranty options • Cartridge supply upgrade • Prepare ... paper jam from the automatic document feeder • Clear carriage jam • Solve print problem • Solve copy and scan problem • Solve networking problem • HP support by entering a keyword in the Search field in the top left of...
User Guide - Page 35

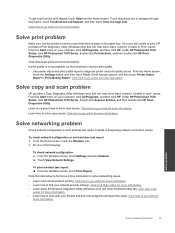
... problem Make sure that the printer is turned on your firewall and anti-virus programs during printer setup. Click here to go online for more about the Network Diagnostic Utility (Windows only) and other troubleshooting tips. To get help solve many common "Unable to scan" issues. Under HP Photosmart 7510 Series, click HP Photosmart 7510 Series...
User Guide - Page 36

... supply upgrade cartridge. 2. This section contains the following information: • Product name (HP Photosmart 7510 Series) • Serial number (located on the back or bottom of the product) •...your country/region and language, then explore the services and warranty area for the HP Photosmart at about support options. After the phone support period After the phone support period,...
User Guide - Page 41

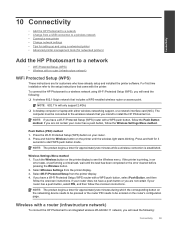
..., select Push Button, and then follow the Wireless Settings Menu method. To connect the HP Photosmart to an integrated wireless WLAN 802.11 network, you will only support 2.4Ghz ❑ A...If you are for approximately two minutes during which the corresponding button on the networking device needs to be entered on your router has a push button, follow the onscreen instructions...
User Guide - Page 42

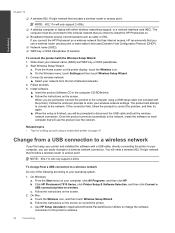
... To change to install the HP Photosmart on the screen. b. Follow prompts...Device Utilities to change the software connection to this printer to wireless. Once the product connects successfully to enter your operating system. 1. Follow the onscreen prompts to the network, install the software on your network name (SSID) and WEP key or WPA passphrase. 2. Click HP Photosmart 7510...
User Guide - Page 43

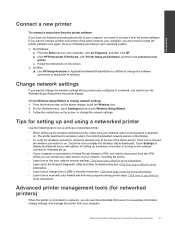
... the Network Diagnostic Utility and other device on your network., including the printer. • Learn how to set up the wireless networked printer, make sure your wireless router or access...the Wireless menu, touch Settingsand then touch Wireless Setup Wizard. 3. On Windows: a. Click HP Photosmart 7510 Series, click Printer Setup and Software, and then click Connect a new printer c. Tips for...
User Guide - Page 45

... cartridges used in the operation of information about providing this anonymous information, you can make this information inaccessible by turning off the memory chip's ability to this product contain... specifications and international regulatory information for the HP Photosmart are provided in this information, you can be used with the HP Photosmart. If you prefer to not allow access to...
User Guide - Page 54

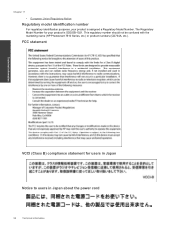
... statement Technical information VCCI (Class B) compliance statement for your product is SDGOB-1021. This regulatory number should not be confused with the marketing name (HP Photosmart 7510 Series, etc.) or product numbers (CD734A, etc.). The Regulatory Model Number for users in Japan Notice to users in Japan about the power cord 52...

Similar Questions

Ask a New Question
Use the box below to post a new question about this HP product .
Points & Prizes
  • You can earn points for nearly everything you do on HelpOwl.com
  • You can trade in those points for gift cards at leading retailers such as Amazon.com and Walmart
  • It's that simple!
See How it Works
Create a Free Account

HP Manuals

Find free HP Photosmart 7510 manuals and user guides available at ManualOwl.com. Try out our unique manual viewer allowing you to interact with manuals from directly within your browser!

HP Reviews

View thousands of HP user reviews and customer ratings available at ReviewOwl.com.

Contact Information

Complete HP customer service contact information including steps to reach representatives, hours of operation, customer support links and more from ContactHelp.com.

Scoreboard Ratings

See detailed HP customer service rankings, employee comments and much more from our sister site.

HP Recalls

Find comprehensive HP recall information updated hourly on RecallOwl.com.