HP ENVY 20-d013w Support Question
HP ENVY 20-d013w Support Question
Find answers below for this question about HP ENVY 20-d013w.Need a HP ENVY 20-d013w manual? We have 3 online manuals for this item!
Question posted by Anonymous-129631 on January 27th, 2014
How To Factory Reset
The person who posted this question about this HP product did not include a detailed explanation. Please use the "Request More Information" button to the right if more details would help you to answer this question.
Current Answers
Answer #1: Posted by geekyankit1991 on January 27th, 2014 11:00 AM
geekyankit1991

Member since:
December 16th, 2013 Points: 166,010

Member since:
December 16th, 2013 Points: 166,010
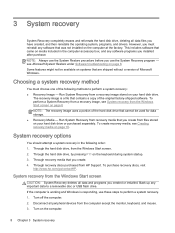
There are three ways :- This document explains how to reset the computer to its original factory shipped state and is divided into sections based on the different ways of performing a system recovery. NOTE:The steps in Windows 8 for resetting a desktop PC to its original state differ from the steps for resetting a notebook PC to its original state. Make sure you use the steps for your PC type. Back up all personal files and read all caution statements before performing a system recovery. CAUTION: If the computer originally came with Windows Vista or Windows 7 and the computer was upgraded to Windows 8, the recovery process will reinstall the original operating system. You must upgrade to Windows 8 (again) after the system recovery is completed. If the computer originally came with Windows Vista and was upgraded to Windows 8, see Performing an HP System Recovery in Windows Vista .If the computer originally came with Windows 7 and was upgraded to Windows 8, see Performing an HP System Recovery in Windows 7 . The complete recovery process can take 4 to 6 hours or more to complete. For best results, the computer should not be connected to the Internet. The computer will restart several times during the process. Do not turn off the power or interrupt the recovery process until the prompt to log in to Windows displays. NOTE: If you are not using the latest version of Windows 8, some graphics and information in this document may vary. You can get the latest version from the Microsoft Store. Types of recovery Your computer might have three types of System Recovery available, or it might have only two. Use the recovery type that resolves your issue without making more changes than necessary.
- System Recovery: This option reformats the system drive (usually C:), reinstalls the original operating system, and reinstalls all the original hardware drivers and software. WARNING:If the size of the OS partition (usually C:) was reduced below a minimum size requirement, other user created partitions will be removed and stored data will be destroyed.
- Factory Reset: Factory Reset removes all partitions, reformats the entire hard drive, reinstalls the original operating system, and reinstalls all the original hardware drivers and software. This option also recreates the required Recovery partition (usually D:) and UEFI partition (usually E:) and reinstalls the required software. The Factory Reset option returns all of the computer's software to the condition it was in at the time of purchase. All user changes or additions are removed.
- Minimized Image Recovery: Available on many of HP's notebook computers, the Minimized Image Recovery removes all partitions, reformats the entire hard drive, reinstalls the original operating system and hardware drivers, and reinstalls HP essential software (such as HP Support Assistant and HP Recovery Manager). Minimized Image Recovery does not reinstall the trial applications and games.
- Recover your HP notebook computer Depending on the condition of the system, you can perform a recovery using one of the following methods:
- Recovery when Windows 8 opens correctly.
- Recovery when Windows 8 does not open correctly.
- Recovery using recovery media, such as discs or a USB flash drive.
- Use one of the following methods to open the Computer Setup Utility.
- Turn on the computer and immediately press the F10 key repeatedly, about once every second, until the Computer Setup Utility opens.
- Turn on the computer and immediately press the Escape key repeatedly, about once every second, until the Startup menu opens. Then press F10 .
- To navigate the menus, choose menu screens by pressing the left or right arrow keys. Use the up or down arrow keys to move through the list of items on the menu screen. Press the Enter key to select an item and open a submenu. Then use the left and right arrow keys to modify the settings. Press the F10 key to save the changes and exit from a submenu, or press the Esc key to exit from a submenu without saving the changes.
- Use the right arrow key to choose the System Configuration menu, use the down arrow key to select Boot Options , then press Enter . Figure 51: System Configuration menu Figure 52: Boot Options menu
- Use the down arrow key to select Secure Boot , press the Enter key, then use the down arrow key to modify the setting to Disable .
- Press F10 to accept the changes and exit.
- The Computer Setup Utility closes and the computer restarts. When the computer has restarted, the Operating System Boot Mode Change screen appears, prompting you to confirm the Boot Options change. Type the code shown on the screen, then press Enter to confirm the change.
- Use the left arrow key to select the File menu, use the down arrow key to select Save Changes and Exit , then press Enter to select Yes .
- The Computer Setup Utility closes and the computer restarts. When the computer has restarted, use the power button to turn the computer off.
- Recovery when Windows 8 opens correctly.
- Recovery when Windows 8 does not open correctly.
- Recovery using recovery media, such as discs or a USB flash drive.
- Turn off the computer.
- Turn on the computer and immediately press the F10 key repeatedly, about once every second, until the Computer Setup Utility opens.
- Use the left and right arrow keys to select the Security menu, then use the up and down arrow keys to select Secure Boot Configuration , and then press Enter . Figure 110: Security menu
- The Secure Boot Configuration warning displays. Press F10 to continue. Figure 111: Secure Boot Configuration
- Use the up and down arrow keys to select Secure Boot , then use the left and right arrow keys to change the setting to Disable . Figure 112: Secure Boot Configuration
- Use the up and down arrow keys to select Legacy Support , then use the left and right arrow keys to change the setting to Enable .
- Press F10 to accept the changes.
- Press F10 again, then press Enter twice to restart the computer. Figure 113: Save Changes and Exit
- As soon as the computer starts, a message appears indicating that the boot mode has changed. Figure 114: Boot mode change message
- Type the four-digit code shown in the message, then press Enter to confirm the change. NOTE:No text field displays for the code. This is expected behavior. When you type the numbers, the code is logged without a text field. The computer starts Windows 8.
Tech freak
Related HP ENVY 20-d013w Manual Pages
Quick Setup Guide - Page 5
... of your computer.
1 Getting information
Type of information
Where to use the
Help and Support
Microsoft Windows operating system. Quick Setup (this Guide)
● Recover factory settings.
then select User guides.
● Find electronic user guides and specifications for your computer model.
● Order parts and find
● Set up your...
Quick Setup Guide - Page 9
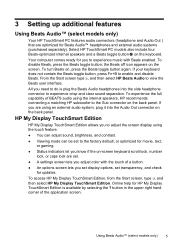
... screen type b, and then select HP Beats Audio to adjust the screen display using the internal speakers, HP recommends connecting a matching HP subwoofer to the factory default, or optimized for HP My Display TouchSmart Edition is plug the Beats Audio headphones into the Audio Out connector on the back panel. the...
Quick Setup Guide - Page 16
A
Off
Connect
On
B
3.
The receiver connection session times out after 20 minutes of the receiver, approximately 3 meters (10 feet) for normal use a USB connector on the same level as the receiver, within 30 cm (12 inches) ...
Quick Setup Guide - Page 18
...
Microsoft System Restore, later in this table). -
If the antenna is the easiest (and
software
sometimes the best) way. Try to move the antenna to factory defaults.
● System Recovery (see Updating device drivers, following). Software troubleshooting
To repair
● Turn the computer off completely and then turn it came with...
Quick Setup Guide - Page 20

... reinstall it. You must restart the computer after recovering software programs or hardware drivers.
Under I need help immediately, select Software Program Reinstallation. 3. Check whether your factory-installed software programs or hardware drivers are damaged, you want to install, select Next, and follow the on CDs or DVDs included in the Recovery...
Quick Setup Guide - Page 24
... the highest quality, best performing, and easiest to use computers in mind. But to minimize energy use a screen saver.
Screen savers can be more than 20 years. We are set to reduce its impact even further, we recognize that came with minimum impact on the planet.
HP also designed this computer...
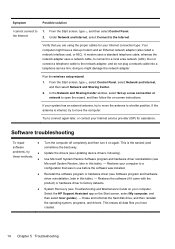
Troubleshooting and Maintenance Guide - Page 7

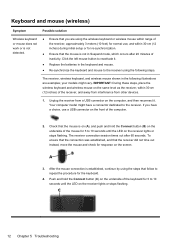
... environment. Keyboard and mouse (with cable)
Symptom
Possible solution
Keyboard commands and typing are bent, reconnect the monitor connector cable to the back of the desktop, and then click Screen resolution.
2. Unplug and reconnect the mouse cable to resume from the drop-down automatically. Power
Symptom
Possible solution
Computer does not...
Troubleshooting and Maintenance Guide - Page 8
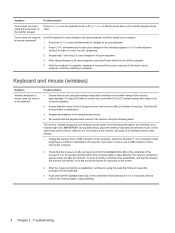
... the following steps. If you are examples; Unplug the receiver from other devices.
1. Your computer model might vary. The receiver connection session times out after 20 minutes of the receiver, approximately 10 meters (32 feet) for normal use a USB connector on the screen.
3. Check that the mouse is not detected.
your...
Troubleshooting and Maintenance Guide - Page 10
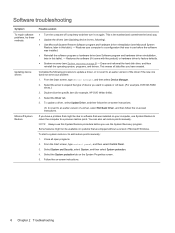
... device drivers
Microsoft System Restore
Possible solution
● Turn the computer off completely and then turn it came with the product) or hardware driver to factory defaults. ● System recovery (see System recovery on page 8) - Or, to revert to an earlier version of a driver, select Roll Back Driver, and then follow...
Troubleshooting and Maintenance Guide - Page 11
... available on CDs or DVDs included in the computer box. From the Start screen, type recovery, and then select HP Recovery Manager. Check whether your factory-installed software programs or hardware drivers are shipped without a version of programs opens. Close all software programs and folders. 2. Symptom
Possible solution
Software program and...
Troubleshooting and Maintenance Guide - Page 12
.... Run System Recovery from the Windows Start screen on the computer at the factory.
System recovery options
You should attempt a system recovery in the computer accessory box...that was not installed on page 8 NOTE: The recovery image uses a portion of the original factory-shipped software.
Run System Recovery from recovery media that are shipped without a version of the following...
Troubleshooting and Maintenance Guide - Page 14
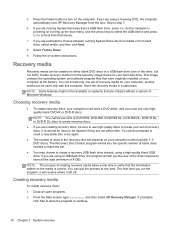
If you are using a high-quality blank USB drive. Select Factory Reset.
9. Recovery media
Recovery media can be used only with this computer.
NOTE: You cannot... If you must use high-quality discs to store all open programs. 2.
You can quit the process at the factory. NOTE: Some features might not be available on your computer must have a DVD writer, and you are running ...
Similar Questions

Hp Data Vault X510 Factory Reset
HP X510 still has a password after factory reset. is that a default password?Your help much apprecia...
HP X510 still has a password after factory reset. is that a default password?Your help much apprecia...
(Posted by danielandcplesh4 1 month ago)

Factory Reset Thin Client Hpt430
Blue screen of death pops out before windows start. How do I factory or simple reset a HP thin clien...
Blue screen of death pops out before windows start. How do I factory or simple reset a HP thin clien...
(Posted by mafist0 1 year ago)

How To Factory Reset T310
All hotkeys are disabled. I have tried the ctrl+alt+shift+space bar . I have tried tapping on the sh...
All hotkeys are disabled. I have tried the ctrl+alt+shift+space bar . I have tried tapping on the sh...
(Posted by cody33431 6 years ago)


Hw Factory Reset Hp T5335z
hello i locked down my hp t5335z by disabling almost all configuration buttons for the user. unfort...
hello i locked down my hp t5335z by disabling almost all configuration buttons for the user. unfort...
(Posted by peter85118 11 years ago)