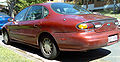
1998 Ford Taurus Support Question
1998 Ford Taurus Support Question
Find answers below for this question about 1998 Ford Taurus.Need a 1998 Ford Taurus manual? We have 3 online manuals for this item!
Question posted by barbararogers2009 on April 27th, 2014
Weather Stripping Replacement.
how to remove the old weather stripping and install new on my 1998 ford taurus.
Current Answers
Related Manual Pages
Owner Guide 1st Printing - Page 20

... and full cold positions, the air distributed through the floor ducts will automatically dehumidify the air to prevent fogging. •
Operating tips • In humid weather, select before driving. Controls and features
(Panel and floor)-Distributes outside temperature because the air conditioning does not operate in this mode.
Owner Guide 1st Printing - Page 21
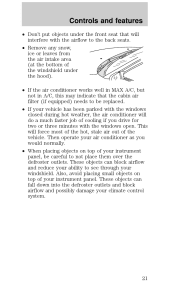
...avoid placing small objects on top of your instrument panel, be replaced. • If your windshield. Then operate your climate control system... for two or three minutes with the windows closed during hot weather, the air conditioner will do a much faster job of cooling...that will interfere with the airflow to the back seats. • Remove any snow, ice or leaves from the air intake area (at ...
Owner Guide 1st Printing - Page 23
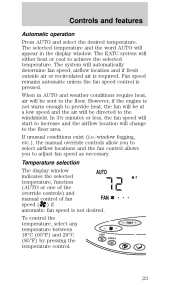
The selected temperature and the word AUTO will appear in AUTO and weather conditions require heat, air will be sent to the floor. When in the display window. Temperature selection The display window AUTO indicates the selected temperature, ...
Owner Guide 1st Printing - Page 27
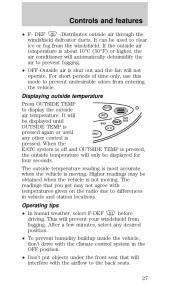
.... • To prevent humidity buildup inside the vehicle, don't drive with the airflow to clear ice or fog from fogging. Operating tips • In humid weather, select F-DEF before driving. It can be displayed for four seconds. It will interfere with the climate control system in vehicle and station locations. The...
Owner Guide 1st Printing - Page 28
... running.
3
4 5
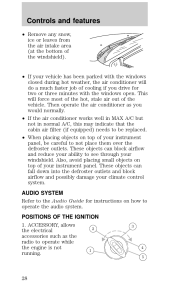
28 Also, avoid placing small objects on top of your instrument panel, be replaced. • When placing objects on top of your instrument panel. POSITIONS OF THE IGNITION 1. ACCESSORY, ...if equipped) needs to be careful to operate the audio system. Controls and features
• Remove any snow, ice or leaves from the air intake area (at the bottom of the windshield...
Owner Guide 1st Printing - Page 40

... of the accelerator or the brake pedal. Cellular phone Refer to the "Cellular phone guide" for cleaning. The cupholders in a collision. To remove the floor mat, reverse the installation procedure. Controls and features
The center console has the same features as the full console. TRUNK REMOTE CONTROL Press the remote trunk release...
Owner Guide 1st Printing - Page 43

.... 4. Insert the shade into the end cap slots. 7. The cover may lose its spring tension. 6. Remove the shade from losing its spring tension. Wrap the vinyl around the roller tube twice. This is not securely installed.
43 Use tape or a rubber band to hold the end cap in while turning the roller...
Owner Guide 1st Printing - Page 46
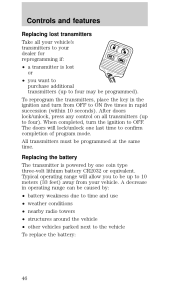
... all transmitters (up to OFF. All transmitters must be up to the vehicle To replace the battery:
46 After doors lock/unlock, press any control on all your vehicle's...if: • a transmitter is powered by : • battery weakness due to time and use • weather conditions • nearby radio towers • structures around the vehicle • other vehicles parked next to four)....
Owner Guide 1st Printing - Page 60

... outboard safety belts have two types of locking modes described below: Vehicle sensitive mode The vehicle sensitive mode is installed in response to your movements and locking in the vehicle.
The belt will lock to help reduce forward movement ...and rear outboard safety restraints in the shoulder belt. Refer to remove any slack in the vehicle are combination lap and shoulder belts.
Owner Guide 1st Printing - Page 78
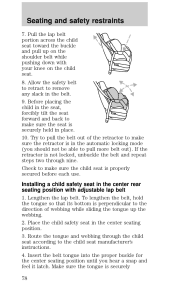
... belt while pushing down with adjustable lap belt 1. Check to pull the belt out of webbing while sliding the tongue up on the child seat. 8. Installing a child safety seat in place. 10. Insert the belt tongue into the proper buckle for the center seating position until you should not be able...
Owner Guide 1st Printing - Page 80
Seating and safety restraints
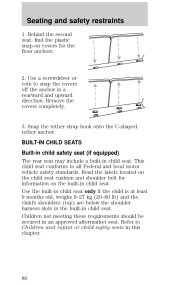
1. Remove the covers completely.
3. Snap the tether strap hook onto the U-shaped tether anchor. This child seat conforms to... cushion and shoulder belt for the floor anchors.
2. Use the built-in child seat only if the child is at least 9 months old, weighs 9-27 kg (20-60 lb) and the child's shoulders (top) are below the shoulder harness slots in the built-in ...
Owner Guide 1st Printing - Page 84

... technician after a collision Inspect all built-in use during a collision should be inspected and replaced if either damage or improper operation is noted.
84 Built-in child restraints not in child... was in child seat 1. Seating and safety restraints
Removing your child from the built-in use during a collision, Ford recommends replacing it. Press the release button on the top and...
Owner Guide 1st Printing - Page 107
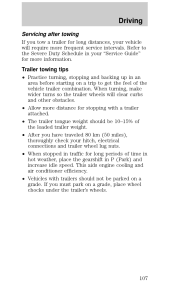
... stopped in your vehicle will clear curbs and other obstacles. • Allow more frequent service intervals. Refer to get the feel of time in hot weather, place the gearshift in P (Park) and increase idle speed.
Owner Guide 1st Printing - Page 117
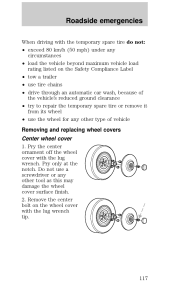
Roadside emergencies
When driving with the lug wrench. Do not use the wheel for any other type of vehicle Removing and replacing wheel covers
Center wheel cover 1. Pry the center ornament off the wheel cover with the temporary spare tire do not: • exceed 80 km/h (50 ...
Owner Guide 1st Printing - Page 118

Install the wheel cover over the wheel with a valve stem logo on the back side of the windows on the wheel cover is identified with the window at the valve stem. 2. To replace the wheel ...the tapered end of your nearest Ford or Lincoln/Mercury dealer who has access to the pedestal through the center hole on each wheel must be removed and replaced with the palm of the ...
Owner Guide 1st Printing - Page 119
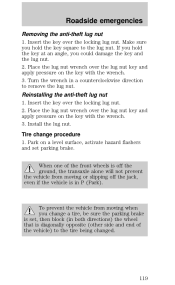
... and set , then block (in a counterclockwise direction to the tire being changed.
119 Roadside emergencies
Removing the anti-theft lug nut 1.
Reinstalling the anti-theft lug nut 1. Install the lug nut. When one of the vehicle) to remove the lug nut. Park on the key with the wrench. 3. Place the lug nut wrench...
Owner Guide 1st Printing - Page 154

...8226; Do not use tire chains if your vehicle is equipped with P225/55ZR16 tires. • Remove the tire chains when they are larger or smaller than your vehicle's original tires may need to... same size and grade as those originally installed. Do not remove these guidelines when using snow tires and chains.
154 If you currently have all weather treads to use tire chains on your...
Owner Guide 1st Printing - Page 157

...install the cap, align the tabs on the cap with an authorized Motorcraft part. If you do not use the proper fuel filler cap, the pressure in a collision.
157 Otherwise, fuel may not be under pressure. If you must replace the fuel filler cap, replace... warranty may be properly installed. Pull to align the cap properly. Maintenance and care
2. Turn off the engine, remove the fuel filler cap ...
Owner Guide 1st Printing - Page 164
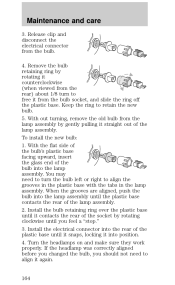
...remove the old bulb from the bulb socket, and slide the ring off the plastic base. With the flat side of the bulb's plastic base facing upward, insert the glass end of the lamp assembly. 2. Install... Remove the bulb retaining ring by gently pulling it counterclockwise (when viewed from the rear) about 1/8 turn the bulb left or right to retain the new bulb. 5. To install the new ...
Owner Guide 1st Printing - Page 166
Install the lamp assembly on liftgate with screw.
Remove bulb socket by turning counterclockwise . 3.
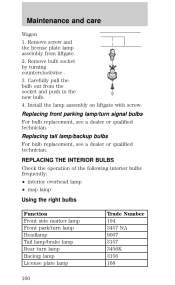
Replacing tail lamp/backup bulbs For bulb replacement, see a dealer or qualified technician. REPLACING THE INTERIOR BULBS Check the operation of the following interior bulbs frequently: • interior overhead lamp • map lamp Using the right bulbs Function Front ...
Similar Questions


Water Collecting On Floor Rear Passenger Compartment.
Water is collecting on the rear passenger floor on the right hand side, even with the windows comple...
Water is collecting on the rear passenger floor on the right hand side, even with the windows comple...
(Posted by djos812 10 years ago)

How Do I Replace The Oil Pressure Switch On A 1998 Ford Taurus?
It's a 3.0 DOHC duratech engine.
It's a 3.0 DOHC duratech engine.
(Posted by Anonymous-125917 10 years ago)


How To Replace Rear Backup Light Bulbs On A 2004 Taurus Wagon
(Posted by Anonymous-89533 11 years ago)