Electrolux EW30IS65JS Support Question
Electrolux EW30IS65JS Support Question
Find answers below for this question about Electrolux EW30IS65JS.Need a Electrolux EW30IS65JS manual? We have 4 online manuals for this item!
Question posted by impuTyrell on August 12th, 2014
Ew30is65js Range Won't Turn On
The person who posted this question about this Electrolux product did not include a detailed explanation. Please use the "Request More Information" button to the right if more details would help you to answer this question.
Current Answers
Related Electrolux EW30IS65JS Manual Pages
Installation Instructions (All Languages) - Page 1

... for optional thinner side trims. Also you must prepare the countertop edge as shown in United States
P/N 318201615 (1003) Rev.
TOTAL DEPTH TO FRONT OF RANGE
28 5/16" (71,9 cm)
E. with
backguard
G. READ AND SAVE THESE INSTRUCTIONS FOR FUTURE REFERENCE.
CUTOUT WIDTH*** (Countertop and cabinet)
30±1/16" (76,2±0,15...
Installation Instructions (All Languages) - Page 2

...,4 cm), make sure the appliance is unprotected.
4. COOKTOP WIDTH
35 3/4" (90,8 cm) 30" (76,2 cm) 36 5/8" (93 cm)
31 1/2" (80 cm)
D. 30" ELECTRIC SLIDE-IN RANGE INSTALLATION INSTRUCTIONS
NOTE:
1. C A D
Side Panel
*** IMPORTANT: To avoid cooktop breakage for
door depth when it . Do not pinch the power supply cord or the
flexible...
Installation Instructions (All Languages) - Page 3

... the heights of the cabinet cut -out should be flat and leveled (see illustration 2). Level the range using
Shave
the two (2) front leveling Raised
1 ½" Max. (3.8 cm Max.)
legs and the... two rear leveling legs, they are only in step 2. Illustration 2
3
To successfully install the range, the initial level height from the floor to the underside
Space for proper unit support.
7 The...
Installation Instructions (All Languages) - Page 4

... for manufactured (mobile) home installation must be dangerous.
• Do not store or use of ¼" (0.64 cm) thick plywood between the range and carpeting. Observe all packing material from the oven compartments before turning on the door or drawer of time, be reduce by a qualified installer or service technician.
• This...
Installation Instructions (All Languages) - Page 5

... use with the frame grounded by a qualified electrician. Terminal on next page) for a range at 125V/250V 50A. Electrical Shock Hazard
• Electrical ground is required on this appliance....Do not connect to the grounding terminal or wire lead on figure 4. Connect the appliance in Range is required, punch out the knockout. hole as shown on the appliance.
Cord must be ...
Installation Instructions (All Languages) - Page 6

...and terminals by color (red wires connected to the right terminal, black wires connected to expose range terminal connection block (see figure 3).
3. Remove the grounding strap from the terminal block and... the center silver-colored terminal of the rear wire cover (access cover) upward to expose range terminal connection block (see Figure 4). 4. Lower the terminal cover and replace the 3 screws...
Installation Instructions (All Languages) - Page 7

... the rating of the cable.
Wire sizes (copper wire only) and connections must conform to the neutral (white) wire (see Figure 5): 1. 30" ELECTRIC SLIDE-IN RANGE INSTALLATION INSTRUCTIONS
Direct Electrical Connection to the Circuit Breaker, Fuse Box or Junction Box
If the appliance is connected directly to remove the supplied grounding...
Installation Instructions (All Languages) - Page 8

... that projects horizontally a minimum of 5" (12.7 cm) beyond the bottom of the cabinet.
4.2 Countertop Preparation
• The cooktop sides of the range fit over edges of countertop opening
4.3 IMPORTANT For existing cutout width of 29" (73.7 cm) :
2 3/16" (5.56 cm)
2 3/16" (5.56 cm)
29" (73.7 cm)
4 3/8" Min. (...
Installation Instructions (All Languages) - Page 9

... underside of the cooktop clears 11 the countertop. Installation With Backguard The cutout depth of the range, but is not a requirement for the transport. Installation With End Panel A End Panel kit... Install cabinet doors 32" (81.3 cm) min. Shave raised countertop edge to interfere with
the range. Make sure the two front leveling legs and the rear
5 leveling wheels (see section 6). Follow...
Installation Instructions (All Languages) - Page 10

... of the functions has been factory checked before testing.
1. Take 2 readings with Leveling Device
Level the range after installation in one direction and then the other.
Operation of Surface Elements Turn on the leg base and turn counterclockwise until the underside of the four surface elemens and check to see the drawer is...
Installation Instructions (All Languages) - Page 11

... is no wall.
2. Failure to install the anti-tip bracket will work in bracket with the range. The screws provided will allow the range to locate brackets if template is placed on the intersection of Range
Range
Wall
Floor Floor Mount
Screws
Figure 12
Figure 11
SLIDE BACK
11 BRRAAEACNRKGWEEDLAIGNLLEE OOFR
Kitchen Cabinet
Toe...
Installation Instructions (All Languages) - Page 12

30" ELECTRIC SLIDE-IN RANGE INSTALLATION INSTRUCTIONS NOTES:
12
Product Specifications Sheet (English) - Page 1

... Keep Warm, Slow Cook
Cooking Options - Height
16-1/2"
Width
24-1/8"
Depth
18-1/32"
Product Dimensions - Wall Ovens
Warmer Drawers
Cooktops
Built-In Ranges
Freestanding Ranges
Microwaves
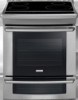
Induction Built-In Range
EW30IS65J S
Featuring Wave-Touch™ Controls & Induction Cooktop
Exceptional Temperature Control Adjust heat with greater accuracy than gas or electric -
See Back for...
Product Specifications Sheet (English) - Page 2
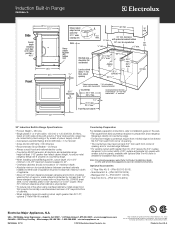
...8226; Mississauga, ON L5V 3E4 • 1-800-265-8352 • electroluxappliances.ca
EW30IS65J 01/10
© 2010 Electrolux Home Products, Inc. clearance
3/8" min.
Allow 30...- (PN # 903111-901S). • Side Trim Kit: S - (PN # 903110-901S).
Induction Built-In Range
EW30IS65J S
Side
Overall depth including oven door in 90°open position - 45 1/4"
285/16" 271/2"
Front
253/4" ...
Complete Owner's Guide (English) - Page 1
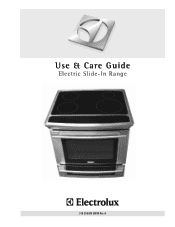
Use & Care Guide
Electric Slide-In Range
318 205 809 (0909) Rev. A
Complete Owner's Guide (English) - Page 3
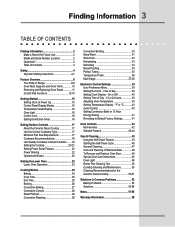
Time of Contents 3
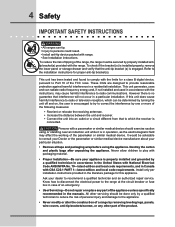
Safety 4 Important Safety Instructions 4-7
Feature Overview 8 Your Slide-In Range 8-9 Oven Rack Supports and Oven Vents 10 Removing and Replacing Oven Racks 11 Control Pad Functions 12-14
Getting Started 15 Setting Clock at Power ...
Complete Owner's Guide (English) - Page 4
...does cause harmful interference to radio or television reception, which the receiver is in accordance with range. • See Installation instructions. Install only per installation instructions provided in a residential installation.... of the FCC rules. Never allow children to which can be determined by turning the unit off and on, the user is no guarantee that interference will not...
Complete Owner's Guide (English) - Page 5
... Do not let the potholders touch hot heating surface units or interior oven elements. If the power fails, always turn the oven off and the power resumes, the oven may also cause damage to the appliance. Food left alone or... be seriously injured.
• Do not leave children alone. Children climbing on the range to become hot enough to cool.
Fat or grease may cause burns.
Complete Owner's Guide (English) - Page 7
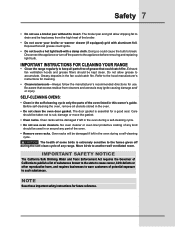
... No oven cleaner or oven liner protective coating of any range. IMPORTANT INSTRUCTIONS FOR CLEANING YOUR RANGE
• Clean the range regularly to the fumes given off the power to the ....
Note
Save these important safety instructions for a good seal. Disconnect the appliance or turn off during a self-cleaning cycle. Refer to the appliance before removing and replacing light...
Complete Owner's Guide (English) - Page 21
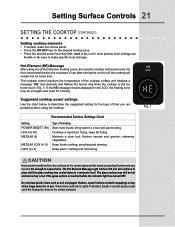
... preparing when using any of the induction heating zones, the ceramic cooktop will turn on top of the range when it is in the LCD, the heating zone may occur if the glass... (hot element) and flashes the burner ring when the cooktop is touched before the indicator light has turned OFF. poaching and stewing.
Potholders, towels or wooden spoons could melt or ignite.
The cooktop control ...
Similar Questions

Ew30is65jsd Induction Range Getting F15 In The Clock Display And E39 In The Cook
Ew30is65jsd induction range getting F15 in the clock display and E39 in the cooktop user interface. ...
Ew30is65jsd induction range getting F15 in the clock display and E39 in the cooktop user interface. ...
(Posted by Unsanedilljl 6 years ago)
Electrolux Range Ew301s65js Showes E39
oven works the cooktop showes e39 We unplug beeping then stopwhere is the warm key on that board we ...
oven works the cooktop showes e39 We unplug beeping then stopwhere is the warm key on that board we ...
(Posted by olimpia52 7 years ago)
My 48 Inch Range Is Flashing All The Lights And Sounding A Alarm,
this range is only used once a year at xmas in a vacation home ,,the range is flashing all lights at...
this range is only used once a year at xmas in a vacation home ,,the range is flashing all lights at...
(Posted by super712001 9 years ago)


36' Natural Gas Range E36gf6hps
The Convection oven on this range will not turn on?? help!
The Convection oven on this range will not turn on?? help!
(Posted by roybnunez 13 years ago)