Dell Vostro 3550 Support Question
Dell Vostro 3550 Support Question
Find answers below for this question about Dell Vostro 3550.Need a Dell Vostro 3550 manual? We have 2 online manuals for this item!
Question posted by whJok on December 7th, 2013
How To Remove The Hard Drive From Vostro 3550
The person who posted this question about this Dell product did not include a detailed explanation. Please use the "Request More Information" button to the right if more details would help you to answer this question.
Current Answers
Related Dell Vostro 3550 Manual Pages
User Manual - Page 5
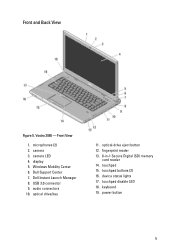
... 13. 8-in-1 Secure Digital (SD) memory
card reader 14. power button
5 microphones (2) 2. display 5. optical-drive eject button 12. touchpad 15. touchpad disable LED 18. Front View
1. Windows Mobility Center 6. Dell Support Center 7. device status lights 17. Vostro 3550 - camera 3. touchpad buttons (2) 16. Dell Instant Launch Manager 8. USB 3.0 connector 9. optical...
User Manual - Page 9
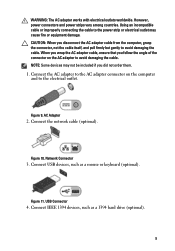
.... Connect the AC adapter to the AC adapter connector on the AC adapter to the electrical outlet. Network Connector
3. Connect USB devices, such as a 1394 hard drive (optional).
9 However, power connectors and power strips vary among countries. USB Connector
4. Connect IEEE 1394 devices, such as a mouse or keyboard (optional). Connect the network...
Owners Manual - Page 4

Installing The Optical Drive 22
8 Hard Drive 23
Removing The Hard Drive 23 Installing The Hard Drive 24
9 ExpressCard 25
Removing The ExpressCard 25 Installing The ExpressCard 26
10 ExpressCard Board 27
Removing The ExpressCard Board 27 Installing The ExpressCard Board 29
11 Wireless Wide Area Network (WWAN) Card 31
Removing The Wireless Wide Area Network (WWAN) Card 31 Installing The ...
Owners Manual - Page 23
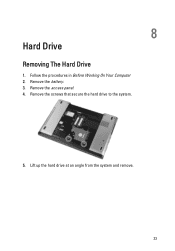
Remove the screws that secure the hard drive to the system.
5. Follow the procedures in Before Working On Your Computer 2. 8
Hard Drive
Removing The Hard Drive
1. Lift up the hard drive at an angle from the system and remove.
23 Remove the access panel. 4. Remove the battery. 3.
Owners Manual - Page 24
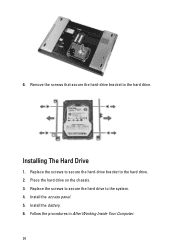
Installing The Hard Drive
1. Replace the screws to secure the hard-drive bracket to the hard drive. Follow the procedures in After Working Inside Your Computer.
24 6. Remove the screws that secure the hard-drive bracket to the hard drive. 2. Place the hard drive on the chassis. 3. Replace the screws to secure the hard drive to the system. 4. Install the battery. 6. Install the ...
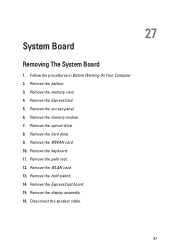
Owners Manual - Page 53
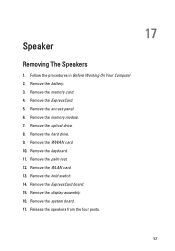
... 4. Remove the optical drive. 8. Remove the hard drive. 9. Remove the ExpressCard board. 15. Release the speakers from the four posts.
17
53 Remove the battery. 3. Remove the access panel. 6. Remove the memory module. 7. Remove the WWAN card. 10. Remove the hold switch. 14. Remove the display assembly. 16. Remove the system board. 17. Speaker
Removing The Speakers
1. Remove the...
Owners Manual - Page 55
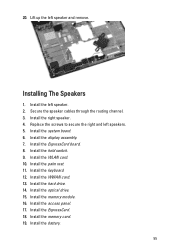
... and left speaker. 2. Install the memory module. 16. Install the memory card. 19. Lift up the left speaker and remove. Install the hold switch. 9. Install the optical drive. 15. Install the keyboard. 12. Installing The Speakers
1. Install the ExpressCard board. 8. Install the system board. 6. Install the hard drive. 14. Install the battery.
55 20.
Owners Manual - Page 63
... Your Computer 2. Remove the memory card. 4. Remove the access panel. 6. Remove the memory module. 7. Remove the WWAN card. 10. Remove the display assembly. 16. Remove the battery. 3. Remove the ExpressCard. 5. Remove the WLAN card. 13. Remove the hard drive. 9. Remove the palm rest. 12. Remove the hold switch. 14. 21
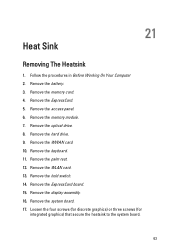
Heat Sink
Removing The Heatsink
1. Remove the system board...
Owners Manual - Page 65
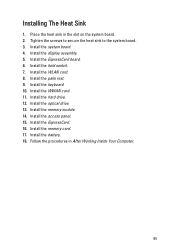
... board. 4. Install the keyboard. 10. Install the memory module. 14. Tighten the screws to secure the heat sink to the system board. 3. Install the optical drive. 13. Install the ExpressCard board. 6. Installing The Heat Sink
1. Install the WWAN card. 11. Install the WLAN card. 8. Install the access panel. 15. Install the...
Owners Manual - Page 67
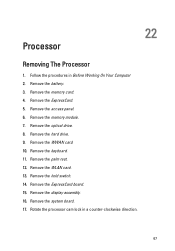
... board. 17. Remove the access panel. 6. Remove the hard drive. 9. Remove the WWAN card. 10. Remove the keyboard. 11. Rotate the processor cam lock in Before Working On Your Computer 2. Remove the battery. 3. Remove the hold switch. 14. Remove the WLAN card. 13. 22
Processor
Removing The Processor
1. Remove the ExpressCard. 5. Remove the ExpressCard board. 15. Remove the memory...
Owners Manual - Page 69
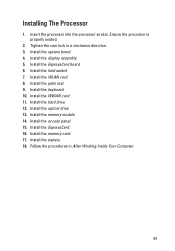
.... Ensure the processor is properly seated.
2. Install the keyboard. 10. Install the access panel. 15. Install the ExpressCard. 16. Install the hold switch. 7. Install the hard drive. 12. Install the battery. 18. Follow the procedures in a clockwise direction. 3. Tighten the cam lock in After Working Inside Your Computer.
69 Insert the processor...
Owners Manual - Page 81

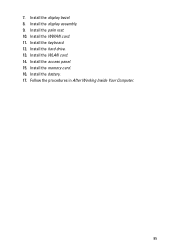
... On Your Computer. 2. Remove the access panel. 5. Remove the display bezel. 12. Release the antenna cables from the right hinge.
81 Remove the display camera. 13. Remove the battery. 3. Remove the keyboard. 8. Remove the memory card. 4. Remove the WWAN card. 9. Remove the palm rest. 10. Remove the hard drive. 7. 26
Display Brackets and Hinges
Removing The Display Brackets...
Owners Manual - Page 85
Install the WLAN card. 14. Install the access panel. 15. Install the display bezel. 8. Install the keyboard. 12. Install the hard drive. 13. Install the battery. 17. Install the palm rest. 10. Install the memory card. 16. Follow the procedures in After Working Inside Your Computer.
85 Install the WWAN card. 11. 7. Install the display assembly. 9.
Owners Manual - Page 87
...On Your Computer 2. Remove the hard drive. 9. Remove the palm rest. 12. Remove the hold switch. 14. Remove the optical drive. 8. Remove the ExpressCard board. 15. Remove the memory module. 7. Remove the WLAN card. 13. Remove the keyboard. 11. Remove the access panel. 6. Remove the battery. 3. Remove the memory card. 4. Remove the WWAN card. 10. Remove the display assembly. 16...
Owners Manual - Page 89
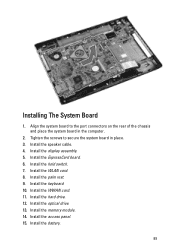
... the WLAN card. 8. Align the system board to secure the system board in the computer.
2. Install the ExpressCard board. 6. Install the palm rest. 9. Install the hard drive. 12. Install the battery.
89 Install the optical...
Owners Manual - Page 91
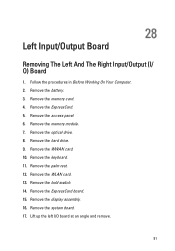
... Left And The Right Input/Output (I /O board at an angle and remove.
91 Remove the access panel. 6. Remove the palm rest. 12. Follow the procedures in Before Working On Your Computer. 2. Remove the ExpressCard. 5. Remove the hold switch. 14. Remove the keyboard. 11. Remove the hard drive. 9. Remove the WWAN card. 10. Remove the display assembly. 16. Remove the system board. 17.
Owners Manual - Page 93
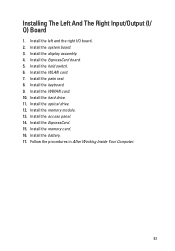
...1. Install the keyboard. 9. Install the system board. 3. Install the palm rest. 8. Install the optical drive. 12. Installing The Left And The Right Input/Output (I /O board. 2. Install the display assembly....the access panel. 14. Install the WLAN card. 7. Install the hard drive. 11. Install the ExpressCard. 15. Follow the procedures in After Working Inside Your Computer.
93 Install ...
Owners Manual - Page 95

... option such as the user password. • read the current amount of memory or set the type of hard drive installed. NOTE: The F2 prompt indicates that you write down your computer. 2. If you press before you ...change the system configuration information after you add, change, or
remove any hardware in your computer to work incorrectly. CAUTION: Unless you are prompted, this program.
Owners Manual - Page 98

...only when the AC
adapter is turned off. Displays the model number and capacity of the hard drive.
System Memory Memory Speed Device Information Fixed HDD SATA ODD eSATA Device AC Adapter Type
...memory in-built on -board network card. Displays the model number and capacity of the optical drive. Enable or disable the power Default: Enabled supply to the on the computer. Displays the...
Owners Manual - Page 99

... system's service tag. Enable or disable the Computrace feature on the computer's internal hard drive (HDD). SATA Operation Adapter Warnings Function Key Behavior Charger Behavior
Miscellaneous Devices
Change the...disables adapter Default: Enabled warnings. Specifies the behavior of different devices in which hard drive the computer can be charged when connected to set , this field can ...
Similar Questions


Hi!
How Can I Make My Dell Vostro 3550 Hotspot?
i want to use my dell vostro 3550 as hotspot.
i want to use my dell vostro 3550 as hotspot.
(Posted by mshoaibaq 11 years ago)

Remove Hard Drive Dell Vostro 1440 Laptop
how i remove hard drive dell vostro 1440 laptop step by step.
how i remove hard drive dell vostro 1440 laptop step by step.
(Posted by hiteshsethi73 12 years ago)