Dell Studio 1909 Support Question
Dell Studio 1909 Support Question
Find answers below for this question about Dell Studio 1909.Need a Dell Studio 1909 manual? We have 3 online manuals for this item!
Question posted by wandcrook on April 27th, 2014
Studio One 1909 Cd Won't Eject
The person who posted this question about this Dell product did not include a detailed explanation. Please use the "Request More Information" button to the right if more details would help you to answer this question.
Current Answers
Answer #1: Posted by LawBasu on April 28th, 2014 11:12 AM
LawBasu

Member since:
April 9th, 2014 Points: 136,930

Member since:
April 9th, 2014 Points: 136,930
Related Dell Studio 1909 Manual Pages
Dell™ Technology Guide - Page 75
... with your computer. If not, proceed to install or reinstall printer drivers if you see the Windows desktop, reinsert the Drivers and Utilities media.
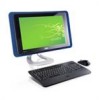
Installing a Printer Driver
printer drivers CD
inkjet printer
laser printer
A driver is your first time to use your Drivers and Utilities media, continue to interface with the printer...
Dell™ Technology Guide - Page 82
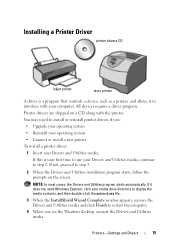
...shut down. 2 Straighten a paper clip and insert one end into the eject hole at the front of different regions worldwide and different disc formats, not... may prevent the operating system from starting. R U N THE DELL D I A G N O S T I C S - The drive tray cannot eject (for your CD, DVD, or BD software. Try allowing the computer to return to a media drive CLOSE OTHER PROGRAMS C H A N G E T H E W ...
Dell™ Technology Guide - Page 204
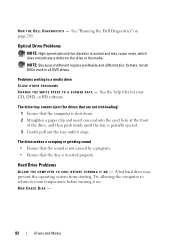
Some computers launch an auto-play selection window. CDs, DVDs, and Blu-ray Disc™ Media
Some computers may come equipped with media buttons for... see the documentation that came with multimedia buttons, press the Play
button. Playing a CD, DVD, or Blu-ray Disc Media
For Drives With Spindles and/or Trays
1 Press the eject button on the drive. 2 Place the media, label side up data •...
Dell™ Technology Guide - Page 205
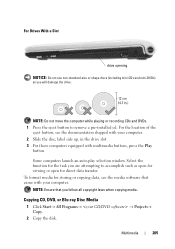
For Drives With a Slot
drive opening NOTICE: Do not use non-standard-size or shape discs (including mini-CDs and mini-DVDs) as you are attempting to remove a pre-installed cd. For the location of the
eject button, see the media software that you follow all copyright laws when copying media. Multimedia
205 Select...
Dell™ Technology Guide - Page 206
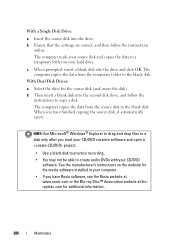
...Microsoft® Windows® Explorer to drag and drop files to a disk only after you start your CD/DVD creation software and open a project.
• Use a blank disk to practice recording. •... folder to the blank disk. When you have finished copying the source disk, it automatically ejects. See the manufacturer's instructions on your hard drive. With Dual Disk Drives:
a Select the...
Dell™ Technology Guide - Page 270
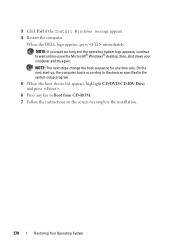
... the boot device list appears, highlight CD/DVD/CD-RW Drive and press .
6 Press any key to Boot from CD-ROM. 7 Follow the instructions on the... screen to wait until you wait too long and the operating system logo appears, continue to complete the installation.
270
Restoring Your Operating System NOTE: If you see the Microsoft® Windows® desktop...
Dell™ Technology Guide - Page 283
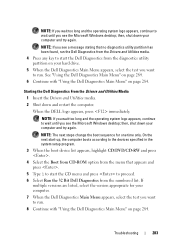
...operating system logo appears, continue to wait until you see the Microsoft Windows desktop; NOTE: If you wait too long and the operating system logo appears, continue to wait until... in the system setup program.
3 When the boot device list appears, highlight CD/DVD/CD-RW and press .
4 Select the Boot from CD-ROM option from the menu that no diagnostics utility partition has been found, run...
Dell™ Technology Guide - Page 293
...
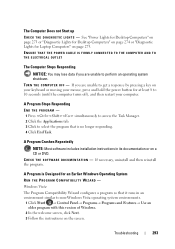
A Program Crashes Repeatedly
NOTE: Most software includes installation instructions in an environment similar to get a response by pressing a key on a CD or DVD. The Computer Does not Start up C H E C K T H E D I A G N O S T ... then restart your computer. See "Power Lights for Desktop Computers" on page 273 or "Diagnostic Lights for Desktop Computers" on page 274 or "Diagnostic Lights for ...
Dell™ Technology Guide - Page 342
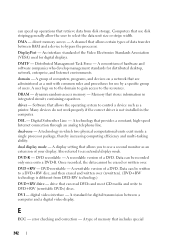
... of the Video Electronics Standards Association (VESA) used for distributed desktop, network, enterprise, and Internet environments.
A group of your display...specific group of data transfer between a computer and a digital video display. Data can read DVDs and most CD media and write to bypass the processor. digital video interface - direct memory access -
Once recorded, the data...
Dell™ Technology Guide - Page 350

... processor. A faster, serial version of the SCSI interface (as hard drives, CD drives, printers, and scanners. The SCSI can open its corresponding folder or file...used for troubleshooting problems.
S
SAS - Hard drive speed is used to connect devices to your Windows desktop and doubleclick the icon, you delete a shortcut, the original file is accessed by an individual identification...
Tech Sheet Windows® 7 - Page 4
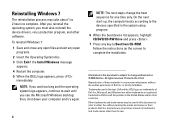
... of Microsoft Corporation in the system setup program.
6 When the boot device list appears, highlight CD/DVD/CD-RW Drive and press .
7 Press any open
programs. 2 Insert the Operating System disc. ...; 2009 Dell Inc. After you reinstall the operating system, you see the Microsoft Windows desktop;
Information in the U.S.A. Printed in this document to refer to wait until you must ...
Setup Guide - Page 5
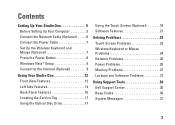
... Power Cable 7 Set Up the Wireless Keyboard and Mouse (Optional 7 Press the Power Button 8 Windows Vista® Setup 9 Connect to the Internet (Optional 9
Using Your Studio One 12 Front View Features 12 Left Side Features 14 Back Panel Features 16 Locating the Service Tag 17 Using the Optical Disc Drive 17...
Setup Guide - Page 7

... (2 inches) on all the sides. For additional safety best practices information, see the Regulatory Compliance Homepage at www.dell.com/ regulatory_compliance. Restricting airflow around your Studio One and connecting peripherals. To prevent overheating ensure that you leave a minimum of the procedures in an enclosed space, such as a cabinet when it to...
Setup Guide - Page 13

...3.
Contact your ISP to check the service status, or try connecting again later. NOTE: Have your desktop or if you will use a DSL, satellite modem, cable TV modem, or Bluetooth® wireless ...click Connect to complete the setup. Click Start → Control Panel.
3. Setting Up Your Studio One
1.
Setting Up Your Internet Connection
If you do not know which type of connection to...
Setup Guide - Page 15
...more information.
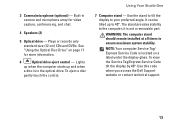
6
Optical drive eject control - it is located on page 17 for video capture, conferencing, and chat.
4 Speakers (2)
5 Optical drive - To eject a disc
gently touch the ...12 cm) CDs and DVDs.
The stand provides stability to ensure maximum system stability. To view the Service Tag/Express Service Code tilt the display by 40°. Using Your Studio One
7 ...
Setup Guide - Page 19

Locating the Service Tag
Using Your Studio One
Using the Optical Disc Drive
1
1 Service Tag Gently tilt the display upwards to reveal the Service Tag. To eject a disc from the drive, gently touch the eject control.
17 The drive will automatically pull the disc in and begin reading its content. Insert the disc, with the label facing outwards and gently push the disc into the slot.
Setup Guide - Page 23

... and images.
Facial Recognition (Optional)
Your computer may support multiple disc media formats including CDs, DVDs, and Blu-ray Discs (if the option is only available if you have ... face and uses this information yourself (such as digital cameras and cell phones.
Using Your Studio One
Software Features
NOTE: For more information, click Start → Programs→ FastAccess....
Setup Guide - Page 24
...Control window and follow the instructions in the Back up files:
1. Using Your Studio One
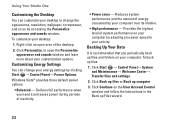
Customizing the Desktop
You can change the appearance, resolution, wallpaper, screensaver, and so on your.... Right-click an open the Personalize appearance and sounds window and learn more about your desktop:
1. Click Start → Control Panel→ System and Maintenance→ Welcome Center→...
Setup Guide - Page 50
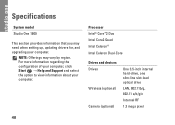
... internal hard-drive, one slim‑line slot-load optical drive
LAN, 802.11b/g, 802.11 a/b/g/n
Internal RF
1.3 mega pixel
48 Specifications
System model
Studio One 1909
This section provides information that you may vary by region. For more information regarding the configuration of your computer, click Start → Help and Support...
Setup Guide - Page 55

Use of this document also applies to the products listed below:
• Dell™ Studio One 1909 • Dell™ Studio One 19
Macrovision Product Notice
This product incorporates copyright protection technology that is intended for home and other rights owners. Appendix
The information in this ...


