
Dell OptiPlex 330 Support Question
Dell OptiPlex 330 Support Question
Find answers below for this question about Dell OptiPlex 330.Need a Dell OptiPlex 330 manual? We have 2 online manuals for this item!
Question posted by ozztreef on February 12th, 2014
How To Remove Bios Chip From Motherboard Of Dell Optiplex 330
The person who posted this question about this Dell product did not include a detailed explanation. Please use the "Request More Information" button to the right if more details would help you to answer this question.
Current Answers
Related Dell OptiPlex 330 Manual Pages
Quick Reference - Page 4

... Mini Tower Computer 38
Front View 38 Back View 40 Back Panel Connectors 41 Removing the Computer Cover 43 Inside View of Your Computer 45 System Board Components 46 Replacing the Computer Cover 47 Solving Problems 47 Dell Diagnostics 48 Power Lights 51 Beep Codes 53 System Messages 54 Diagnostic Lights 56...
Quick Reference - Page 6
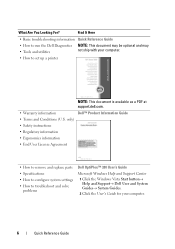
... instructions
• Regulatory information
• Ergonomics information
• End User License Agreement
• How to remove and replace parts • Specifications • How to configure system settings • How to troubleshoot and solve
problems
Dell OptiPlex™ 330 User's Guide
Microsoft Windows Help and Support Center 1 Click the Windows Vista Start button→ Help...
Quick Reference - Page 55
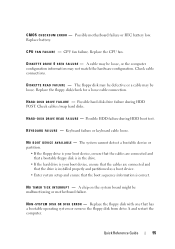
... system or remove the floppy ...K E Y B O A R D F A I N T E R R U P T - A chip on the system board might be defective or a cable may not match the hardware configuration.
D I S K .... Check cable connections. The floppy disk may be malfunctioning or motherboard failure. Possible hard disk drive failure during HDD boot test.
Possible motherboard failure or RTC battery low. D I S K D R...
Quick Reference - Page 57
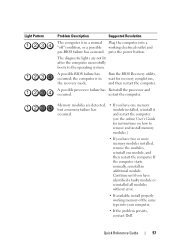
...remove the modules, reinstall one memory module installed, reinstall it and restart the computer. (see the online User's Guide for recovery completion, and then restart the computer. Quick Reference Guide
57
If the computer starts normally, reinstall an additional module.
A possible BIOS...a possible working electrical outlet and pre-BIOS failure has occurred.
Light Pattern
Problem ...
Quick Reference - Page 63
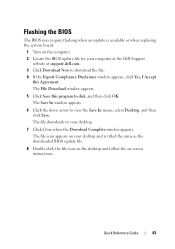
... flashing when an update is titled the same as the downloaded BIOS update file.
8 Double-click the file icon on the desktop and follow the on the computer. 2 Locate the BIOS update file for your computer at the Dell Support
website at support.dell.com. 3 Click Download Now to disk, and then click OK. The...
Quick Reference - Page 66
...computer, 12 Internet connection
about, 17 options, 17 setting up , 15, 23
problems beep codes, 53 Dell Diagnostics, 48
Product Information Guide, 6
R
regulatory information, 6 ResourceCD
Dell Diagnostics, 48
66
Index See system board
N
network Network Setup Wizard, 16
Network Setup Wizard, 16
... 26 connect two, 24-25 connect VGA, 24-25 display settings, 26 extended desktop mode, 26
motherboard.
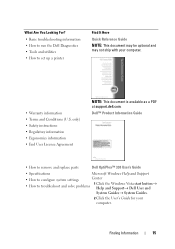
User's Guide - Page 15
...
System Guides→ System Guides.
2 Click the User's Guide for your computer.
• Warranty information • Terms and Conditions (U.S. Dell™ Product Information Guide
• How to remove and replace parts
Dell OptiPlex™ 330 User's Guide
• Specifications
Microsoft Windows Help and Support
• How to configure system settings
Center
• How to set...
User's Guide - Page 27
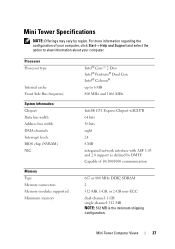
Processor Processor type
Internal cache Front Side Bus frequency
System Information Chipset Data bus width Address bus width DMA channels Interrupt levels BIOS chip (NVRAM) NIC
Memory Type Memory connectors Memory modules supported Minimum memory
Intel® Core™ 2 Duo Intel® Pentium® Dual Core Intel® Celeron&#...
User's Guide - Page 39
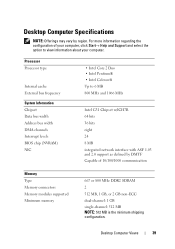
.... Processor Processor type
Internal cache External bus frequency
System Information Chipset Data bus width Address bus width DMA channels Interrupt levels BIOS chip (NVRAM) NIC
• Intel Core 2 Duo • Intel Pentium® • Intel Celeron® Up to...ECC
dual-channel: 1 GB single-channel: 512 MB NOTE: 512 MB is the minimum shipping configuration.
Desktop Computer Views
39
User's Guide - Page 66
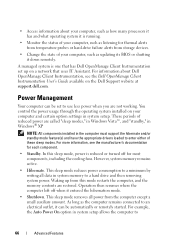
...either of your computer, such as updating its BIOS or shutting it down remotely.
Operation then resumes where the ..., including the cooling fans. This sleep mode removes all data in the computer must support the hibernate... more information, see the Dell OpenManage Client Instrumentation User's Guide available on a network that has Dell OpenManage Client Instrumentation set to...
User's Guide - Page 79
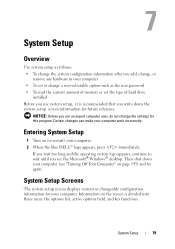
...write down your computer (see the Microsoft® Windows® desktop. Then shut down the system setup screen information for future ...Information on (or restart) your computer. 2 When the blue DELL™ logo appears, press immediately.
System Setup
Overview
Use system... the system configuration information after you add, change, or
remove any hardware in your computer • To set or...
User's Guide - Page 104
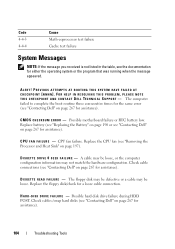
... during HDD POST.
D I S K D R I V E F A I C A L S U P P O R T - Replace battery (see "Replacing the Battery" on page 190 or see "Contacting Dell" on page 267 for assistance).
Possible motherboard failure or RTC battery low. Check cables /swap hard disks (see "Contacting Dell" on page 267 for assistance).
104
Troubleshooting Tools The computer failed to complete the boot routine...
User's Guide - Page 105
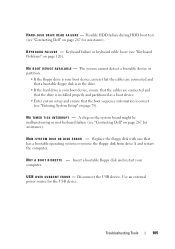
... R - Keyboard failure or keyboard cable loose (see "Contacting Dell" on page 120). A chip on the system board might be malfunctioning or motherboard failure (see "Keyboard Problems" on page 267 for assistance)....the cables are connected and that has a bootable operating system or remove the floppy disk from drive A and restart the computer. Disconnect the USB device. Troubleshooting Tools
105...
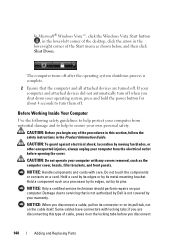
User's Guide - Page 143
... the safety information in the Dell™ Product Information
Guide. • A component can be replaced or-if purchased separately-installed by
performing the removal procedure in this document may ...require the following tools: • Small flat-blade screwdriver • Small Phillips screwdriver • Small plastic scribe • Flash BIOS update...
User's Guide - Page 144
...the cover. if you are turned off when you begin any covers removed, such as a processor by its edges, not by moving fan blades...Windows Vista Start button , in the lower-left corner of the desktop, click the arrow in the
lower-right corner of the procedures in... shutdown process is complete.
2 Ensure that is not authorized by Dell is not covered by its metal mounting bracket.
Hold a card ...
User's Guide - Page 220
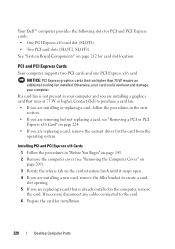
... card.
If a card fan is already installed in the next
section. • If you are removing but not replacing a card, see "Removing a PCI or PCI
Express x16 Card" on page 212 for card slot location. Your Dell™ computer provides the following slots for PCI and PCI Express cards: • One PCI Express...
User's Guide - Page 233
... hard drive.
page 257).
Desktop Computer Parts
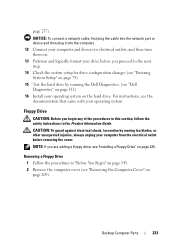
233 CAUTION: To guard against electrical shock, laceration by running the Dell Diagnostics. (see "Installing a Floppy Drive" on page 235.
Floppy Drive
CAUTION: Before you are adding a floppy drive, see "Dell Diagnostics" on page 111). 16 Install your drive before removing the cover. Removing a Floppy Drive
1 Follow the...
User's Guide - Page 245

...back of the computer chassis.
NOTICE: Route the DC power cables under the chassis tabs. Desktop Computer Parts
245 NOTE: Double-check all screws may cause electrical shock as these screws are... to the securing clip on page 111).
You can do so by running the Dell Diagnostics (see "Removing the Computer Cover"
on page 209). CAUTION: Failure to components inside your computer,...
User's Guide - Page 247

... static electricity from your computer's electronic components. You can do so by touching an unpainted metal surface on
page 209). Desktop Computer Parts
247 NOTICE: To prevent static damage to the computer.
Removing the Processor and Heat Sink
1 Follow the procedures in the Product Information Guide.
Processor
CAUTION: Before you touch any...
User's Guide - Page 270
... the device or devices covered in this document in compliance with the FCC regulations:
• Product name: OptiPlex 330
• Model number: DCSM and DCNE
• Company name: Dell Inc. Worldwide Regulatory Compliance & Environmental Affairs One Dell Way Round Rock, TX 78682 USA 512-338-4400
NOTE: For further regulatory information, see your Product...
Similar Questions


