
Dell Inspiron One 2320 Support Question
Dell Inspiron One 2320 Support Question
Find answers below for this question about Dell Inspiron One 2320.Need a Dell Inspiron One 2320 manual? We have 3 online manuals for this item!
Question posted by robey20 on September 20th, 2013
How Does Touch Screen Work For Dell Inspiron 2320
The person who posted this question about this Dell product did not include a detailed explanation. Please use the "Request More Information" button to the right if more details would help you to answer this question.
Current Answers
Related Dell Inspiron One 2320 Manual Pages
Quick Start Guide (PDF) - Page 1
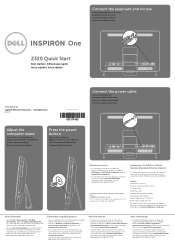
... document in accordance with your desktop, click Start→ All Programs→ Dell Help Documentation or go to support.dell.com/manuals.
• To contact Dell for Mexico)
The following information is provided in the device(s) described in this document is subject to dell.com/ContactDell. Dell™, the DELL logo, and Inspiron™ are trademarks of the...
Owners Manual - Page 7
... 97
Removing the Power-Button Board 97 Replacing the Antenna-In Connector 98
25 Speakers 101
Removing the Speakers 101 Replacing the Speakers 102
26 Touch-Screen Control Board (Optional) 105
Removing the Touch-Screen Control Board 105
Contents
7
Owners Manual - Page 8
Replacing the Touch-Screen Control Board. . . . . . 106
27 Display 109
Display Assembly 109 Removing the Display Assembly 109 Replacing the Display Assembly 111
Display Panel 113 Removing the Display ...
Owners Manual - Page 12
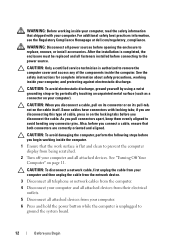
...you Begin See the safety instructions for complete information about safety precautions, working inside the computer. CAUTION: When you connect a cable, ensure that... discharge, ground yourself by using a wrist grounding strap or by periodically touching an unpainted metal surface (such as a connector on the locking tabs ...dell.com/regulatory_compliance. if you disconnect the cable.
Owners Manual - Page 15
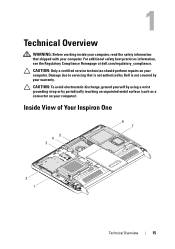
... due to servicing that shipped with your computer. Inside View of Your Inspiron One
45 3
6 7
2 1
Technical Overview
15
1
Technical Overview
WARNING: Before working inside your computer, read the safety information that is not authorized by Dell is not covered by periodically touching an unpainted metal surface (such as a connector on your computer. For additional...
Owners Manual - Page 16
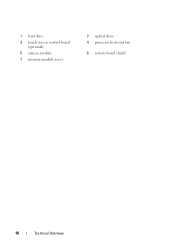
1 hard drive 3 touch-screen control board
(optional) 5 camera module 7 memory-module cover
2 optical drive 4 processor heat-sink fan
6 system-board shield
16
Technical Overview
Owners Manual - Page 18
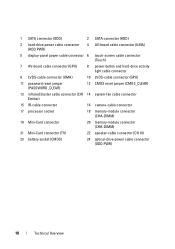
1 SATA connector (ODD)
2 SATA connector (HDD)
3 hard-drive power cable connector (HDD PWR)
4 AV-board cable connector (UMA)
5 display-panel power cable connector 6 touch-screen cable connector (Touch)
7 AV-board cable connector (GPU)
8 power-button and hard-drive activity light cable connector
9 LVDS-cable connector (UMA)
10 LVDS-cable connector (GPU)
11 password ...
Owners Manual - Page 19
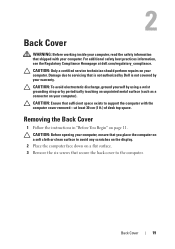
... your computer. 2
Back Cover
WARNING: Before working inside your computer, read the safety information that shipped with the computer cover removed-at dell.com/regulatory_compliance. CAUTION: Only a certified service ... strap or by periodically touching an unpainted metal surface (such as a connector on a flat surface. 3 Remove the six screws that is not authorized by Dell is not covered by ...
Owners Manual - Page 23
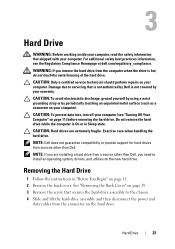
...-drive assembly and then disconnect the power and
data cables from a source other than Dell, you are extremely fragile. CAUTION: Only a certified service technician should perform repairs on...the computer is not covered by periodically touching an unpainted metal surface (such as a connector on your computer).
3
Hard Drive
WARNING: Before working inside your computer, read the safety...
Owners Manual - Page 27
... using a wrist grounding strap or by your warranty.
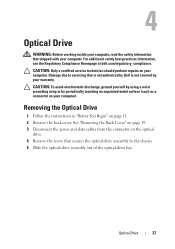
4
Optical Drive
WARNING: Before working inside your computer, read the safety information that secures the optical-drive assembly to servicing that is not authorized by Dell is not covered by periodically touching an unpainted metal surface (such as a connector on your computer. Optical Drive
27...
Owners Manual - Page 31
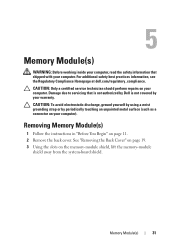
... the slots on page 11. 2 Remove the back cover. Memory Module(s)
31
5
Memory Module(s)
WARNING: Before working inside your computer, read the safety information that is not authorized by Dell is not covered by periodically touching an unpainted metal surface (such as a connector on your computer. Damage due to servicing that shipped with...
Owners Manual - Page 35
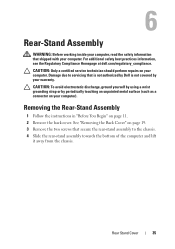
...Rear-Stand Assembly
WARNING: Before working inside your computer, read the safety information that is not authorized by Dell is not covered by periodically touching an unpainted metal surface (.... For additional safety best practices information, see the Regulatory Compliance Homepage at dell.com/regulatory_compliance. CAUTION: Only a certified service technician should perform repairs on your...
Owners Manual - Page 37
...
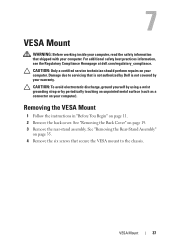
VESA Mount
WARNING: Before working inside your computer, read the safety information that is not authorized by Dell is not covered by periodically touching an unpainted metal surface ... your computer. For additional safety best practices information, see the Regulatory Compliance Homepage at dell.com/regulatory_compliance. Removing the VESA Mount
1 Follow the instructions in "Before You Begin"...
Owners Manual - Page 57
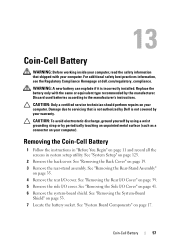
... by using a wrist grounding strap or by periodically touching an unpainted metal surface (such as a connector on...the Back Cover" on page 11 and record all the screens in system setup utility. See "Removing the Rear-Stand ...13
Coin-Cell Battery
WARNING: Before working inside your computer, read the safety information that is not authorized by Dell is incorrectly installed.
See "Removing the...
Owners Manual - Page 105
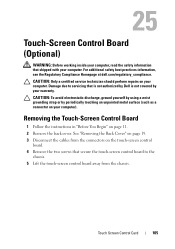
... a certified service technician should perform repairs on page 11. 2 Remove the back cover. 25
Touch-Screen Control Board (Optional)
WARNING: Before working inside your computer, read the safety information that is not authorized by Dell is not covered by periodically touching an unpainted metal surface (such as a connector on your computer).
See "Removing the Back...
Owners Manual - Page 106
... on the computer, replace all screws and ensure that secure the touch-screen control board to the
chassis. 4 Connect the cables to the computer.
106
Touch Screen Control Card
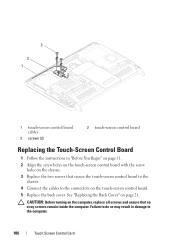
See "Replacing the Back Cover" on page 21. 3
2 1
1 touch-screen control board cables
3 screws (2)
2 touch-screen control board
Replacing the Touch-Screen Control Board
1 Follow the instructions in damage to the...
Owners Manual - Page 107
Touch Screen Control Card
107
6 Connect your computer and all attached devices to electrical outlets, and turn them on.
Owners Manual - Page 110
See "Removing the Middle Frame" on the system board, touch-screen control board, AV board, and the converter board.
3 2
1
4
5
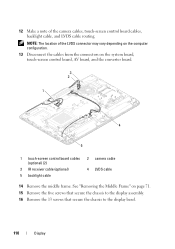
1 touch-screen control board cables (optional) (2)
3 IR receiver cable (optional) 5 backlight cable
2 camera cable 4 ... display bezel.
110
Display NOTE: The location of the camera cables, touch-screen control board cables, backlight cable, and LVDS cable routing.
Owners Manual - Page 111
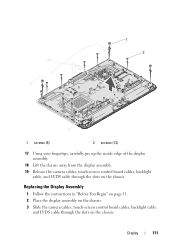
Replacing the Display Assembly
1 Follow the instructions in "Before You Begin" on page 11. 2 Place the display assembly on the chassis. 3 Slide the camera cables, touch-screen control board cables, backlight cable
and LVDS cable through the slots on the chassis.
1 2
1 screws (5)
2 screws (13)
17 Using your fingertips, carefully pry up the ...
Owners Manual - Page 112
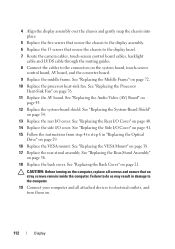
... and ensure that secure the chassis to the display bezel. 7 Route the camera cables, touch-screen control board cables, backlight
cable and LVDS cable through the routing guides. 8 Connect the ...cables to step 6 in "Replacing the Optical
Drive" on the system board, touch-screen
control board, AV board, and the converter board. 9 Replace the middle frame. See "Replacing the ...


