
Dell Inspiron One 2320 Support Question
Dell Inspiron One 2320 Support Question
Find answers below for this question about Dell Inspiron One 2320.Need a Dell Inspiron One 2320 manual? We have 3 online manuals for this item!
Question posted by dadihrolfsson on October 26th, 2013
The Screen Went Black When I Was Swiching The Display But The System Is On
The person who posted this question about this Dell product did not include a detailed explanation. Please use the "Request More Information" button to the right if more details would help you to answer this question.
Current Answers
Related Dell Inspiron One 2320 Manual Pages
Quick Start Guide (PDF) - Page 1
...999-3355). Dell™, the DELL logo, and Inspiron™ are trademarks of problemen voor de klantenservice. ...meer wilt weten over de functies en geavanceerde opties die voor uw desktop beschikbaar zijn.
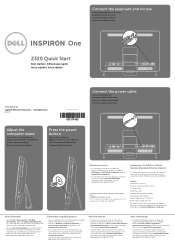
• Ga naar dell.com/ContactDell als u contact... Conecte el teclado y el mouse Conecte o teclado e o mouse
One
2320 Quick Start
Snel starten | Démarrage rapide Inicio rápido | In...
Owners Manual - Page 7
...
Removing the Power-Button Board 97 Replacing the Antenna-In Connector 98
25 Speakers 101
Removing the Speakers 101 Replacing the Speakers 102
26 Touch-Screen Control Board (Optional) 105
Removing the Touch...
Owners Manual - Page 8
Replacing the Touch-Screen Control Board. . . . . . 106
27 Display 109
Display Assembly 109 Removing the Display Assembly 109 Replacing the Display Assembly 111
Display Panel 113 Removing the Display Panel 113 Replacing the Display Panel 113
Display-Panel Brackets 114 Removing the Display-Panel Brackets 114 Replacing the Display-Panel Brackets 115
28 Camera Module 117
Removing the ...
Owners Manual - Page 12
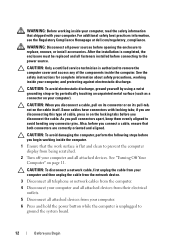
... the cable. WARNING: Disconnect all attached devices. CAUTION: To avoid damaging the computer, perform the following steps before opening the enclosure to prevent the computer display from being scratched.
2 Turn off your computer, and protecting against electrostatic discharge. if you are correctly oriented and aligned. For additional safety best practices information...
Owners Manual - Page 16
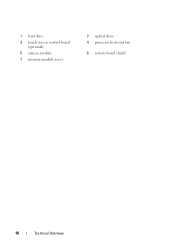
1 hard drive 3 touch-screen control board
(optional) 5 camera module 7 memory-module cover
2 optical drive 4 processor heat-sink fan
6 system-board shield
16
Technical Overview
Owners Manual - Page 18
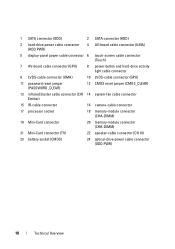
1 SATA connector (ODD)
2 SATA connector (HDD)
3 hard-drive power cable connector (HDD PWR)
4 AV-board cable connector (UMA)
5 display-panel power cable connector 6 touch-screen cable connector (Touch)
7 AV-board cable connector (GPU)
8 power-button and hard-drive activity light cable connector
9 LVDS-cable connector (UMA)
10 LVDS-cable connector (...
Owners Manual - Page 19
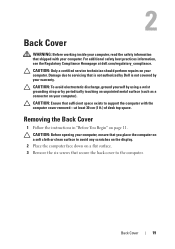
... your computer). CAUTION: Before opening your computer, ensure that you place the computer on a soft cloth or clean surface to avoid any scratches on the display.
2 Place the computer face down on page 11. Back Cover
19 2
Back Cover
WARNING: Before working inside your computer, read the safety information that secure...
Owners Manual - Page 57
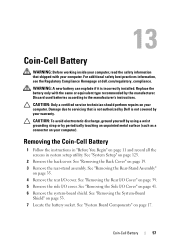
... page 19. 3 Remove the rear-stand assembly. See "Removing the Side I /O cover.
See "Removing the System-Board
Shield" on page 11 and record all the screens in system setup utility. For additional safety best practices information, see the Regulatory Compliance Homepage at dell.com/regulatory_compliance. Removing the Coin-Cell Battery
1 Follow...
Owners Manual - Page 63

... "Replacing the Side I /O cover. CAUTION: Before turning on the Mini-Card WLAN (2 antenna cables) Main WLAN (white triangle) Auxiliary WLAN (black triangle)
TV tuner (1 antenna cable)
Antenna Cable Color Scheme
white black black
6 Replace the system-board shield. Connectors on the computer, replace all screws and ensure that secure the Mini-Card to...
Owners Manual - Page 105
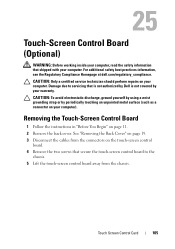
... by your warranty.
CAUTION: Only a certified service technician should perform repairs on your computer.
Removing the Touch-Screen Control Board
1 Follow the instructions in "Before You Begin" on the touch-screen control
board. 4 Remove the two screws that secure the touch-screen control board to servicing that shipped with your computer. 25
Touch...
Owners Manual - Page 109
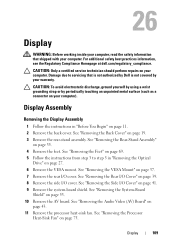
...5 Follow the instructions from step 3 to servicing that shipped with your computer. 26
Display
WARNING: Before working inside your computer, read the safety information that is not authorized... discharge, ground yourself by using a wrist grounding strap or by your computer). Display Assembly
Removing the Display Assembly
1 Follow the instructions in "Removing the Optical
Drive" on page 75...
Owners Manual - Page 110
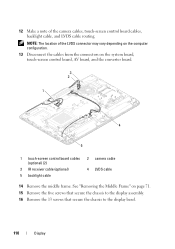
... 5 backlight cable
2 camera cable 4 LVDS cable
14 Remove the middle frame. NOTE: The location of the camera cables, touch-screen control board cables, backlight cable, and LVDS cable routing. 12 Make a note of the LVDS connector may vary depending on the ...71. 15 Remove the five screws that secure the chassis to the display assembly. 16 Remove the 13 screws that secure the chassis to the...
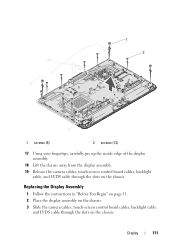
Owners Manual - Page 111
...
1 Follow the instructions in "Before You Begin" on page 11. 2 Place the display assembly on the chassis. 3 Slide the camera cables, touch-screen control board cables, backlight cable
and LVDS cable through the slots on the chassis. Display
111 1 2
1 screws (5)
2 screws (13)
17 Using your fingertips, carefully pry up the inside edge of...
Owners Manual - Page 112
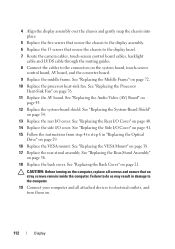
...computer and all screws and ensure that secure the chassis to the display bezel. 7 Route the camera cables, touch-screen control board cables, backlight
cable and LVDS cable through the routing guides...11 Replace the AV board. See "Replacing the Rear I/O Cover" on the system board, touch-screen
control board, AV board, and the converter board. 9 Replace the middle frame. See "Replacing ...
Owners Manual - Page 113
... the instructions in "Before You Begin" on page 11.
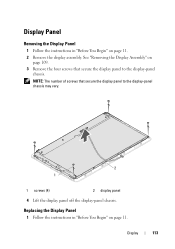
NOTE: The number of screws that secure the display panel to the display-panel chassis may vary.
2 1
1 screws (4)
2 display panel
4 Lift the display panel off the display-panel chassis. Display
113 Display Panel
Removing the Display Panel
1 Follow the instructions in "Before You Begin" on page 11. 2 Remove the...
Owners Manual - Page 114
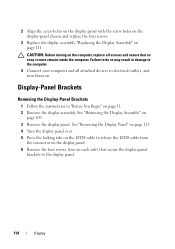
... LVDS cable to release the LVDS cable from
the connector on the display panel. 6 Remove the four screws (two on page 11. 2 Remove the display assembly. "Replacing the Display Assembly" on the display-panel chassis and replace the four screws.
3 Replace the display assembly. Failure to do so may result in "Before You Begin" on...
Owners Manual - Page 125
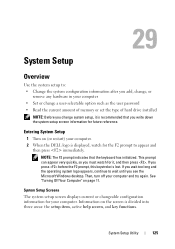
... before the F2 prompt, this keystroke is divided into three areas: the setup item, active help screen, and key functions. See "Turning Off Your Computer" on (or restart) your computer. System Setup...until you see the Microsoft Windows desktop. Entering System Setup
1 Turn on page 11. This prompt can appear very quickly, so you must watch for it is displayed, watch for the F2 prompt to...
Owners Manual - Page 126
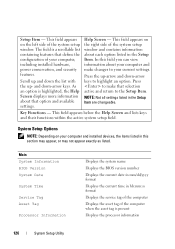
... field appears on the left side of the system setup window and contains information about your current settings. As an option is highlighted, the Help Screen displays more information about that define the configuration of the computer when the asset tag is a scrollable list containing features that option and available settings.
System...
Owners Manual - Page 137
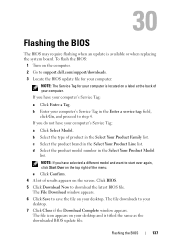
...BIOS
The BIOS may require flashing when an update is located on your computer. b Enter your desktop. 7 Click Close if the Download Complete window appears. d Select the product model number in...1 Turn on the computer. 2 Go to download the latest BIOS file. The file icon appears on the screen. If you have your computer's Service Tag:
a Click Select Model. Click BIOS. 5 Click Download Now ...
Owners Manual - Page 138
8 Double-click the file icon on the desktop and follow the instructions on the screen.
138
Flashing the BIOS
Similar Questions

My Dell Inspirion One 2320 Will Not Boot. The Screen Is Black.
(Posted by charlesvince13 9 years ago)

Dell Inspiron One 2320 Screen Goes Black How To Fix
(Posted by Blindsu 10 years ago)

Inspiron One 2205 Screen Stays Black When Turned On
(Posted by daniurdeed 10 years ago)
Dell Inspiron One 2205 All In One Touch Screen Wont Turn On Screen Is Black
(Posted by them7 10 years ago)

Computer Is On But Screen Is Black And Unresponsive. White Light Flashing.
I have a Dell 2320. Recently when I try to use it after several hours on but unused, the screen is b...
I have a Dell 2320. Recently when I try to use it after several hours on but unused, the screen is b...
(Posted by brandees22 11 years ago)