Dell Inspiron N7110 Support Question
Dell Inspiron N7110 Support Question
Find answers below for this question about Dell Inspiron N7110.Need a Dell Inspiron N7110 manual? We have 2 online manuals for this item!
Question posted by Geraza on February 19th, 2014
How To Remove Dell Inspiron Laptop Hard Drive P14e
The person who posted this question about this Dell product did not include a detailed explanation. Please use the "Request More Information" button to the right if more details would help you to answer this question.
Current Answers
Related Dell Inspiron N7110 Manual Pages
Setup Guide - Page 5
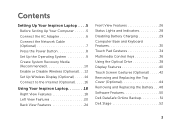
... Set Up Wireless Display (Optional 14 Connect to the Internet (Optional 16
Using Your Inspiron Laptop 18 Right View Features 18 Left View Features 20 Back View Features 24
... the Optical Drive 38 Display Features 40 Touch Screen Gestures (Optional 42 Removing and Replacing the Top Cover (Optional 44 Removing and Replacing the Battery 48 Software Features 50 Dell DataSafe Online...
Setup Guide - Page 7
... computer, ensure that you allow dust to the computer.
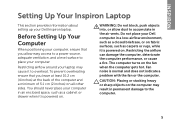
5 INSPIRON
Setting Up Your Inspiron Laptop
This section provides information about setting up your laptop may result in permanent damage to accumulate in an enclosed space,... air vents. Restricting airflow around your Dell Inspiron laptop. Fan noise is normal and does not indicate a problem with the fan or the computer.
Setup Guide - Page 23
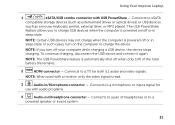
...to eSATA
compatible storage devices (such as external hard drives or optical drives) or USB devices
(such as a mouse, keyboard, printer, external drive, or MP3 player). NOTE: The USB ... Connects to a pair of the total battery life remains.
2
HDMI connector -
Using Your Inspiron Laptop
1
eSATA/USB combo connector with audio programs.
4
Audio-out/Headphone connector - The USB PowerShare
...
Setup Guide - Page 29
...Indicates the battery charge status. Using Your Inspiron Laptop
1
Power indicator light - CAUTION: To avoid loss of data, never turn off the computer when the hard drive
activity light is enabled. For more ...is on when the computer reads or writes data. A solid
white light indicates hard drive activity. NOTE: The battery is charging when the computer is enabled.
Indicates the...
Setup Guide - Page 62
...problems -
• Back up your files immediately.
• Use a virus-scanning program to check the hard drive or CDs.
• Save and close any open files or programs and shut down any error message ....
-- Ensure that the program is displayed to help in troubleshooting when contacting Dell.
60 Write down your computer through the Start menu.
• Check the software documentation or contact...
Setup Guide - Page 63
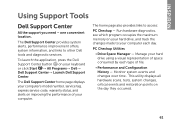
... changes, critical events and restoration points on your hard drive, and track the changes made to your computer each type of your keyboard or click Start → All Programs→ Dell→ Dell Support Center→ Launch Dell Support Center. To launch the application, press the Dell Support Center button on improving the performance of file...
Setup Guide - Page 65
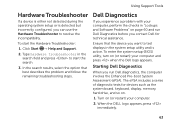
... in the system setup utility and is active. When the DELL logo appears, press immediately.
63
Dell Diagnostics
If you contact Dell for devices such as the system board, keyboard, display, memory, hard drive, and so on (or restart) your computer and press when the Dell logo appears. The ePSA includes a series of diagnostic tests for...
Setup Guide - Page 67
INSPIRON
Restoring Your Operating System
You can restore the operating system on your computer using these options. Option
Use
System Restore
as the first solution
Dell DataSafe ...files before using any of System Restore and Dell DataSafe Local Backup
when installing the Dell factory-installed software on a newly installed hard drive
Dell Factory Image Restore Operating System disc
to ...
Setup Guide - Page 70
... operating state it was in all the devices (USB drive, printer, and so on your computer and try again.
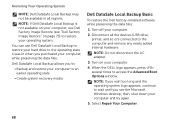
5. Restoring Your Operating System
NOTE: Dell DataSafe Local Backup may not be available in when you purchased your hard drive to access the Advanced Boot Options window. Dell DataSafe Local Backup allows you to:
• Backup...
Setup Guide - Page 72

... of :
• Operating system failure that prevents the use the system recovery media, created using Dell DataSafe Local Backup, to return your hard drive to the operating state it is designed to wait until you see the Microsoft Windows desktop; NOTE... media in case of the recovery options installed on your computer.
• Hard drive failure that prevents data from the list and press .
4.
Setup Guide - Page 73
... Restore did not resolve your computer and try again.
71 If possible, back up all data on the hard drive and removes any programs or drivers installed after you received your operating system.
When the DELL logo appears, press several times to the operating state it was in certain countries or on certain computers...
Setup Guide - Page 74

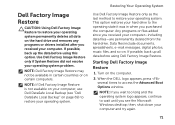
... process begins and may need to restart the computer.
72 Click Dell Factory Image Restore. Click Finish to select Dell Factory Tools, then Dell Factory Image Restore.
7. NOTE: Depending upon your configuration, you do not want to continue to reformat the hard drive and restore the system software to proceed with the Factory Image Restore...
Setup Guide - Page 79
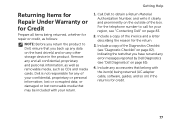
... back up any data on the hard drive(s) and on page 83.
2. Include a copy of your confidential, proprietary or personal information; Include any accessories that belong with your region, see "Dell Diagnostics" on the outside of the invoice and a letter describing the reason for your return.
1. lost removable media that may be included with...
Setup Guide - Page 84
... page 64
for more information about the Microsoft Windows operating system and features
support.dell.com
upgrade your computer with new or additional components like a new hard drive
reinstall or replace a worn or defective part
the Service Manual at support.dell.com/manuals
NOTE: In some countries, opening and replacing parts of your computer...
Setup Guide - Page 92

... a random vibration spectrum that simulates user environment):
Operating
0.66 GRMS
NonOperating
1.30 GRMS
90
Computer Environment
Maximum shock (for non-operating - measured with Dell Diagnostics running on the hard drive and a 2-ms half-sine pulse; Specifications
Computer Environment
Temperature range:
Operating
0° to 35°C (32° to 95°F)
Storage
-40°...
Service Manual - Page 49
... 15). 3 Follow the instructions from a source other than Dell, you remove the hard drive from the computer when the drive is hot, do not touch the metal housing of the hard drive. CAUTION: Hard drives are installing a hard drive from step 3 to install an operating system, drivers, and utilities on page 27).
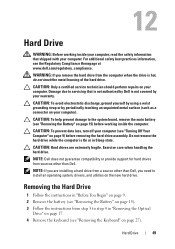
12
Hard Drive
WARNING: Before working inside your computer, read the...
Service Manual - Page 50
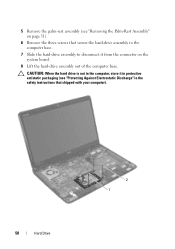
... Electrostatic Discharge" in the safety instructions that secure the hard-drive assembly to the computer base.
7 Slide the hard-drive assembly to disconnect it in the computer, store it from the connector on page 31).
6 Remove the three screws that shipped with your computer).
50
Hard Drive
2 1 CAUTION: When the hard drive is not in protective antistatic packaging (see...
Service Manual - Page 51
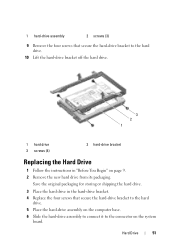
... drive from its packaging.
1 hard-drive assembly
2 screws (3)
9 Remove the four screws that secure the hard-drive bracket to the hard
drive. 5 Place the hard-drive assembly on the computer base. 6 Slide the hard-drive assembly to connect it to the hard drive.
10 Lift the hard-drive bracket off the hard drive.
3 2 1
1 hard drive 3 screws (4)
2 hard-drive bracket
Replacing the Hard Drive...
Service Manual - Page 70
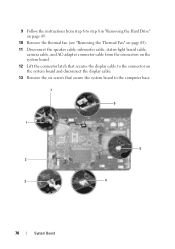
9 Follow the instructions from step 6 to step 8 in "Removing the Hard Drive" on page 49.
10 Remove the thermal fan (see "Removing the Thermal Fan" on page 65). 11 Disconnect the speaker cable, subwoofer cable, status-... to the connector on the system board and disconnect the display cable. 13 Remove the six screws that secure the system board to the computer base.
7
6
1
5 2
3
4
70
System Board
Service Manual - Page 72

... Coin-Cell Battery" on page 75).
17 Remove the thermal cooling assembly (see "Removing the Thermal Cooling Assembly" on page 81).
18 Remove the processor (see "Replacing the Keyboard" on page 85). Replacing... on page 66). 12 Follow the instructions from step 5 to step 7 in "Replacing the Hard Drive" on page 51. 13 Replace the palm-rest assembly (see "Replacing the Palm-Rest Assembly" on page ...
Similar Questions


How To Remove Laptop Hard Drive Dell Inspiron N7110 Model
(Posted by moUSATIE 10 years ago)

How To Remove Out Internal Hard Drive In Dell Inspiron N7110
(Posted by exqgs 10 years ago)