Get support for Dell Inspiron N5110

Dell Inspiron N5110 Support Question

Dell Inspiron N5110 Support Question

Find answers below for this question about Dell Inspiron N5110.
Need a Dell Inspiron N5110 manual? We have 2 online manuals for this item!
Question posted by y0lfhlaw on August 25th, 2013

Inspiron N5110 Won't Boot To Windows Hard Drive Ok

The person who posted this question about this Dell product did not include a detailed explanation. Please use the "Request More Information" button to the right if more details would help you to answer this question.

Current Answers

There are currently no answers that have been posted for this question.
Be the first to post an answer!

Remember that you can earn up to 1,100 points for every answer you submit. The better the quality of your answer, the better chance it has to be accepted.

Related Dell Inspiron N5110 Manual Pages

Setup Guide - Page 25

... is powered on the computer to eSATA compatible storage devices (such as external hard drives or optical drives) or USB devices (such as a mouse, keyboard, printer, external drive, or MP3 player. 2 HDMI connector - NOTE: If you to charge ...turn on /off or in sleep state. Using Your Inspiron Laptop 1 USB 2.0 connector - Connects to a TV for both 5.1 audio and video signals.
Setup Guide - Page 31

...wireless, see "Enable or Disable Wireless" on page 30. 2 Hard drive activity light - For more information on the battery status light, see...the computer is enabled. Turns on . 3 Battery status light - Using Your Inspiron Laptop 1 Power indicator light - A solid white light indicates hard drive activity. Indicates the battery charge status. Indicates the power states. A solid ...
Setup Guide - Page 65

... for troubleshooting information: -- Solving Problems -- If you have other software problems - • Back up your files immediately. • Use a virus-scanning program to check the hard drive or CDs. • Save and close any open files or programs and shut down any error message that is compatible with the program. -- Write down...
Setup Guide - Page 66

... consumed by each day. To launch the application, press the Dell Support Center button on your hard drive, and track the changes made to your computer. one convenient location. Monitor system events and changes over time. INSPIRON Using Support Tools Dell Support Center All the support you need - Manage your keyboard or click...
Setup Guide - Page 68

... the option that the device you contact Dell for devices such as the system board, keyboard, display, memory, hard drive, and so on. 1. To enter the system setup (BIOS) utility, turn on (or restart) your computer... diagnostics, the computer invokes the Enhanced Pre-boot System Assessment (ePSA). Ensure that best describes the problem and follow the remaining troubleshooting steps.
Setup Guide - Page 70

... Restore and Dell DataSafe Local Backup when installing the Dell factory-installed software on a newly installed hard drive Dell Factory Image Restore Operating System disc to restore your computer to the operating state it was ...System disc may not ship with your computer. 68 INSPIRON Restoring Your Operating System You can restore the operating system on your computer using these options.
Setup Guide - Page 73

... Image Restore (see the Microsoft Windows desktop; NOTE: Do not disconnect the AC adapter. 3. Dell DataSafe Local Backup allows you to: • Backup and restore your hard drive to the operating state it was in all the devices (USB drive, printer, and so on) connected... your computer, use Dell DataSafe Local Backup to restore your computer to access the Advanced Boot Options window.
Setup Guide - Page 75

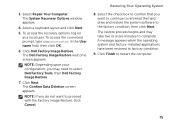
... your computer using the system recovery media: 1. Select the appropriate boot device from being recovered. Use the system recovery media in when you... DataSafe Local Backup, to return your hard drive to the operating state it is designed to wait until you backup your computer. • Hard drive failure that you see the Microsoft Windows desktop; Restoring Your Operating System To...
Setup Guide - Page 76

.... NOTE: Dell Factory Image Restore may not be available in when you received your computer and try again. 74 Turn on the hard drive and removes any programs or drivers installed after you received your operating system. Use Dell Factory Image Restore only as the last method to access the Advanced Boot Options window.
Setup Guide - Page 77

...and factory-installed applications have been restored to restart the computer. 75 The System Recovery Options window appears. 4. The Confirm Data Deletion screen appears. The restore process begins and may need ... the check box to confirm that you do not want to continue to reformat the hard drive and restore the system software to proceed with the Factory Image Restore, click Cancel. ...
Setup Guide - Page 82

Include a copy of the Diagnostics Checklist (see "Diagnostic Checklist" on page 83), indicating the tests that you back up any data on the hard drive(s) and on any other storage device in the product. Include a copy of the invoice and a letter describing the reason for your region, see "Dell Diagnostics" ...
Setup Guide - Page 88

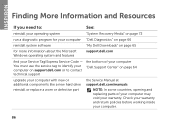
...INSPIRON Finding More Information and Resources If you need to contact technical support the bottom of your computer "Dell Support Center" on page 65 for more information about the Microsoft Windows... Downloads" on page 64 upgrade your computer with new or additional components like a new hard drive reinstall or replace a worn or defective part the Service Manual at support.dell.com/manuals...
Setup Guide - Page 96

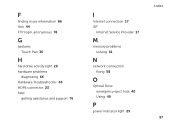
measured with the hard drive in head-parked position and a 2-ms half-sine pulse): Operating 110 G NonOperating 160...1.30 GRMS 94 Computer Environment Maximum shock (for non-operating - for operating - measured with Dell Diagnostics running on the hard drive and a 2-ms half-sine pulse; Specifications Computer Environment Temperature range: Operating 0° to 35°C (32°...
Setup Guide - Page 99

... login, anonymous 78 G gestures Touch Pad 36 H hard drive activity light 29 hardware problems diagnosing 66 Hardware Troubleshooter 66 HDMI connector 23 help getting assistance and support 76 I Internet connection 17 ISP Internet Service Provider 17 M memory problems solving 61 N network connection fixing 58 O Optical Drive emergency eject hole 40 Using 40 P power...
Service Manual - Page 6

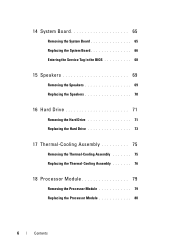
... Board 66 Entering the Service Tag in the BIOS 68 15 Speakers 69 Removing the Speakers 69 Replacing the Speakers 70 16 Hard Drive 71 Removing the Hard Drive 71 Replacing the Hard Drive 73 17 Thermal-Cooling Assembly 75 Removing the Thermal-Cooling Assembly 75 Replacing the Thermal-Cooling Assembly 76 18 Processor Module 79...
Service Manual - Page 66

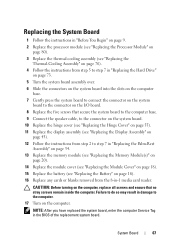
... board from the connector on the I/O board. 13 Turn the system board assembly over. 14 Follow the instructions from step 3 to step 5 in "Removing the Hard Drive" on page 71. 15 Remove the thermal cooling assembly (see "Removing the Thermal-Cooling Assembly" on page 75). 16 Remove the processor module (see "Removing...
Service Manual - Page 67

... the thermal cooling assembly (see "Replacing the Battery" on page 16). 16 Replace any cards or blanks removed from step 5 to step 7 in "Replacing the Hard Drive" on page 73. 5 Turn the system board assembly over. 6 Slide the connectors on the system board into the slots on the computer base. 7 Gently press...
Service Manual - Page 71

... you are extremely fragile. CAUTION: Only a certified service technician should perform repairs on page 65. 3 Remove the two screws that secure the hard-drive assembly to the system board. CAUTION: Hard drives are installing a hard drive from step 2 to servicing that is not authorized by Dell is hot, do not touch the metal housing of the...
Service Manual - Page 72

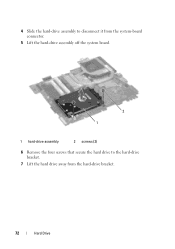
4 Slide the hard-drive assembly to disconnect it from the system-board connector. 5 Lift the hard-drive assembly off the system board. 2 1 1 hard-drive assembly 2 screws (2) 6 Remove the four screws that secure the hard drive to the hard-drive bracket. 7 Lift the hard drive away from the hard-drive bracket. 72 Hard Drive
Service Manual - Page 73

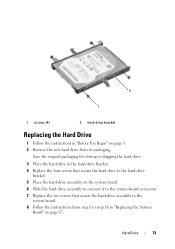
... for storing or shipping the hard drive. 3 Place the hard drive in the hard-drive bracket. 4 Replace the four screws that secure the hard drive to the hard-drive bracket. 5 Place the hard-drive assembly on the system board. 6 Slide the hard-drive assembly to connect it to the system-board connector. 7 Replace the two screws that secure the hard-drive assembly to the system-board...

Similar Questions

Ask a New Question
Use the box below to post a new question about this Dell product .
Points & Prizes
  • You can earn points for nearly everything you do on HelpOwl.com
  • You can trade in those points for gift cards at leading retailers such as Amazon.com and Walmart
  • It's that simple!
See How it Works
Create a Free Account

Dell Manuals

Find free Dell Inspiron N5110 manuals and user guides available at ManualOwl.com. Try out our unique manual viewer allowing you to interact with manuals from directly within your browser!

Dell Reviews

View thousands of Dell user reviews and customer ratings available at ReviewOwl.com.

Contact Information

Complete Dell customer service contact information including steps to reach representatives, hours of operation, customer support links and more from ContactHelp.com.

Scoreboard Ratings

See detailed Dell customer service rankings, employee comments and much more from our sister site.

Dell Recalls

Find comprehensive Dell recall information updated hourly on RecallOwl.com.