
Dell Inspiron N5050 Support Question
Dell Inspiron N5050 Support Question
Find answers below for this question about Dell Inspiron N5050.Need a Dell Inspiron N5050 manual? We have 2 online manuals for this item!
Question posted by Blindsu on October 27th, 2013
How To Turn On Keyboard Backlight On Dell Inspiron N5050
The person who posted this question about this Dell product did not include a detailed explanation. Please use the "Request More Information" button to the right if more details would help you to answer this question.
Current Answers
Answer #1: Posted by RathishC on October 28th, 2013 6:44 AM
RathishC

Member since:
June 19th, 2012 Points: 2,516,090

Member since:
June 19th, 2012 Points: 2,516,090
Hi Blindsu,
The system model you are using does not come with a backlight keyboard. If you are using a different system, please let me know so that I can help you further.
You may also refer to the link given below for steps on how to use backlight keyboard:
You may also refer to the Dell Article 277550 on http://dell.to/XULgT1
Thanks & Regards
Rathish C
#iworkfordell
To know more about Dell Product Support, Drivers & Downloads, Order & Dispatch status -> choose your region US Customers; India Customers. For Dell support videos click Here.
Related Dell Inspiron N5050 Manual Pages
Owners Manual - Page 1
P18F002; P18F003 Dell Inspiron M5040/15-N5040/ 15-N5050 Owner's Manual
Regulatory model: P18F
Regulatory type: P18F001;
Owners Manual - Page 2
..., or death. is a registered trademark owned by Bluetooth SIG, Inc.; Regulatory model: P18F
Regulatory type: P18F001; Reproduction of these materials in this text: Dell™, the DELL logo, and Inspiron™ are trademarks of your computer. Trademarks used in the United States and/or other countries. Microsoft®, Windows®, and the Windows...
Owners Manual - Page 3
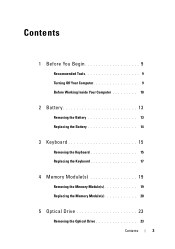
Contents
1 Before You Begin 9
Recommended Tools 9 Turning Off Your Computer 9 Before Working Inside Your Computer 10
2 Battery 13
Removing the Battery 13 Replacing the Battery 14
3 Keyboard 15
Removing the Keyboard 15 Replacing the Keyboard 17
4 Memory Module(s 19
Removing the Memory Module(s 19 Replacing the Memory Module(s 20
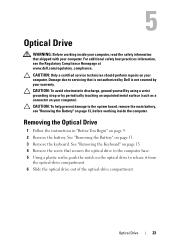
5 Optical Drive 23
Removing the Optical...
Owners Manual - Page 5
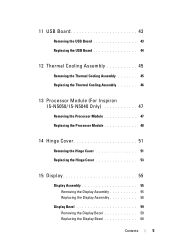
... USB Board 44
12 Thermal Cooling Assembly 45
Removing the Thermal Cooling Assembly 45 Replacing the Thermal Cooling Assembly 46
13 Processor Module (For Inspiron 15-N5050/15-N5040 Only 47
Removing the Processor Module 47 Replacing the Processor Module 48
14 Hinge Cover 51
Removing the Hinge Cover 51 Replacing the...
Owners Manual - Page 9
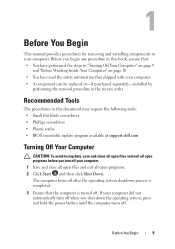
... Phillips screwdriver • Plastic scribe • BIOS executable update program available at support.dell.com
Turning Off Your Computer
CAUTION: To avoid losing data, save and close all open files and...A component can be replaced or-if purchased separately-installed by
performing the removal procedure in "Turning Off Your Computer" on page 9
and "Before Working Inside Your Computer" on page 10...
Owners Manual - Page 10
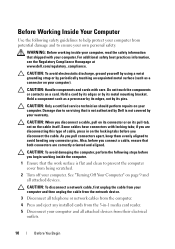
...should perform repairs on the cable itself.
CAUTION: Handle components and cards with locking tabs;
See "Turning Off Your Computer" on your own personal safety. CAUTION: To avoid electrostatic discharge, ground yourself by... surface (such as a processor by its edges, not by Dell is flat and clean to prevent the computer cover from potential damage and to help protect ...
Owners Manual - Page 13
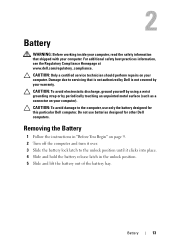
...You Begin" on page 9. 2 Turn off the computer and turn it over. 3 Slide the battery lock latch to the computer, use batteries designed for this particular Dell computer.
CAUTION: To avoid electrostatic...practices information, see the Regulatory Compliance Homepage at www.dell.com/regulatory_compliance. Battery
13
2
Battery
WARNING: Before working inside your computer, read the ...
Owners Manual - Page 15
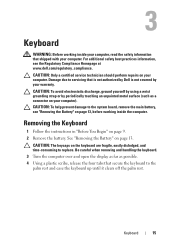
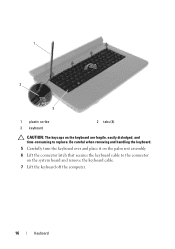
..., read the safety information that is not authorized by Dell is not covered by periodically touching an unpainted metal surface (such as possible. 4 Using a plastic scribe, release the four tabs that secure the keyboard to replace.
Be careful when removing and handling the keyboard. 3 Turn the computer over and open the display as far...
Owners Manual - Page 16
..., easily dislodged, and time-consuming to the connector on the palm rest assembly. 6 Lift the connector latch that secures the keyboard cable to replace. Be careful when removing and handling the keyboard. 5 Carefully turn the keyboard over and place it on the system board and remove the keyboard cable. 7 Lift the keyboard off the computer.
16...
Owners Manual - Page 17
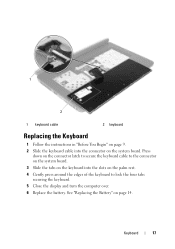
... the connector latch to secure the keyboard cable to lock the four tabs securing the keyboard. 5 Close the display and turn the computer over. 6 Replace the battery.
See "Replacing the Battery" on page 14. 1
2
1 keyboard cable
2 keyboard
Replacing the Keyboard
1 Follow the instructions in "Before You Begin" on page 9. 2 Slide the keyboard cable into the slots on...
Owners Manual - Page 19
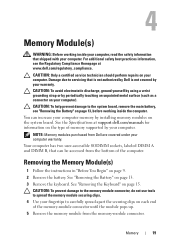
...: To help prevent damage to servicing that can increase your computer memory by your computer). NOTE: Memory modules purchased from Dell are covered under your computer. Removing the Memory Module(s)
1 Follow the instructions in "Before You Begin" on each end... the memory-module connector.
See "Removing the Battery" on page 15. See "Removing the Keyboard" on page 13. 3 Remove the...
Owners Manual - Page 21
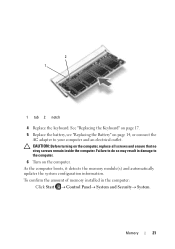
..., it detects the memory module(s) and automatically updates the system configuration information. See "Replacing the Keyboard" on page 17. 5 Replace the battery, see "Replacing the Battery" on the computer. ... in damage to the computer. 6 Turn on page 14, or connect the
AC adapter to your computer and an electrical outlet. CAUTION: Before turning on the computer, replace all screws and...
Owners Manual - Page 23
...the system board, remove the main battery, see the Regulatory Compliance Homepage at www.dell.com/regulatory_compliance. CAUTION: To help prevent damage to release it from
the optical-...base. 5 Using a plastic scribe, push the notch on your computer). See "Removing the Keyboard" on page 13, before working inside the computer. CAUTION: To avoid electrostatic discharge, ground yourself...
Owners Manual - Page 24
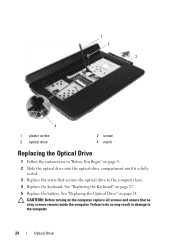
... and ensure that secures the optical drive to the computer.
24
Optical Drive CAUTION: Before turning on page 9. 2 Slide the optical drive into the optical-drive compartment until it is ...fully
seated. 3 Replace the screw that no stray screws remain inside the computer. See "Replacing the Keyboard" on page 24. 1 2
3
4
1 plastic scribe 3 optical drive
2 screw 4 notch
Replacing the ...
Owners Manual - Page 25
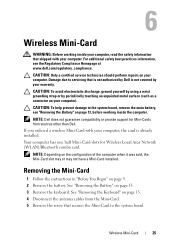
..., ground yourself by using a wrist grounding strap or by your computer, read the safety information that is not authorized by Dell is already installed. NOTE: Depending on page 13. 3 Remove the keyboard. Wireless Mini-Card
25 Your computer has one half Mini-Card slots for Mini-Cards from the Mini-Card. 5 Remove...
Owners Manual - Page 28
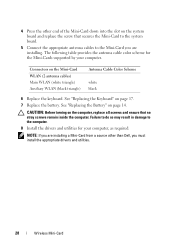
4 Press the other than Dell, you must install the appropriate drivers and ...(white triangle) Auxiliary WLAN (black triangle)
Antenna Cable Color Scheme
white black
6 Replace the keyboard. See "Replacing the Keyboard" on the computer, replace all screws and ensure that secures the Mini-Card to the system ...scheme for your computer. CAUTION: Before turning on page 17. 7 Replace the battery.
Owners Manual - Page 47
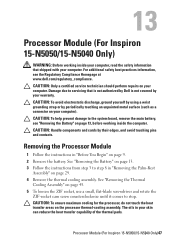
...grounding strap or by their edges, and avoid touching pins and contacts. Processor Module (For Inspiron 15-N5050/15-N5040 Only)47 See "Removing the Battery" on page 13. 3 Follow the instructions.... 13
Processor Module (For Inspiron 15-N5050/15-N5040 Only)
WARNING: Before working inside your computer, read the safety information that is not authorized by Dell is not covered by your ...
Owners Manual - Page 48
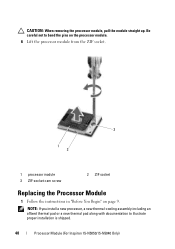
... page 9. CAUTION: When removing the processor module, pull the module straight up. Be careful not to illustrate proper installation is shipped.
48
Processor Module (For Inspiron 15-N5050/15-N5040 Only)
Owners Manual - Page 49
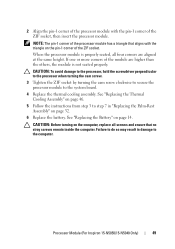
...screws remain inside the computer. When the processor module is not seated properly. CAUTION: Before turning on the computer, replace all four corners are higher than the others, the module is ...For Inspiron 15-N5050/15-N5040 Only)
49 CAUTION: To avoid damage to the processor, hold the screwdriver perpendicular to the processor when turning the cam screw. 3 Tighten the ZIF socket by turning the...
Owners Manual - Page 50

50
Processor Module (For Inspiron 15-N5050/15-N5040 Only)
Similar Questions

How To Turn On Dell Inspiron N5050 Laptop Backlit Keyboard
(Posted by burksrrankine 9 years ago)

How To Turn Bluetooth Adapter On From Keyboard In Inspiron N5050
(Posted by spShpen 10 years ago)

How Do I Turn On Keyboard Backlight Inspiron 15 Intel (n5010)
(Posted by doalmac3 10 years ago)
How To Turn On Dell Inspiron N5050 Backlit Keyboard
(Posted by yanMel 10 years ago)
