
Dell Inspiron N5050 Support Question
Dell Inspiron N5050 Support Question
Find answers below for this question about Dell Inspiron N5050.Need a Dell Inspiron N5050 manual? We have 2 online manuals for this item!
Question posted by ughqa on September 13th, 2013
Inspiron 15 Intel N5050 Cannot Find Wireless Driver
The person who posted this question about this Dell product did not include a detailed explanation. Please use the "Request More Information" button to the right if more details would help you to answer this question.
Current Answers
Related Dell Inspiron N5050 Manual Pages
Owners Manual - Page 1
P18F003 P18F002; Dell Inspiron M5040/15-N5040/ 15-N5050 Owner's Manual
Regulatory model: P18F
Regulatory type: P18F001;
Owners Manual - Page 2
Information in this text: Dell™, the DELL logo, and Inspiron™ are trademarks of Dell Inc.
is a registered trademark owned by Bluetooth SIG, Inc.; All rights reserved. P18F003
2011 - 05
Rev. Notes, Cautions, and Warnings
...
Owners Manual - Page 3
... 9
Recommended Tools 9 Turning Off Your Computer 9 Before Working Inside Your Computer 10
2 Battery 13
Removing the Battery 13 Replacing the Battery 14
3 Keyboard 15
Removing the Keyboard 15 Replacing the Keyboard 17
4 Memory Module(s 19
Removing the Memory Module(s 19 Replacing the Memory Module(s 20
5 Optical Drive 23
Removing the Optical Drive...
Owners Manual - Page 4
Replacing the Optical Drive 24
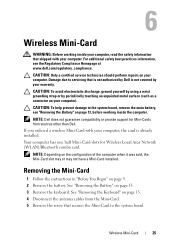
6 Wireless Mini-Card 25
Removing the Mini-Card 25 Replacing the Mini-Card 27
7 Palm-Rest Assembly 29
Removing the Palm-Rest Assembly 29 Replacing the ...
Owners Manual - Page 5
... Thermal Cooling Assembly 45 Replacing the Thermal Cooling Assembly 46
13 Processor Module (For Inspiron 15-N5050/15-N5040 Only 47
Removing the Processor Module 47 Replacing the Processor Module 48
14 Hinge... Cover 51
Removing the Hinge Cover 51 Replacing the Hinge Cover 53
15 Display 55
Display Assembly 55 Removing the Display Assembly 55 Replacing the Display Assembly ...
Owners Manual - Page 15
... palm rest. CAUTION: The keycaps on your computer.
CAUTION: To avoid electrostatic discharge, ground yourself by using a wrist grounding strap or by your computer). Keyboard
15 Damage due to servicing that secure the keyboard to replace.
3
Keyboard
WARNING: Before working inside your computer, read the safety information that shipped with your...
Owners Manual - Page 19
... practices information, see "Removing the Battery" on the type of the computer. Removing the Memory Module(s)
1 Follow the instructions in "Before You Begin" on page 15. See "Removing the Battery" on the system board. CAUTION: To help prevent damage to the system board, remove the main battery, see the Regulatory Compliance...
Owners Manual - Page 23
... your warranty.
5
Optical Drive
WARNING: Before working inside your computer, read the safety information that shipped with your computer. See "Removing the Keyboard" on page 15. 4 Remove the screw that secures the optical drive to the computer base. 5 Using a plastic scribe, push the notch on your computer. Removing the Optical Drive...
Owners Manual - Page 25
...to the system board.
Wireless Mini-Card
25
NOTE: Dell does not guarantee compatibility or provide support for Wireless Local Area Network (...should perform repairs on your computer. If you ordered a wireless Mini-Card with your computer. Damage due to servicing that... Keyboard" on page 13. 3 Remove the keyboard. 6
Wireless Mini-Card
WARNING: Before working inside your computer, read the...
Owners Manual - Page 26
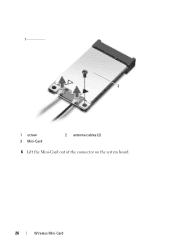
1
3 2
1 screw 3 Mini-Card
2 antenna cables (2)
6 Lift the Mini-Card out of the connector on the system board.
26
Wireless Mini-Card
Owners Manual - Page 27
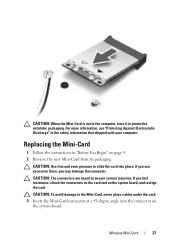
...: The connectors are keyed to the Mini-Card, never place cables under the card. 3 Insert the Mini-Card connector at a 45-degree angle into place. Wireless Mini-Card
27 CAUTION: Use firm and even pressure to slide the card into the connector on page 9. 2 Remove the new Mini-Card from its...
Owners Manual - Page 28
...to the system board.
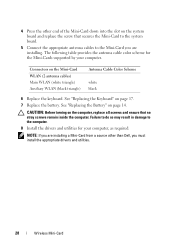
5 Connect the appropriate antenna cables to the computer. 8 Install the drivers and utilities for the Mini-Cards supported by your computer, as required. CAUTION: Before turning ...Replace the battery. 4 Press the other than Dell, you must install the appropriate drivers and utilities.
28
Wireless Mini-Card NOTE: If you are installing. See "Replacing the Battery" on page...
Owners Manual - Page 30
See "Removing the Keyboard" on page 15. 5 Remove the two screws on the system board and remove the cables.
30
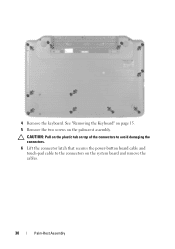
Palm-Rest Assembly CAUTION: Pull on the plastic tab on top of the connectors to avoid damaging the connectors. 6 Lift the connector latch that secures the power-button board cable and touch-pad cable to the connectors on the palm-rest assembly. 4 Remove the keyboard.
Owners Manual - Page 37
... page 13, before removing the hard-drive assembly. Exercise care when handling the hard drive. CAUTION: To help prevent damage to install an operating system, drivers, and utilities on the new hard drive. NOTE: Dell does not guarantee compatibility or provide support for hard drives from the computer base. Hard Drive...
Owners Manual - Page 47
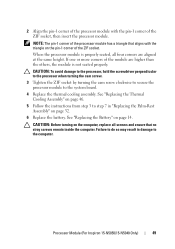
...-socket cam screw counterclockwise until it comes to step 8 in "Before You Begin" on page 9. 2 Remove the battery. Processor Module (For Inspiron 15-N5050/15-N5040 Only)47 13
Processor Module (For Inspiron 15-N5050/15-N5040 Only)
WARNING: Before working inside your computer, read the safety information that is not authorized by Dell is not covered by...
Owners Manual - Page 48
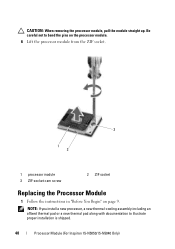
... page 9. CAUTION: When removing the processor module, pull the module straight up. Be careful not to illustrate proper installation is shipped.
48
Processor Module (For Inspiron 15-N5050/15-N5040 Only)
Owners Manual - Page 49
... a triangle that no stray screws remain inside the computer. NOTE: The pin-1 corner of the module are aligned at the same height. Processor Module (For Inspiron 15-N5050/15-N5040 Only)
49
Failure to the system board. 4 Replace the thermal cooling assembly.
Owners Manual - Page 50

50
Processor Module (For Inspiron 15-N5050/15-N5040 Only)
Owners Manual - Page 55

... "Before You Begin" on page 13. 3 Remove the two screws from the computer base. CAUTION: Only a certified service technician should perform repairs on your computer. 15
Display
WARNING: Before working inside your computer, read the safety information that is not authorized by Dell is not covered by periodically touching an unpainted...
Owners Manual - Page 67

... Keyboard" on page 45. See "Removing the Optical Drive" on page 13, before working inside the computer.
See "Removing the Thermal
Cooling Assembly" on page 15. 5 Remove the memory module(s). For additional safety best practices information, see "Removing the Battery" on page 23. 7 Follow the instructions from the 3-in "Removing the...
Similar Questions

When Using Keyboard The Cursor Moves In Inspiron 15 Intel (n5010) Please Lresolv
(Posted by arooj707 10 years ago)


How Install Manual Wireless Driver For Ubuntu Dell N5050
(Posted by angbaseb 10 years ago)


What Kind Of Wireless Drivers Does Dell N5050 Use
(Posted by jheidri 10 years ago)