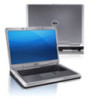
Dell Inspiron 5521 Support Question
Dell Inspiron 5521 Support Question
Find answers below for this question about Dell Inspiron 5521.Need a Dell Inspiron 5521 manual? We have 1 online manual for this item!
Question posted by santoshkokare24 on May 6th, 2013
My Bluetooth Device Is Not Working
The person who posted this question about this Dell product did not include a detailed explanation. Please use the "Request More Information" button to the right if more details would help you to answer this question.
Current Answers
Answer #1: Posted by prateekk007 on May 6th, 2013 8:19 PM
prateekk007

Member since:
December 5th, 2012 Points: 2,137,520

Member since:
December 5th, 2012 Points: 2,137,520
Hi santoshkokare24
Please install the network drivers from the link mentioned below. Click Network and download the respective driver for the wireless card.
Please let me know if further help is required.
For easy access to drivers, manuals and product updates, please visit our Support Site .
Thanks & Regards
Prateek K
Related Dell Inspiron 5521 Manual Pages
Owners Manual - Page 1
Dell Inspiron 3521/5521 Owner's Manual
Computer model: Inspiron 3521/5521 Regulatory model: P28F Regulatory type: P28F001
Owners Manual - Page 2
...®, and the Windows start button logo are either trademarks or registered trademarks of your computer. Bluetooth® is used in the United States and/or other countries;
Notes, Cautions, and Warnings
NOTE...Microsoft Corporation in this text: Dell™, the DELL logo, and Inspiron™ are not followed. A00
and is a registered trademark owned by Dell under license.
2012 ...
Owners Manual - Page 3
Contents
1 Before You Begin 7
Turn Off Your Computer and Connected Devices . . . 7 Safety Instructions 7 Recommended Tools 8
2 After Working Inside Your Computer 9
3 Removing the Battery 11
Procedure 11
4 Replacing the Battery 13
Procedure 13 Postrequisites 13
5 Removing the Memory Module(s 15
Prerequisites 15 Procedure ...
Owners Manual - Page 7
... outlets. 4 Disconnect all telephone cables, network cables, and attached devices from your computer. 5 Press and hold the power button for shut-down instructions. 3 Disconnect your computer and all attached devices from potential damage and ensure your personal safety. NOTE: If you finish working inside the computer, replace all covers, panels, and screws before...
Owners Manual - Page 8

... that you must disengage before disconnecting the cable. CAUTION: When you work, periodically touch an unpainted metal surface to avoid bending any connector pins...certified service technician is authorized to remove the computer cover and access any installed card from the network device. CAUTION: To disconnect a network cable, first unplug the cable from your computer, and protecting against...
Owners Manual - Page 9
..., cards, and any other part(s) you complete the replacement procedures, ensure the following: • Replace all attached devices to do so may damage your computer. After Working Inside Your Computer | 9 Failure to their electrical outlets.
CAUTION: Before turning on your computer. • Connect your computer and all screws and ensure that no...
Owners Manual - Page 11
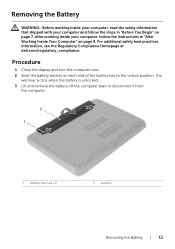
... your computer and follow the instructions in "Before You Begin" on page 7. Removing the Battery
WARNING: Before working inside your computer, read the safety information that shipped with your computer, follow the steps in "After Working Inside Your Computer" on page 9. Procedure
1 Close the display and turn the computer over. 2 Slide the...
Owners Manual - Page 13
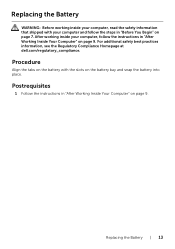
..." on page 7. Procedure
Align the tabs on the battery with your computer and follow the instructions in "After Working Inside Your Computer" on page 9.
Replacing the Battery | 13 Replacing the Battery
WARNING: Before working inside your computer, read the safety information that shipped with the slots on the battery bay and snap...
Owners Manual - Page 15
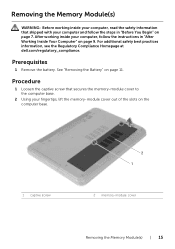
Removing the Memory Module(s)
WARNING: Before working inside your computer, read the safety information that secures the memory-module ... with your fingertips, lift the memory-module cover out of the slots on page 7. After working inside your computer, follow the steps in "After Working Inside Your Computer" on page 11.
Prerequisites
1 Remove the battery. See "Removing the Battery" ...
Owners Manual - Page 17
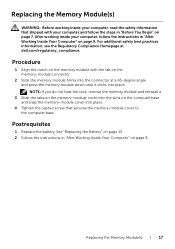
... with the tab on page 7. Replacing the Memory Module(s) | 17
After working inside your computer, follow the steps in "After Working Inside Your Computer" on page 9. Procedure
1 Align the notch on the .../regulatory_compliance. Replacing the Memory Module(s)
WARNING: Before working inside your computer, read the safety information that secures the memory-module cover to the computer base...
Owners Manual - Page 19
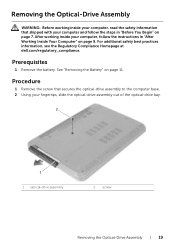
...See "Removing the Battery" on page 7. Removing the Optical-Drive Assembly
WARNING: Before working inside your computer, read the safety information that secures the optical-drive assembly to the...bay.
2
1
1 optical-drive assembly
2 screw
Removing the Optical-Drive Assembly | 19 After working inside your computer and follow the instructions in "Before You Begin" on page 11. Procedure
1...
Owners Manual - Page 21

... on page 9. Replacing the Optical-Drive Assembly | 21 Postrequisites
1 Replace the battery. See "Replacing the Battery" on page 13. 2 Follow the instructions in "After Working Inside Your Computer" on computer base. After working inside your computer, follow the steps in "Before You Begin" on page 9.
Replacing the Optical-Drive Assembly
WARNING: Before...
Owners Manual - Page 23
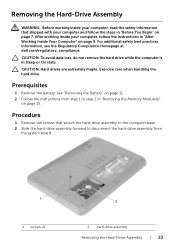
... the hard-drive assembly from
the system board.
1
1 screws (2)
2
2 hard-drive assembly
Removing the Hard-Drive Assembly | 23 Removing the Hard-Drive Assembly
WARNING: Before working inside your computer, read the safety information that secure the hard-drive assembly to the computer base. 2 Slide the hard-drive assembly forward to step...
Owners Manual - Page 25
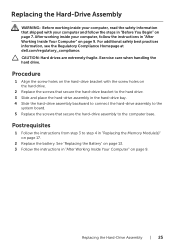
...drives are extremely fragile. Exercise care when handling the hard drive. After working inside your computer, follow the instructions in "After Working Inside Your Computer" on the hard drive.
2 Replace the screws ...hard-drive bracket to the hard drive. 3 Slide and place the hard-drive assembly in "After Working Inside Your Computer" on page 9. See "Replacing the Battery" on page 13. 3 Follow ...
Owners Manual - Page 27
... assembly.
1
23
1 plastic scribe 3 keyboard
2 tabs (9)
Removing the Keyboard | 27
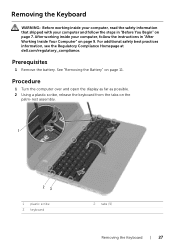
After working inside your computer and follow the instructions in "Before You Begin" on page 7. Prerequisites
1 Remove...regulatory_compliance. Removing the Keyboard
WARNING: Before working inside your computer, read the safety information that shipped with your computer, follow the steps in "After...
Owners Manual - Page 29
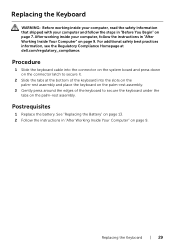
... the edges of the keyboard to secure it.
2 Slide the tabs at dell.com/regulatory_compliance. Replacing the Keyboard | 29 After working inside your computer and follow the instructions in "After Working Inside Your Computer" on the connector latch to secure the keyboard under the tabs on page 9.
Postrequisites
1 Replace the battery. Procedure...
Owners Manual - Page 31
... step 1 to the computer base.
1
1 screws (12)
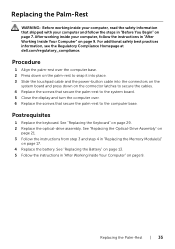
Removing the Palm-Rest | 31 After working inside your computer and follow the instructions in "After Working Inside Your Computer" on page 9.
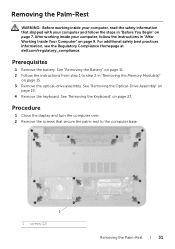
Prerequisites
1 Remove the battery. Removing the Palm-Rest
WARNING: Before working inside your computer, read the safety information that secure the palm-rest to...
Owners Manual - Page 35
... on
page 21. 3 Follow the instructions from step 3 and step 4 in "After Working Inside Your Computer" on page 17. 4 Replace the battery. See "Replacing the Battery" ... Postrequisites
1 Replace the keyboard.
Replacing the Palm-Rest | 35 Replacing the Palm-Rest
WARNING: Before working inside your computer, read the safety information that secure the palm-rest to the computer base. For ...
Owners Manual - Page 37
... has a half wireless mini-card slot which supports a Wireless Local Area Network (WLAN) + Bluetooth combo card. Prerequisites
1 Remove the battery.
See "Removing the Battery" on page 11. 2...instructions from sources other than Dell. See "Removing the Optical-Drive Assembly" on page 9. After working inside your computer, follow the steps in "Before You Begin" on page 27. 5 Remove the...
Owners Manual - Page 39
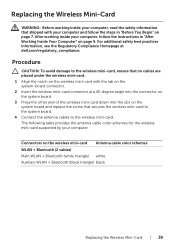
...working inside your computer, follow the steps in "After Working Inside Your Computer" on page 9. Connectors on the wireless mini-card Antenna cable color schemes WLAN + Bluetooth (2 cables) Main WLAN + Bluetooth (white triangle) white Auxiliary WLAN + Bluetooth... page 7. Replacing the Wireless Mini-Card
WARNING: Before working inside your computer, read the safety information that secures ...
Similar Questions

Does The Dell Inspiron 5521 Have A Backlit Keyboard
(Posted by MjanAngel 9 years ago)


How To Search Bluetooth In Dell Laptop Inspiron N4030
(Posted by Hebri 10 years ago)

My Laptop Won't Connect To The Internet Through Wifi
I've tried my wifi and other friends' wifi connections and my computer won't connect to the internet
I've tried my wifi and other friends' wifi connections and my computer won't connect to the internet
(Posted by chrismc1125 10 years ago)

Upgrading Ram & Graphic Card For Inspiron 5521
I have a dell inspiron 5521 Lap with i7,8GB Ram and 1GB Radion Grafics. I want to up grade Ram &...
I have a dell inspiron 5521 Lap with i7,8GB Ram and 1GB Radion Grafics. I want to up grade Ram &...
(Posted by PIMEdayur 11 years ago)