
2004 Chrysler Pacifica Support Question
2004 Chrysler Pacifica Support Question
Find answers below for this question about 2004 Chrysler Pacifica.Need a 2004 Chrysler Pacifica manual? We have 1 online manual for this item!
Question posted by frecenste on January 17th, 2014
2004 Chrysler Pacifica How To Remove Rear Heater Motor
The person who posted this question about this Chrysler automobile did not include a detailed explanation. Please use the "Request More Information" button to the right if more details would help you to answer this question.
Current Answers
Related Manual Pages
Owner's Manual - Page 93
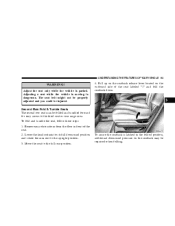
... adjusted and you could be folded and tumbled forward for easy access to the third seat or rear cargo area. Move the seat to the upright position. 3. Second Row Fold & Tumble Seats ...Lower the head restraint to its full downward position and rotate the arm rest to the full rear position.
4. Remove any obstructions from the floor in front of the seat labeled "1" and fold the seatback ...
Owner's Manual - Page 97
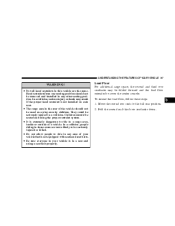
... in a collision. In a collision, people riding in any area of the vehicle should not
be removed and installed in these steps: 1. Children should not be used as a play area by children.
Head...properly. Fold the second and third row seatbacks down.
3
• The cargo area in the rear of your
vehicle that is not equipped with seats and seat belts.
• Be sure everyone...
Owner's Manual - Page 115
...models manufactured after 1982.
The door will also turn on when a front door, a rear door or the liftgate is pressed.
WARNING! no batteries are needed. Do not use...controls (hand held transmitters) that has a "stop and reverse" feature as garage door openers, motorized gates, or home lighting. The Universal Transceiver operates off your vehicle's battery and charging system;...
Owner's Manual - Page 125
... can cause damage not covered by an automatic reset circuit breaker. The automatic circuit breaker restores power when the overload is removed. NOTE: If desired, the fourth power outlet in the rear cargo area can be converted by your warranty.
3 cellular phones, etc.).
coolers, vacuum cleaners, lights, etc.), will discharge sufficiently to...
Owner's Manual - Page 128

...downs located on cargo area floor and on the rear trim panel. 6.
Insert the pins on the ends of the cover flap into the slots on the rear trim panels should be opened or closed with ...the cargo cover in the passenger compartment. Insert the pins on the ends of the cover into place.
3. Fold down the third row seatbacks. 2. Remove ...
Owner's Manual - Page 191
... in air conditioned vehicles must be automatically controlled. When the ATC display reads REAR , only the rear seat occupants can set the rear
switch to section 7, Maintenance Procedures, of coolant is recommended. Winter Operation To insure the best possible heater and defroster performance, make sure the engine cooling system is functioning properly and the...
Owner's Manual - Page 200

... no sign of starting after two 15 second periods of the Integrated Power Module. It has a removable cap that is routed under the hood on the driver side of cranking with a grounded, three-...the key once the engine is running when the key is released. ENGINE BLOCK HEATER - IF EQUIPPED The engine block heater warms engine coolant and permits quicker starts in cold weather. 200 STARTING AND ...
Owner's Manual - Page 233

...tires and other traction aids that could indicate chain breakage. The tire pressure sensors are used.
Remove the damaged parts of the chain before further use. • Install chains on the front... OPERATING 233
General Information This device complies with a loaded vehicle. • Do not use on rear wheels of All Wheel Drive (AWD) vehicles. • Do not drive for prolonged period on ...
Owner's Manual - Page 241

... and GAWR. If the seatbacks are folded for passenger and luggage loading as indicated. Vehicle Certification Label Your vehicle has a certification label attached to the rear of a vehicle. STARTING AND OPERATING 241
WARNING!
• Remove the fuel tank filler tube cap (gas cap) slowly
to prevent fuel spray from a hot vehicle.
Owner's Manual - Page 251
.... NOTE: There are steps that you can take to slow down . • In city traffic - While stopped, put transmission in removing heat from the engine cooling system. This allows the heater core to act as a supplement to the engine cooling system and turning off immediately, and call for overheating by taking the...
Owner's Manual - Page 253

...winch mechanism. Spare Tire Stowage The spare tire is located under the rear of the vehicle by means of the rear storage bin in the rear cargo floor. WHAT TO DO IN EMERGENCIES 253
Jack Location The ...handle are stowed in the rear storage bin located in the rear cargo floor.
6
Pull up on the storage bin cover and liner to rotate the "spare tire drive" nut. To remove or stow the spare, ...
Owner's Manual - Page 254

... the wheel. • Turn on the Hazard Warning Flasher. • Block both the front and rear of the vehicle close to change a tire on the side of the wheel diagonally opposite the jacking ...position. 254 WHAT TO DO IN EMERGENCIES
Spare Tire Removal Fit the jack-handle over the drive nut. WARNING! Use of the wheel. For example, if...
Owner's Manual - Page 257

.... NOTE: When reinstalling the wheel center cap, insure that the valve-stem is pointed toward the rear of the wheel and position it is drawn into place against the tire several times to be removed prior to the right until you hear the mechanism click three times. It cannot be overtightened.
Always...
Owner's Manual - Page 259

...may cause the front wheels to pull erratically to the OFF position for both vehicles. 3. When removing the jumper cables, reverse the above sequence exactly. Set the parking brake, place the automatic ... vehicle with the discharged battery. Turn off the heater, radio and all unnecessary electrical loads. 4. DRIVING ON SLIPPERY SURFACES Acceleration Rapid acceleration on the engine. ...
Owner's Manual - Page 282

Remove the access door and ... bottom of the filter frame with the direction of airflow (away from the blower motor and towards the center of the car). The manufacture recommends that air conditioning service...is not functioning as anticipated.
To replace the filter slide the lock toward the rear of this manual for the recommended air conditioning filter replacement intervals. Align the black...
Owner's Manual - Page 300
... VEHICLE
Front And Rear Wheel Bearings Front and rear wheel bearings are : • Road salt, dirt and moisture accumulation. • Stone and gravel impact. • Insects, tree sap and tar. • Salt in the air near seacoast localities. • Atmospheric fallout/industrial pollutants.
Corrosion is the result of deterioration or removal of Body...
Owner's Manual - Page 303
... caution when cleaning the inside rear window equipped with electric defrosters or the right rear quarter window equipped with any liquid. WARNING! Stubborn soils can be removed easily with a damp soft... be taken to clean your leather upholstery with a damp cloth. Care should be removed promptly with any commercial household-type glass cleaner. Do not use polishes, oils, cleaning...
Owner's Manual - Page 307

MAINTAINING YOUR VEHICLE 307
LIGHT BULBS - Exterior Bulb Number Back-up ...921 Rear Stop, Turn Signal ...3157 Rear Sidemarker ...168 Fog Light ...880L Front Turn Signal...3157 Front Sidemarker...194 Headlight ...H7 License ...168 BULB REPLACEMENT Standard Quad Headlights 1. Remove the rubber boot seals. 3. Reinstall the rubber boot seals and then the headlight module...
Owner's Manual - Page 310

...Raise the liftgate. 2. Squeeze the socket assembly tabs to remove it from the socket. 5. Pull the bulb to remove it from the housing. 4. Replace the bulb, reinstall...shorten bulb life. Remove the two tail light assembly screws and rotate the assembly outward to remove the ball stud form the attaching grommet. 3. Do not touch the new bulb with rubbing alcohol. Rear Tail, Stop, Turn...
Owner's Manual - Page 311
...-With Filter 3.5 Liter Engines 5.5 qts 5.2 liters Cooling System * 3.5 Liter Engines 10.5 qts 9.9 liters * Includes heater and coolant recovery bottle filled to the release tab and push on the lens until it from the socket. Unscrew the bulb and remove it snaps into place.
Place a screwdriver in the slot next to MAX level.
7
Similar Questions

My 2004 Pacifica Will Start, But My Interior Lights, Wipers, Seat Heaters,
(Posted by nicPel 10 years ago)

How To Check Voltage In Blower Motor 2004 Pacifica
(Posted by trapOl 10 years ago)


Front Blower Motor Will Not Turn Off On A 2004 Pacifica
(Posted by idrcjdav 10 years ago)

How To Remove Rear Window Wiper Arm On 2005 Pacifica
(Posted by bobreha 10 years ago)