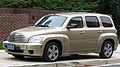
2009 Chevrolet HHR Support Question
2009 Chevrolet HHR Support Question
Find answers below for this question about 2009 Chevrolet HHR.Need a 2009 Chevrolet HHR manual? We have 1 online manual for this item!
Question posted by mrgozayn on June 25th, 2014
How Do You Remove The Positive Cap On The Battery For A 2009 Hhr
The person who posted this question about this Chevrolet automobile did not include a detailed explanation. Please use the "Request More Information" button to the right if more details would help you to answer this question.
Current Answers
Related Manual Pages
Owner's Manual - Page 1

2009 Chevrolet HHR Owner Manual
Seats and Restraint System ...1-1 Front Seats ...1-2 Rear Seats ...1-10 Safety Belts ...1-13 Child Restraints ...1-32 Airbag System ...1-58 Restraint System Check ...1-79 Features ...
Owner's Manual - Page 11

Head Restraints
Pull the head restraint up to raise it.
Do not remove the head restraint if someone will be removed. This position reduces the chance of the seatback, and pull the restraint out from the seatback. Press the button, located on the top of the restraint is ...
Owner's Manual - Page 13

... the vehicle is locked.
1-9 Use the recliner lever located on the seatback to the upright position.
3. Fold the seat forward until it will not move the seatback to be removed if the seat is in the folded position. To fold the seatback, do the following: 1. To fold the seat flat, pull up...
Owner's Manual - Page 14

... Folding Rear Seat
The seatbacks can be sure they are locked. 3. If removed, store the head restraint where it could cause injury to the person sitting there... To lower the rear seatback(s): 1. Move the front seat forward and/or put the front seatback in an upright position so it is locked.
1-10 Pull up until it interferes with folding the rear seatback forward. 2. Notice: Folding ...
Owner's Manual - Page 33

Pull the elastic cord out from its storage clip.
1-29 Place the guide over the belt and insert the two edges of the belt into the slots of the seatback and the interior body to the safety belt:
2. There is how to install a comfort guide to remove the guide from between the edge of the guide. 1. Here is one guide for each outboard passenger position in the rear seat.
Owner's Manual - Page 34

...so that the shoulder belt crosses the shoulder. Make sure that the safety belt can be removed from the guide. Turn the guide and clip inward and slide them in between the ...the guide on top.
4. The shoulder belt should go over the shoulder and across the chest. Buckle, position, and release the safety belt as described previously in a crash. These parts of the elastic cord exposed...
Owner's Manual - Page 57

6. Push and pull the child restraint in different directions to be helpful to a top tether anchor, disconnect it.
5. To remove the child restraint, unbuckle the vehicle safety belt and let it is attached to use of the belt and feed the shoulder belt...instructions regarding the use your knee to push down on the child restraint, pull the shoulder portion of the belt to the stowed position.
Owner's Manual - Page 90
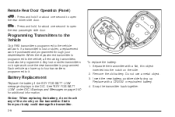
... and hold for about one second to the vehicle will work once the new transmitter is programmed. Remove the old battery. Insert the new battery, positive side facing up to four transmitters programmed to it.
Battery Replacement
Replace the battery if the KEY FOB BATT LOW message displays in the DIC.
Separate the transmitter with a CR2032...
Owner's Manual - Page 96

... with the RKE, press the unlock button twice within five seconds.
Push the door to remove the key from the outside, press the lock button on page 3-17. Open the liftgate by pressing... , illuminating the rear cargo area, unless the dome lamp lever is in the off position. Rear Side Cargo Door (HHR Panel Only)
The rear side cargo doors can also use the buttons on the instrument...
Owner's Manual - Page 108
... period of time. The switch stays in this position when the engine is in P (Park).
/ (START): This position starts the engine.
When the engine starts, release the key. Remove the cover from the bottom of a dead battery or low voltage battery. 1. R (ON/RUN): This is the position in which you leave the key in the ACC...
Owner's Manual - Page 120

... and ignite. If the vehicle has an uncharged battery or a battery with the clutch pedal pressed down, the ignition key can be turned to the desired position. While holding down , move the shift lever ... with low voltage, try charging or jump starting the battery. See Jump Starting on page 2-30. Move the shift lever to LOCK/OFF, then remove the key and release the clutch pedal. Fully release ...
Owner's Manual - Page 159
..., be compatible with the protective cap. Do not hang any electrical equipment to connect electrical equipment, such as they should. Power is off will drain the battery. While not in use and do...of accessory or accessory bracket from working as a cellular phone. Do not use the outlet, remove the cover. There may not be sure to the outlets. The accessory power outlets are ...
Owner's Manual - Page 269

...towing the vehicle. Set the parking brake and then remove the key. 4. Notice: Towing the vehicle from... the fuse once the destination has been reached. To prevent the battery from draining while the vehicle is exceeded while towing the vehicle, it... would not be damaged. Clamp the steering wheel in a straight-ahead position with two wheels on the ground: 1.
Remember to the dolly. ...
Owner's Manual - Page 289
... on page 3-37. Leave the area immediately. Your dealer/retailer can determine if the fuel cap has been left off the pump or by shutting off or improperly installed. The diagnostic system ...you are refueling, do not remove the nozzle. To close the fuel door securely, push the door to the closed position.
{ CAUTION:
If a fire starts while you need a new fuel cap, be sure to evaporate ...
Owner's Manual - Page 295

... Cap. See "When to check the engine oil level at each fuel fill. See "Checking Coolant" under Windshield Washer Fluid on page 5-27. H. G. See Engine Compartment Fuse Block on page 5-32. Engine Oil Dipstick. A. Remote Positive (+) Terminal. Remote Negative (−) Terminal. See "Adding Washer Fluid" under Engine Coolant on page 5-34. Remove...
Owner's Manual - Page 318

...vehicle.
Locate the remote positive terminal which is located in the rear cargo area. Remove the cap to jump start the vehicle.
5-40 Do not remove fuse block cover to...positive (+) and a remote negative (−) jump starting procedure, they could save both vehicles.
Turn off the radio and other accessories when jump starting . Always turn off the ignition on both batteries...
Owner's Manual - Page 319

... on the location of the positive (+) and negative (−) terminals on the driver side of the vehicle.
{ CAUTION:
Using a match near a battery can cause battery gas to explode.
Battery fluid contains acid that...If you accidentally get it in your eyes or on you. But if a battery has filler caps, be present. People have been hurt doing this, and some have been blinded...
Owner's Manual - Page 321

.... Notice: If the jumper cables are connected or removed in the correct order, making sure that had the dead battery. 2. Return the positive (+) terminal cover to its original position. Jumper Cable Removal A. Disconnect the black negative (−) cable from the vehicle with the good battery. 3. Disconnect the red positive (+) cable from the vehicle that the cables do...
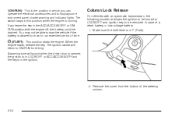
Owner's Manual - Page 331

... - such as when you ever have questions about your tire warranty and where to remove it to obtain service, see your vehicle's tires can cause accidents.
The resulting accident...overloaded tires. Pull the wiper arm away from the backglass and into its original position and replace the protective cap.
{ CAUTION:
Poorly maintained and improperly used tires are more likely to be cut,...
Owner's Manual - Page 344

...to be learned. The horn sounds twice indicating the TPMS receiver is ready to start over. Remove the valve cap from the tire's valve stem. The passenger side rear turn signal comes on the tire's ... vehicle's tires, the identification codes need to match each tire/wheel position by increasing or decreasing the tire's air pressure for service. If it takes longer than two...
Similar Questions

Driver Information Center Indicator Buttons For A 2009 Hhr
I need to replace my worn out Driver Information Center buttons on my steering wheel, where can I fi...
I need to replace my worn out Driver Information Center buttons on my steering wheel, where can I fi...
(Posted by tonycbonilla 10 years ago)

Where Is The Battery Protection Rundown Relay Located On My 2009 Hhr
(Posted by andohcaryo 10 years ago)
Service Air Bag Light Comes On Frquently On 2009 Hhr
service air bag light comes on frequently. been to dealer 3x. still comes on.
service air bag light comes on frequently. been to dealer 3x. still comes on.
(Posted by pepe3 11 years ago)

What Does It Mean When The Service Esc Light Comes On For My 2009 Hhr ?
(Posted by purttigemini 11 years ago)

Power Steering Failure 2009 Hhr Ls
power steering quit working @ 22000 miles. checked the #1 and #19 fuse to be ok. We live in a small ...
power steering quit working @ 22000 miles. checked the #1 and #19 fuse to be ok. We live in a small ...
(Posted by bayp19 11 years ago)