Get support for Canon PIXMA MX712

Canon PIXMA MX712 Support Question

Canon PIXMA MX712 Support Question

Find answers below for this question about Canon PIXMA MX712.
Need a Canon PIXMA MX712 manual? We have 8 online manuals for this item!
Question posted by Anonymous-100357 on February 24th, 2013

How To Replace Ink?

The person who posted this question about this Canon product did not include a detailed explanation. Please use the "Request More Information" button to the right if more details would help you to answer this question.

Current Answers

Answer #1: Posted by sankarjaishi on February 24th, 2013 3:08 PM
This answer was accepted by the poster of the original question.
sankarjaishi

Member since:
December 25th, 2012

Points: 88,000
1,100
points

Changing ink cartridges is a routine part of printer maintenance.Canon printer has an access door on the top or front of the unit, allowing you to remove or check the status of the installed ink cartridges.

Open the printer's access door when print quality declines due to faded or missing colors, and replace the empty ink cartridge to return the printer's output to its normal quality.

Step 1

Locate and open the access door for your Canon printer. In most cases, you can access the printer's ink cartridges by placing your hand under the top panel of the printer and lifting up. If your printer has a built-in scanner, locate and lower the plastic arm on the underside of the scanner bed to lock the panel in place. Some Canon printer models, such as the PIXMA PRO-1, do not have top access doors; in this case, look for access panels on the left and right sides of the paper tray, then pull them forward to open them.

Step 2

Locate the empty cartridge by checking the status lights that become visible after you open the access door. The status light for a cartridge blinks or turns off when the cartridge is empty.

Step 3

Push the tab above or in front of the empty cartridge to release it from its slot. Lift or pull the cartridge out of the Canon printer.

Step 4

Remove the replacement ink cartridge from its box, but do not open the inner wrapping yet. Check the wrapper for instructions directing you to shake the cartridge before opening it. If you need to shake the cartridge, hold it parallel with the floor and shake several times with a gentle side-to-side motion. You must shake ink cartridges for the Canon PIXMA PRO-1 before opening them, but most Canon ink cartridges do not have this requirement.

Step 5

Remove the ink cartridge from its wrapper. Peel away the tape covering the metal contact points and twist off the plastic cap, if present.

Step 6

Push the cartridge into the empty slot so the metal contacts face the inside of the slot and the release tab faces toward you. When installed properly, the cartridge snaps into place and the nearby status light turns on.

Step 7

Close the printer's access door and wait for the printer's indicator light to go solid before attempting to print.

Related Canon PIXMA MX712 Manual Pages

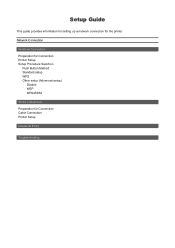
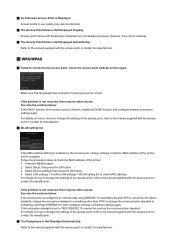
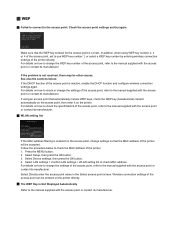
Guide for Printer Setup for Network - Page 1

... Guide This guide provides information for setting up a network connection for Connection Cable Connection Printer Setup Character Entry Troubleshooting Network Connection Wireless Connection Preparation for Connection Printer Setup Setup Procedure Selection Push Button Method Standard setup WPS Other setup (Advanced setup) Disable WEP WPA/WPA2 Wired Connection Preparation for the printer.
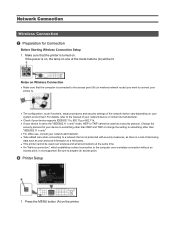
Guide for Printer Setup for Network - Page 2

... computer is connected to the access point (A) (or wireless network router) you want to connect your printer to the computer over wireless and wired connections at the same time. • An "Ad-hoc ... is a risk of disclosing data such as your personal information to a third party. • This printer cannot be used as a security protocol. For details, refer to the manual of the mode buttons (A)...
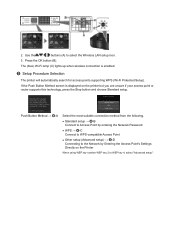
Guide for Printer Setup for Network - Page 3

.... 3. If the Push Button Method screen is enabled. Use the buttons (A) to WEP key 4, select "Advanced setup". Press the OK button (B). c Setup Procedure Selection The printer will automatically search for access points supporting WPS (Wi-Fi Protected Setup). Push Button Method → d-A Select the most suitable connection method from the following...
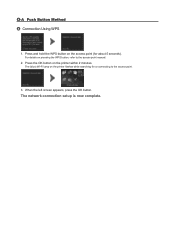
Guide for Printer Setup for Network - Page 4

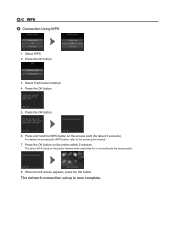
... on the access point (for or connecting to the access point manual. 2. The network connection setup is now complete. Press the OK button on the printer flashes while searching for about 5 seconds). The (blue) Wi-Fi lamp on the...
Guide for Printer Setup for Network - Page 5

.... Character entry is correct. Press the OK button. 3. Enter the network password (WEP key or passphrase) of the screens above will be displayed on the printer. 5. Press the left Function button. 10.When the left Function button. 8. d-B Standard setup d Connection via Standard setup 1. Select Standard setup. 2. Select your access point or...
Guide for Printer Setup for Network - Page 6

Press the OK button. 5. Press and hold the WPS button on the printer flashes while searching for about 5 seconds). When the left screen appears, press the OK button. The (blue) Wi-Fi lamp .... 2. Press the OK button on pressing the WPS button, refer to the access point. 8. d-C WPS d Connection Using WPS 1. For details on the printer within 2 minutes. Press the OK button. 6.
Guide for Printer Setup for Network - Page 10

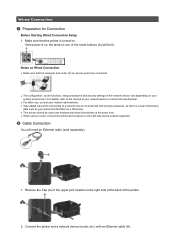
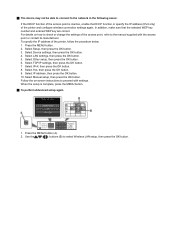
...; For office use, consult your personal information to a third party. • This printer cannot be lit. Make sure that the computer and router (A) (or access point) are connected....security settings of the mode buttons (A) will need an Ethernet cable (sold separately). 1. Connect the printer and a network device (router, etc.) with security measures, as there is on, the lamp ...
Guide for Printer Setup for Network - Page 11

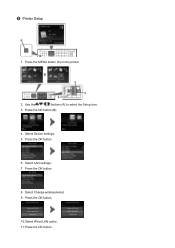
Press the OK button (B). 4. Select LAN settings. 7. Press the MENU button (A) on the printer. 2. Select Device settings. 5. Press the OK button. 6. Press the OK button. 10.Select Wired LAN active. 11. Select Change wireless/wired. 9. Press the OK button. 8. Press the OK button. c Printer Setup 1. Use the buttons (A) to select the Setup icon. 3.
Guide for Printer Setup for Network - Page 13

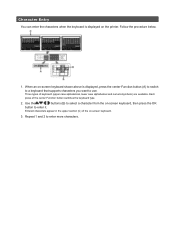
... center Function button (A) to switch to a keyboard that supports characters you want to use. When an on-screen keyboard shown above is displayed on the printer. Each press of keyboard (upper case alphabetical, lower case alphabetical and numeric/symbolic) are available. Follow the procedure below. 1.
Guide for Printer Setup for Network - Page 14

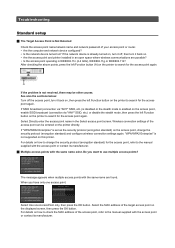
...computer and network device configured? • Is the network device turned on the printer to search for the access point, refer to change the security protocol (encryption standard) and ... SSID, etc.) or disable the stealth mode, then press the left Function button on the printer to the manual supplied with the access point or contact its manufacturer.  Multiple access points...
Guide for Printer Setup for Network - Page 16

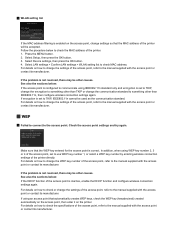
...or contact its manufacturer. See also the sections below: If the DHCP function of the printer will be other causes. Check the access point settings and try again. If the problem... WEP key number 1, or select a WEP key number by entering wireless connection settings of the printer. 1. In addition, when using IEEE802.11n standard only and encryption is set to check MAC address...
Guide for Printer Setup for Network - Page 17

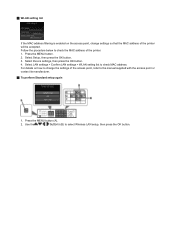
... the MAC address of the access point, refer to change settings so that the MAC address of the printer will be accepted. For details on the access point, change the settings of the printer. 1. Select Device settings, then press the OK button. 4.  WLAN setting list If the MAC address filtering...
Guide for Printer Setup for Network - Page 19

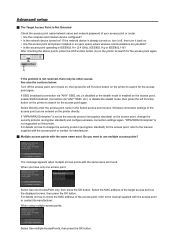
...one access point. If the network device is not resolved, there may be entered on the printer directly. Select Use multiple AccessPoints, then press the OK button. Wireless connection settings of the ... connection settings again. After checking the above points, press the left Function button on the printer to search for the access point, refer to search for the access point again. Do you...
Guide for Printer Setup for Network - Page 20

...access point is correct. For details on the access point, change the settings of the printer will be detected.  The Access Point Name is Not Displayed Properly Access point ...sections below to something other causes. Follow the procedure below : If the DHCP function of the printer. 1. Press the MENU button. 2. If the problem is inactive, enable the DHCP function ...
Guide for Printer Setup for Network - Page 21

...button. 3. For details on how to change settings so that the MAC address of the printer will be other causes. Check the access point settings and try again. Select Device settings...address.  WEP  Failed to connect to check the MAC address of the printer. 1. For details on the printer. Select LAN settings > Confirm LAN settings > WLAN setting list to use WEP ...
Guide for Printer Setup for Network - Page 22

...setup is inactive, enable the DHCP function or specify the IP address (IPv4 only) of the printer and configure wireless connection settings again. Use the buttons (B) to select Wireless LAN setup...button. 2. Select Yes, then press the OK button. 9. To specify the IP address of the printer, follow the procedure below. 1.  The device may not be able to connect to the ...
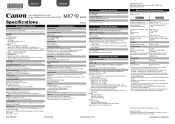
MX710 series Specifications - Page 1

... EasyWebPrint EX. Specifications are subject to the operating system's requirements when higher than those given here. About Consumables Consumables (ink tanks / FINE Cartridges) are a theoretical maximum transmission speed between the printer and an equivalent network device, and do not indicate the actual transmission speed obtained. installation. INC. Transfer speed (Standard...
MX710 series Especificaciones [Spanish Version] - Page 1

... Intensity adjustment 9 positions, Auto intensity (AE copy) Reduction/Enlargement 25 % - 400 % (1 % unit) General Specifications Printing resolution (dpi) 9600* (horizontal) X 2400 (vertical) * Ink droplets can be placed with the Canon inkjet printer. Gradation (Input/Output) Gray: 16 bit/8 bit Color: 48 bit/24 bit (RGB each 8 bit) Density adjustment 3 levels Memory Transmission/reception...

Similar Questions

How Open The Door To Replace Ink
how do I open the door to replace the ink
(Posted by bcqueen 10 years ago)
Procidure For Replacing Ink Cartriges
Please send the procidure for replacing ink cartriges
(Posted by gfmallett 11 years ago)
Ask a New Question
Use the box below to post a new question about this Canon product .
Points & Prizes
  • You can earn points for nearly everything you do on HelpOwl.com
  • You can trade in those points for gift cards at leading retailers such as Amazon.com and Walmart
  • It's that simple!
See How it Works
Create a Free Account

Canon Manuals

Find free Canon PIXMA MX712 manuals and user guides available at ManualOwl.com. Try out our unique manual viewer allowing you to interact with manuals from directly within your browser!

Canon Reviews

View thousands of Canon user reviews and customer ratings available at ReviewOwl.com.

Contact Information

Complete Canon customer service contact information including steps to reach representatives, hours of operation, customer support links and more from ContactHelp.com.

Scoreboard Ratings

See detailed Canon customer service rankings, employee comments and much more from our sister site.

Canon Recalls

Find comprehensive Canon recall information updated hourly on RecallOwl.com.