Brother International Innov-is NQ1600E Support Question
Brother International Innov-is NQ1600E Support Question
Find answers below for this question about Brother International Innov-is NQ1600E.Need a Brother International Innov-is NQ1600E manual? We have 3 online manuals for this item!
Question posted by albarbwhite on June 21st, 2023
Can I Do Edge To Edge Quilting On This Machine
I have a 1600E & would like to know if I can do edge to edge quilting with it
Current Answers
Answer #1: Posted by SonuKumar on June 21st, 2023 9:42 AM
SonuKumar

Member since:
May 9th, 2021 Points: 16,622,280

Member since:
May 9th, 2021 Points: 16,622,280
The Brother Innov-Is NQ1600E is a versatile embroidery machine that can handle a variety of projects, including quilting. While it doesn't have a specific "edge-to-edge" quilting feature, you can still achieve an edge-to-edge quilting effect using the machine's embroidery capabilities.
Here's a general approach to achieve edge-to-edge quilting with the Brother Innov-Is NQ1600E:
- Hooping: Choose an appropriate size hoop for your quilting project. The machine comes with several hoop options. Ensure that your quilt sandwich (top fabric, batting, and backing) fits within the hoop.
- Stabilizer: Select a suitable stabilizer to support your quilting design. Stabilizer helps prevent shifting and puckering of the fabric during embroidery. For quilting, you may choose tear-away or cut-away stabilizer depending on the design and fabric.
- Design selection: Choose an embroidery design that suits your edge-to-edge quilting vision. The machine allows you to import designs or use built-in designs. Consider selecting a design that seamlessly repeats or can be easily aligned for continuous quilting.
- Alignment and marking: Mark your quilt top and backing fabric to ensure proper alignment. You can use fabric markers or temporary marking methods to indicate the starting point and guide for each row of quilting.
- Hoop and attach: Hoop your quilt sandwich, making sure the layers are smooth and taut. Attach the hoop to the machine.
- Positioning: Use the machine's positioning features to align the design with your marked guidelines. Some machines offer options like the ability to move the design within the hoop or utilize a camera for precise placement.
- Test and adjust: Run a test stitch or basting stitch to verify the design's placement and alignment. Make any necessary adjustments before proceeding to quilt the entire project.
- Quilting: Once you're satisfied with the design placement, start the embroidery process. The machine will stitch out the design, and you can move the hoop as needed to continue quilting row by row until you cover the desired area.
Remember to practice on scrap fabric or smaller projects before attempting a larger edge-to-edge quilting project. This will help you become familiar with the machine's features and ensure the best results.
Additionally, consult the instruction manual for your specific machine model for detailed guidance on using the embroidery features and quilting techniques.
Please respond to my effort to provide you with the best possible solution by using the "Acceptable Solution" and/or the "Helpful" buttons when the answer has proven to be helpful.
Regards,
Sonu
Your search handyman for all e-support needs!!
Related Brother International Innov-is NQ1600E Manual Pages
Operation Manual - Page 8
...accessories 5 Optional accessories 6
Turning the Machine On/Off 7
Turning on the machine 8 Turning off the machine 8 Select machine setting for the first time 8
LCD... frame 30 Embroidering small fabrics or fabric edges 32
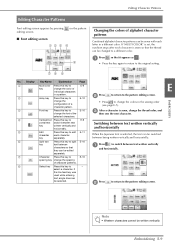
Attaching the Embroidery Frame 33 Selecting... 15 Embroidering linked characters 16
Embroidery Applications 18
Sewing embroidery patterns which use appliqu 18 Using a frame...
Operation Manual - Page 14

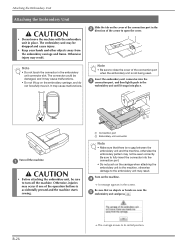
... for operation keys" on the LCD to the machine may become tangled or damage to perform operations. Note
• The operation keys of this key to sew embroidery.
7 Back key
Press to return to raise...
a
a
1 "Start/Stop" button
Press the "Start/Stop" button to the fabric.
Orange:
The machine is winding the bobbin thread, or the bobbin winder shaft is moved to the right side.
2 Needle ...
Operation Manual - Page 25
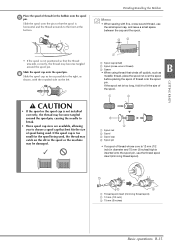
...and leave a small space between the cap and the spool. Winding/Installing the Bobbin
Memo
• When sewing with the rounded side on the slit in diameter and 75 mm (3 inches) high is not installed ... onto the spool pin. If the spool cap is 12 mm (1/2 inch) in the spool or the machine may become tangled around the spool pin, causing the needle to break.
• Three spool cap sizes ...
Operation Manual - Page 33
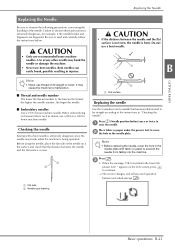
...needles. When embroidering on the LCD screen, press to a raise the needle. Checking the needle
Sewing with fabric or paper to cover b the hole in "Checking the needle". Press (Needle position...the handling of any other needle may bend the needle or damage the machine.
• Never use recommended home machine needles. Replacing the Needle
Replacing the Needle
Be sure to automatically lower...
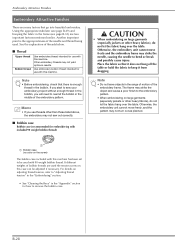
Operation Manual - Page 36
... may result. Note
• Be sure to close the cover of the arrow to turn off the machine. Otherwise, injuries may occur if one of the operation buttons is accidentally pressed and the machine starts sewing.
1 Connection port 2 Embroidery unit connector
Note
• Make sure that no gap between the embroidery unit and...
Operation Manual - Page 38
...that go into beautiful embroidery. If you start to sew your embroidery project without enough thread in the bobbin, you use with this machine. Memo
• If you will need to rewind... embroidery pattern.
Otherwise, the embroidery unit cannot move freely and the embroidery frame may not sew out correctly.
■ Bobbin case
Bobbin case (recommended for use threads other heavy fabrics),...
Operation Manual - Page 40
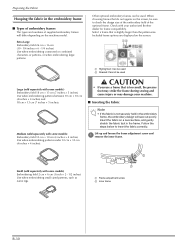
...inches). When choosing frames that is too small, the presser foot may strike the frame during sewing and cause injury or may damage your authorized Brother dealer for frame compatibility.
Lift-up and...
1 Highlighted: Can be used 2 Shaded: Cannot be used
Large (sold separately with your machine.
■ Inserting the Fabric
Note
• If the fabric is slightly larger than the pattern...
Operation Manual - Page 43

...the frame-securing lever is not lowered, the following message appears.
You cannot start sewing until you . B
1 Frame-securing lever 2 Carriage
Align the embroidery frame guide ...bobbin thread.
c
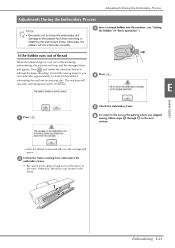
Basic operations B-33 b
Lower the frame-securing lever to be level with the right edge c of the embroidery frame holder.
b
1 Arrow mark
Pull the embroidery frame toward you lower the frame...
Operation Manual - Page 46
... can try embroidering.
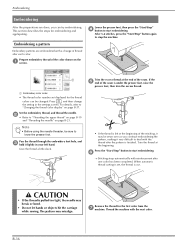
This section describes the steps for the first color from the g machine. Prepare embroidery thread of the color shown on page B-37.
Set the embroidery thread,... pattern may break or bend.
• Do not let hands or objects hit the carriage while sewing. f
Stitching stops automatically with the next color. Remove the thread for embroidering and appliqu...
Operation Manual - Page 57
...be sewn with each character
key
separately.
6
Split text Press this key to change then sew the next character.
b Press
to return to the pattern editing screen.
• Press to edit E-11
character ... by pressing editing screen.
select a character.
If "MULTI COLOR" is set, the machine stops after each character is sewn, change the colors in a different color.
Operation Manual - Page 63
...to enter the
key
embroidery screen.
4
Memory key Press this key to save
patterns to the machine's
memory or USB flash drive.
5
Trial key
Press this key to move the
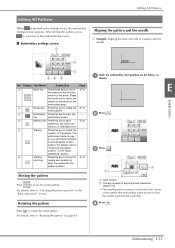
point key... screen, the embroidery settings screen appears. Editing All Patterns
Editing All Patterns
When is enough space to sew
pattern.
For details, refer to check the
position of a pattern and the needle
2
3 65...
Operation Manual - Page 66
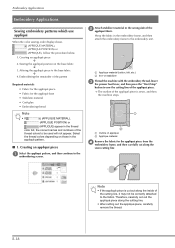
... frame to the embroidery unit.
1 Applique material (cotton, felt, etc.) 2 Iron-on stabilizer
c
Thread the the presser
machine with the embroidery foot lever, and then press the
thread, lower "Start/Stop"
button to sew the cutting line of the appliqué piece.
The outline of the appliqué piece is sewn...
Operation Manual - Page 67
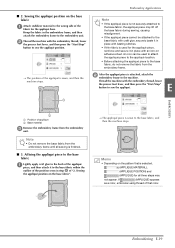
... unit. b
After the appliqué embroidery frame
piece is finished.
■ 3. attach
the
Thread the machine with basting stitches.
• If thin fabric is used for all three steps may lift off the base fabric during sewing, causing misalignment.
• If the appliqué piece cannot be used to attach the appliqu...
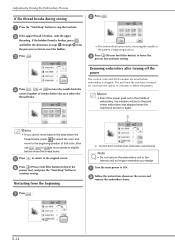
Operation Manual - Page 71
...
section.
After the thread is automatically cut, the carriage will stop and the message below to run out of thread during embroidering, the machine will stop after sewing approximately 10 stitches.
the Bobbin" of "Basic operations".)
(see
"Setting
If the bobbin runs out of thread
When the bobbin begins to
rethread...
Operation Manual - Page 72
... Process
If the thread breaks during sewing
b Press . b If the upper thread is broken, press
and follow the directions in the middle of embroidery, the machine returns to the beginning position of... saved when embroidery is turned on remove the embroidery frame.
a Turn the main power to
continue sewing.
to
lower
the
d Press
,
, or
to move the needle back the
correct number of ...
Operation Manual - Page 74
... Increase the thread tension slightly, and begin sewing again.
b
Press tension
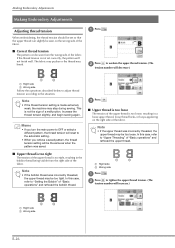
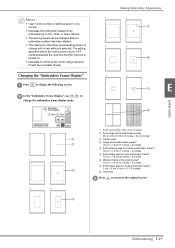
to the situation. If the thread tension is made extremely weak, the machine may break. b Press to weaken the...side of the fabric. The fabric may pucker or the thread may stop during sewing. Making Embroidery Adjustments
Making Embroidery Adjustments
Adjusting thread tension
When embroidering, the thread ...
Operation Manual - Page 76
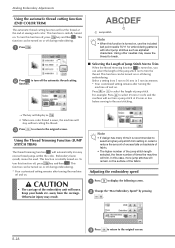
... jump stitches such as
• When one color thread is sewn, the machine will cut the thread at the end of sewing each color. to turn off the automatic thread
cutting
1 Jump stitch
Note
...the "Max Embroidery Speed" by pressing /. For example: Press to select 25 mm (1 inch) and the machine will not trim a jump stitch of Jump Stitch Not to the next stitching.
The key will display...
Operation Manual - Page 77
...4 Embroidering area for border embroidery frame*
18 cm × 10 cm (7 inches × 4 inches)
5 Embroidery area for quilt embroidery frame*
15 cm × 15 cm (6 inches × 6 inches)
6 Medium frame embroidering area*
10 cm ×...to OFF remains selected the next time that the machine is turned on thin, thick, or heavy fabrics.
• The sewing speed can be changed after an embroidery pattern ...
Operation Manual - Page 94

...broken or not threaded correctly, and the "Start/Stop" button, etc. Turn the machine off the
Since any of the characters.
The thread tension is incorrect. Fabric is...
Symptom
Probable Cause
Remedy
Reference
Embroidery pattern Fabric outside the frame edges interferes with
does not sew out the sewing arm, so the embroidery unit cannot
correctly.
This message appears ...
Operation Manual - Page 98
... pattern edit E-5
L
LCD B-4 LCD messages A-10 LCD operation B-9 LCD screen
cleaning A-2
M
Machine surface cleaning A-2 Main power switch B-2 Maintenance A-2 Manual needle threading B-22 Mirror image key E-7 ...sizes & uses B-23
Needle bar thread guide B-3 Needle plate B-3
A-14 E-28 edges or corners B-32 restarting from the beginning E-24 resuming embroidery after turning off the power...
Similar Questions

Why Is My Machine Pulling Bobbin Thread Around The Edges?
I have cleaned everything, pulled it all apart, cleaned it all out, adjusted the bobbin tension scre...
I have cleaned everything, pulled it all apart, cleaned it all out, adjusted the bobbin tension scre...
(Posted by schulerfam 9 years ago)

What Accessories Can Be Used With A Sc9500 Sewing/quilting Machine
(Posted by TRAPStuli 9 years ago)

Brother Ls 2000 Sewing Machine Price
I Want To Know Above Sewing Machine Price In Indian Rupees,please Anser Me Imediately
I Want To Know Above Sewing Machine Price In Indian Rupees,please Anser Me Imediately
(Posted by iladave84503 10 years ago)

Where To Buy Bobbins For My Sc9500 Sewing & Quilting Machine?
I need to know how to purchase bobbins for my sc9500 sewing & quilting machine and the price of ...
I need to know how to purchase bobbins for my sc9500 sewing & quilting machine and the price of ...
(Posted by beverlyandjohn18 11 years ago)

Brother Innovis 4000d Lcd Screen Would Not Display? Any Ideas???
the machine bulb comes on so i know there is power to the machine, but the lcd screen displays nothi...
the machine bulb comes on so i know there is power to the machine, but the lcd screen displays nothi...
(Posted by jbcarney3 11 years ago)