Bosch WTMC5321US Support Question
Bosch WTMC5321US Support Question
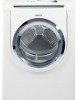
Find answers below for this question about Bosch WTMC5321US - 27" Electric Dryer 500 Series.Need a Bosch WTMC5321US manual? We have 3 online manuals for this item!
Question posted by andeslay1 on August 21st, 2012
Error Code E01
this unit star working and within two minuts or less the unit display E01
Current Answers
Related Bosch WTMC5321US Manual Pages
Pedestal Installation Instructions - Page 3

...Figure 2
q Remove the four transportation bolt hole covers on the back of the unit. Figure 3 q Insert the bolt assemblies. This aligns the bolt assembly so the... avoid sliding it is all four assemblies going counterclockwise.
Preparing Your Existing Appliance
1. For dryers go directly to pedestal installation. 2. Preparing Your Appliance
Existing Appliance - The transportation bolts ...
Pedestal Installation Instructions - Page 5

... only, so the appliance can be removed before using the appliance. After all the way from the unit.
If the appliance slides, it to 1/2 turn (see Figure 11).
Figure 13 Step 7 below ...fit up against the floor. Loosely thread all four bolts before tightening any future transport (e.g. For dryers go directly to washers. q Loosen all four bolts with the appliance and pedestal housings. q...
Pedestal Installation Instructions - Page 8

...United States or Canada*. Warranty Service Warranty service is null and void. Warranty Restriction If the Pedestal is subject to the Operating, Care and Installation Instructions" that came with the washer or dryer...from state to state or province to the instructions provided in the washer or dryer Operating, Care and Installation Instructions", supplier will repair or replace any other ...
Installation and Use & Care (all languages) - Page 2

...
Panel 11
Summary of instructions 12
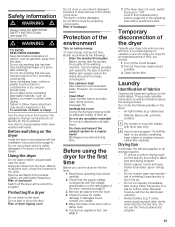
Safety information 13
Before switching on the dryer 13
Using the dryer 13
Protecting the dryer 13
Protection of the environment 13
Before using the dryer for the first time 13
Temporary disconnection of the dryer 13
Laundry 13
Identification of fabrics 13
Drying tips 13
Program selection 14
Automatic...
Installation and Use & Care (all languages) - Page 3
... explode.
3. ATTENTION
ATTENTION - Read all laundry chemicals and aids in full working condition. Do not tamper with automatic drum... when using the dryer.
d IMPORTANT SAFETY INSTRUCTIONS..dd
d WARNING d
To reduce the risk of fire, electric shock, serious injury... rotating.
7. Timed cycles 20, 40 and 60 minutes
Each dryer which may occur as vegetable oil, cooking oil, petroleum...
Installation and Use & Care (all languages) - Page 4
... floor damage and mold growth, do not cover all local codes and ordinances.
GROUNDING INSTRUCTIONS
This appliance must only be conveyed with
the National Electric Code, ANSI/NFPA70 ć latest edition/State and Municipal codes and/or local codes. - Items contaminated with the appliance.
The dryer must be reused.
In Canada, in your dealer, distributor, service...
Installation and Use & Care (all languages) - Page 5

...dryer is visibly damaged. door) ć due to back. Installation location
d WARNING d
Do not install the dryer: - Additional distances reduce noise transmission.
-
Dimension
Weight
a
27...dryer door is delivered with
c
37.2" (945 mm) packaging
d
19.7" (500 mm)/ 143 lbs
angle
170 - 180°
(64 kg)
If installing the dryer...as a complete unit. Do not lift it by...
Installation and Use & Care (all languages) - Page 6
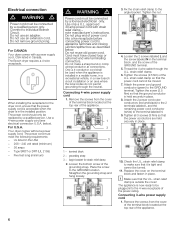
... held securely in a new branch circuit installation or an area where the local codes do not permit grounding through the U.L. strain relief clamp to individual Branch Circuit....the terminal block located at connections. Your dryer comes without a power supply cord. i Make sure that the power cord cannot be connected by a qualified person. Electrical connection
d WARNING d
Power cord must...
Installation and Use & Care (all languages) - Page 7
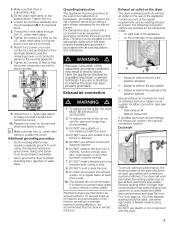
...will work best when the venting system has as few air flow restrictions as to the optional connection location. For Canada the dryer comes with this dryer.
7 DO NOT exhaust the dryer into...)
Special exhaust air connections must terminate in the terminal block.
5. Your dryer will reduce the risk of electric shock by a qualified electrician or service technician if you are possible for...
Installation and Use & Care (all languages) - Page 8
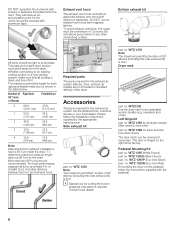
...appropriate manufacturer! Required parts The parts required for the exhaust air system can be obtained from the dryer. Bottom exhaust kit
All joints should be a minimum of 12 inches (30 cm) above ...ground level or any other obstructing surface. The male end of the dryer. Accessories
The parts required for the exhaust air system (elbows, lines, exhaust air outlets) are ...
Installation and Use & Care (all languages) - Page 9
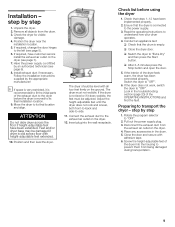
... frontĆtoĆback and sideĆto its final location and align.
q Switch the dryer to "OFF".
q After 3-5 minutes press the Stop button and open the door.
5. If the dryer does not work, switch the dryer to "Extra Dry" and then press the Start button. Disconnect the exhaust duct from
the exhaust air...
Installation and Use & Care (all languages) - Page 10
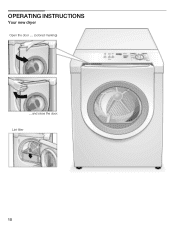
OPERATING INSTRUCTIONS
Your new dryer
Open the door .... (colored marking)
....and close the door. Lint filter
10
Installation and Use & Care (all languages) - Page 11
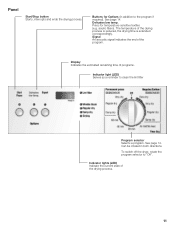
acrylic fibers). Display Indicates the estimated remaining time of the drying process.
11 Signal An acoustic signal indicates the end of the drying process is reduced, the drying time is extended correspondingly. See page 14. Panel
Start/Stop button Starts, interrupts and ends the drying process.
To switch off the dryer, rotate the...
Installation and Use & Care (all languages) - Page 12
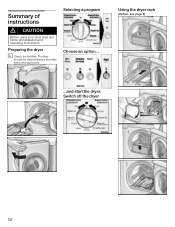
Using the dryer rack
(Option, see page 8)
...and start the dryer. Preparing the dryer
i Check the lint filter. The filter
should be cleaned before and after every drying process.
Switch off the dryer
12 Selecting a program Choose an option... Summary of instructions d CAUTION
Before using your dryer read and follow all installation and operating instructions.
Installation and Use & Care (all languages) - Page 13
... flammable on it (even after washing). Using the dryer
Do not leave children unsupervised near the dryer. Do not lean or sit on the dryer.
Before drying, spin the laundry thoroughly in the dryer: - Blockages may result in clothes while drying. If the dryer does not work, switch the dryer to dry in the troubleshooting section (page 20...
Installation and Use & Care (all languages) - Page 14
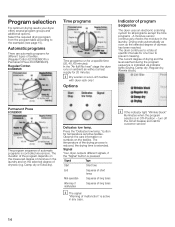
...). Damp dry or Extra dry). Observe the care information or symbols on ambient air without a heat supply for 20 minutes. Signal Your dryer outputs different signals, if the "Signal" button is in the laundry. Select the required drying program from the program table according to prevent creasing. Automatic programs
There are automatic programs...
Installation and Use & Care (all languages) - Page 18
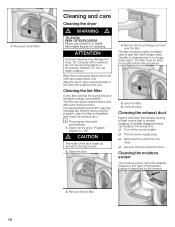
... the moisture sensor
The moisture sensor has to prevent clogging. If a warning signal and an E01 warning message are emitted during the drying process.
2. d CAUTION
The inside of the door... each drying process. A partially clogged exhaust can lengthen the drying time. q Turn off the dryer.
Do not use scouring agents or allĆpurpose cleaners.
The filter is deposited on the ...
Installation and Use & Care (all languages) - Page 20
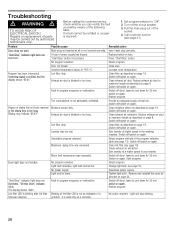
... dirty. Exhaust air duct is emitted and the display shows E:01". Replace/switch on page 18. Increase room temperature.
Degree of power supply has tripped. Start/Stop" button not pressed. Switch off dryer, leave to cool down for 30 min, switch on again.
Spin laundry at all or not inserted correctly. No program...
Installation and Use & Care (all languages) - Page 21
... center. You will usually correct the problem.
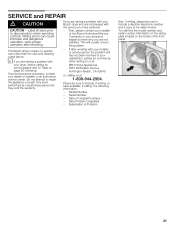
- Wiring errors can cause improper and dangerous operation. The Bosch dryers require no special care other than the care and cleaning noted...you are having a problem with the service you have available, if calling, the following . Any work performed by either writing to include, if writing, or have received: - Date Problem Originated - Model...
Installation and Use & Care (all languages) - Page 22
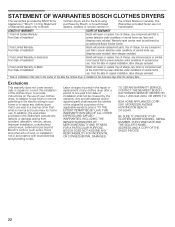
...electrical and plumbing codes. Exclusions
This warranty does not cover service calls or repairs to correct the installation of the clothes dryer...electric wiring in your home or to the first using purchaser by Bosch or its authorized dealers, retailers or service centers in
the United States or Canada. Labor charges incurred in the repair or replacement of any clothes dryer... service work, external...
Similar Questions

Error Code E03 Displayed On Screen.
A Day Ago, Have Received An Error E-03 On Display. My Wife Cleaned Out The Lint And Hasnt Used The D...
A Day Ago, Have Received An Error E-03 On Display. My Wife Cleaned Out The Lint And Hasnt Used The D...
(Posted by carollor13 8 years ago)

Bosch Nexxt 500 Series Dryer Won't Start
(Posted by Carldelt 10 years ago)

Bosch 500 Series Dryer
where is the reset switch located on the 500 series dryer?
where is the reset switch located on the 500 series dryer?
(Posted by lyndabland 10 years ago)

What Does The Error Code E01 Mean
(Posted by pamz 12 years ago)

Wtmc3321us 500 Series Dryer
My dryer worked yesterday and today when I put a load in it only puts out cold air, not hot. I have ...
My dryer worked yesterday and today when I put a load in it only puts out cold air, not hot. I have ...
(Posted by billywhichway 12 years ago)