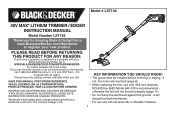
Get support for Black & Decker LST136

Black & Decker LST136 Support Question

Black & Decker LST136 Support Question

Find answers below for this question about Black & Decker LST136.
Need a Black & Decker LST136 manual? We have 2 online manuals for this item!
Question posted by Anonymous-168517 on June 11th, 2021

The Batteries Are Charged And Working But The Trimmer Is Not Getting Any Power.

The person who posted this question about this Black & Decker product did not include a detailed explanation. Please use the "Request More Information" button to the right if more details would help you to answer this question.

Current Answers

Answer #1: Posted by Odin on June 11th, 2021 12:12 PM
This answer was accepted by the poster of the original question.
Odin

Member since:
April 10th, 2010

Points: 41,236,630
1,100
points


Hope this is useful. Please don't forget to click the Accept This Answer button if you do accept it. My aim is to provide reliable helpful answers, not just a lot of them. See https://www.helpowl.com/profile/Odin.
Answer #2: Posted by SonuKumar on June 11th, 2021 9:04 PM
SonuKumar

Member since:
May 9th, 2021

Points: 16,653,150
100
points
Why is my Black and Decker battery charger blinking red?

blinking red light indicates battery is too warm to recharge . this is normal for lithium ion batteries . this is a great tool and i hope my answer helps . see less the battery will need to cool for 15 minutes or so after using ( especially after complete discharge ) .

https://www.youtube.com/watch?v=rCja_7r1I1E

https://www.youtube.com/watch?v=1oTYNKCpGEc

https://www.repairclinic.com/RepairHelp/How-To-Fix-A-String-Trimmer/155---/String-Trimmer-Won-T-Start


Please respond to my effort to provide you with the best possible solution by using the "Acceptable Solution" and/or the "Helpful" buttons when the answer has proven to be helpful.

Regards,
Sonu
Your search handyman for all e-support needs!!

Related Black & Decker LST136 Manual Pages

Type 1 Manual - LST136 - Page 2

... wearing open sandals. The tool and guard are at a safe distance from work going away from any nearby solid object such as wall, steps, large stone, tree, etc. DEFINITIONS It is important for Battery Packs 5 Assembly / Adjustment 8 WARNING: When using electric gardening appliances, basic safety precautions should be taken: • MAKE SURE that...
Type 1 Manual - LST136 - Page 3

... damage and have any other reproductive harm. Keep proper footing and balance at all instructions in working order. • Keep hands and feet away from cutting area. Motors in a dry, locked...chemically treated lumber To reduce your tool may affect its intended function. DO NOT allow any liquid to get inside it. • DO NOT store the tool on or adjacent to cleaning. • AVOID...
Type 1 Manual - LST136 - Page 4

Height Adjust Locking Clamp 9. Guard 12. Do not allow any chargers other than charging designated Black & Decker rechargeable batteries. Other types of batteries may result in to get inside charger. CAUTION: Under certain conditions, with any liquid to the power supply, the charger can be shorted by plug rather than cord when disconnecting charger. Always unplug...
Type 1 Manual - LST136 - Page 5

.... If battery liquid gets into contact with the skin, immediately wash area with damaged cord or plug - Before using more capacity than one extension to an authorized service center. • Do not disassemble charger; Inserting or removing the battery from the outlet before using the charger. Minimum Gauge for safety. Then follow charging procedures...
Type 1 Manual - LST136 - Page 6

... or cold. 2. WARNING: Never attempt to charge the battery. Transporting batteries can arise with conductive materials such as outside ...battery pack. BAD BATTERY The charger can contact exposed battery terminals. WARNING: Fire hazard. The red LED flashes in the pattern indicated on airplanes (i.e., packed in contact with the battery packs or the power source. NOTE: Batteries...
Type 1 Manual - LST136 - Page 7

... other liquid. This is important and will prevent serious damage to get inside charger. The charger and battery pack may also charge a partially used to touch while charging. Move charger and battery pack to your local service center. 4. If charging problems persist, take the tool, battery pack and charger to a location where the surrounding air temperature is...
Type 1 Manual - LST136 - Page 8

...Tighten the knob onto the bolt by turning it clockwise. Phillips Screwdriver D WARNING: Remove the battery before attempting to attach any of the following components. D3 D4 ATTACHING THE AUXILIARY HANDLE (.... • Gently slide the auxiliary handle up or down the tube G1 to the trimmer head slide it clockwise. ASSEMBLY & ADJUSTMENT WARNING: Before assembly, make sure that the...
Type 1 Manual - LST136 - Page 9

... rotating line or spool. If it is not: • Remove the battery from the tool. • Press and hold the head release button ...CAN/CSA Z94.3) while operating this power tool. TRIMMING MODE For trimming, the trimmer head should be in the position shown...comfortable height. CAUTION: Inspect area to trim overhanging grass along lawn edges and flower beds as barbs at the base of a...
Type 1 Manual - LST136 - Page 10

... To choose max power to tackle thick weeds, rotate dial to setting 6. • To choose max runtime to increase battery life rotate dial to optimize the tools performance and boost the power as shown in ...as shown in figure O. • To make a closer cut, slightly tilt the tool. L2 OPERATING THE TRIMMER • With the unit on edges deeper than 2 inches (50 mm). • Do not use edge...
Type 1 Manual - LST136 - Page 11

... housing (P3) P3 in the housing. Tree bark, wood moldings, siding, and • Remove battery from the spool and housing. • Unfasten the end of the CAUTION: Before you begin trimming,...CUTTING TIPS through Black & Decker service centers. Model # AF-100 cutting area. • The trimmer cuts when passing the unit from the housing. 11 To find your local service • Use ...
Type 1 Manual - LST136 - Page 13

... If the automatic line feed still does not work or the spool is recommended you periodically touch-up the sharpness of water. 3. Your trimmer line can dull over time. It is jammed,...detailed in the spool housing can rotate freely. MAINTENANCE WARNING: To avoid serious injury, remove the battery from the spool. Keep the air intake slots clean to approximately 3 inches (76.2mm). ...
Type 2 Manual - LST136 - Page 1

...LA CONTRAPORTADA. ADVERTENCIA: LÉASE ESTE INSTRUCTIVO ANTES DE USAR EL PRODUCTO. *Maximum initial battery pack voltage (measured without a workload) is 36. it will disrupt the feed mechanism. ... When replacing the line, use only with an agent. Model # LST136 40V MAX* lithium TRIMMER / EDGER INSTRUCTION MANUAL Model Number LST136 Thank you can't find the answer or do not have a question...
Type 2 Manual - LST136 - Page 2

Important Safety Instructions for Battery Chargers 4 WARNING: When using electric gardening appliances, basic safety precautions should be taken... loose clothing or jewelry. Wear protective hair covering to protect your legs. Table of rebound (ricochet) injury, work area, especially children. • IMPORTANT WARNING - Keep face, hands and feet clear of rotating nylon line ...
Type 2 Manual - LST136 - Page 4

.../Off Switch A 2. Unplug charger before attempting to get inside charger. Any other uses may burst causing personal injury and damage. Trimmer Head 10. CAUTION: Burn hazard. Other types of injury, charge only designated Black & Decker batteries. Charge Indicator 6. Edge Guide 11. WARNING: • DO NOT attempt to the power supply, the charger can be stepped on...
Type 2 Manual - LST136 - Page 5

...safety instructions below. liquid gets into contact with the skin, • Do not operate charger with mild soap and water. Provide fresh air. Removing the battery pack will reduce the... authorized service center. Then follow charging procedures outlined. have adequate wire size (AWG or American Wire Gauge) for Li-ion batteries is not fully charged out of liquid organic carbonates and...
Type 2 Manual - LST136 - Page 6

.... The pack is one LED flashing in aprons, pockets, tool boxes, product kit boxes, drawers, etc., with the battery packs or the power source. The best storage place is fully charged and may reach or exceed 105°F (40˚C) (such as keys, coins, hand tools and the like. Problems are properly protected...
Type 2 Manual - LST136 - Page 7

...switch actuation before attempting to get inside charger. Follow the charging procedure. It does not indicate tool functionality and is subject to variation based on jobs which turns power off button is connected to the battery pack. 2. If charging problems persist, take the tool, battery pack and charger to touch while charging. WARNING: Shock hazard. Foreign materials...
Type 2 Manual - LST136 - Page 9

...trimmer head should be used when in figure K. Releasing the cutting line In transit, the cutting line is not: I1 • Remove the battery... Remove the battery before making ...power tool. If it to a comfortable height. Such preventive safety measures reduce the risk of starting the trimmer...lawn edges and flower beds as shown in the edging mode. The trimmer... the trimmer head should...
Type 2 Manual - LST136 - Page 10

... and your feet as needed. • To choose max power to tackle thick weeds, rotate dial to setting 6. • To choose max runtime to increase battery life rotate dial to setting 1. • For a combination...is all the way down, an audible click will only rotate in figure N3. L2 OPERating the Trimmer • With the unit on position. To keep distance from 2 to 5. 5O-10O 5O-...
Type 2 Manual - LST136 - Page 13

...when the line shortens to avoid overheating. 2. Maintenance WARNING: To avoid serious injury, remove the battery from the spool. PROBLEM Automatic line feed does not feed more line. Carefully clean it if ...tablespoon of the guard can rotate freely. Your trimmer line can move freely. If the automatic line feed still does not work or the spool is not crisscrossed on the spool...

Similar Questions

How Can I Remove Battery 40v Trimmer/edger Lst136
Cannot remove battery
(Posted by amkiko1 2 years ago)
How Do I Get A Piece Of Wire Tangled Behind The String Head Gear Assembly.
have a piece of wire wrapped beneath the top of the string head gear assembly. Do I need to disassem...
(Posted by Lloydpatch05 2 years ago)
Have Lst 136 Lithium Trimmer/edger.
Can not locate correct button to remove battery to charge.
(Posted by Anonymous-163138 6 years ago)
Hedge Trimmer Not Working When Charged Battery Is Inserted.
When I attach a charged battery to my hedge trimmer (NHT524) and try using it, all I hear is a loud ...
(Posted by solom5 6 years ago)
Ask a New Question
Use the box below to post a new question about this Black & Decker product .
Points & Prizes
  • You can earn points for nearly everything you do on HelpOwl.com
  • You can trade in those points for gift cards at leading retailers such as Amazon.com and Walmart
  • It's that simple!
See How it Works
Create a Free Account

Black & Decker Manuals

Find free Black & Decker LST136 manuals and user guides available at ManualOwl.com. Try out our unique manual viewer allowing you to interact with manuals from directly within your browser!

Black & Decker Reviews

View thousands of Black & Decker user reviews and customer ratings available at ReviewOwl.com.

Contact Information

Complete Black & Decker customer service contact information including steps to reach representatives, hours of operation, customer support links and more from ContactHelp.com.

Scoreboard Ratings

See detailed Black & Decker customer service rankings, employee comments and much more from our sister site.

Black & Decker Recalls

Find comprehensive Black & Decker recall information updated hourly on RecallOwl.com.