Get support for Bernina Bernette 740E

Bernina Bernette 740E Support Question

Bernina Bernette 740E Support Question

Find answers below for this question about Bernina Bernette 740E.
Need a Bernina Bernette 740E manual? We have 1 online manual for this item!
Question posted by eddieccptrdir on April 10th, 2012

Where Can I Find A Knob Wheel That Goes On The Top Right For The Sewing Machine?

The person who posted this question about this Bernina product did not include a detailed explanation. Please use the "Request More Information" button to the right if more details would help you to answer this question.

Current Answers

Answer #1: Posted by TJMBUSA on April 10th, 2012 8:10 PM
TJMBUSA

Member since:
September 4th, 2010

Points: 9,220
100
points
ALMOST ANY SEWING CENTER SHOULD BE ABLE TO HELP YOU,SINCE YOU DIDN'T MENTION THE BRAND ITS A LITTLE DIFFICULT TO ANSWER,however there are many sewing machine repair stores.

Related Bernina Bernette 740E Manual Pages

Manual - Page 3

l'intatet du progrilis technique. L 1992 Fritz Gegauf Ltd. Bernina Sewing Machines CH43266 Steckbern (Switzerland) 1992 Fritz Gegaut SA Faboque de machines a coudre Bernina CH-8266 Steckborn (Suisse) 1992 Fritz Gegauf AG Bernina Naaimachinefabtiek CH-8266 Steckbom (Zwitserland) We reserve the right to make technical changes in Sous reserve des modifications apponees dans Veranderir9en in het...
Manual - Page 4

... 26 26 24 38,40 18 Neatening edges whole . changing Buttons sewing on (Model 740E onlyl Buttonholes Colour code green and blue Colour code red and yellow COnneding the machine wrong tool 'Model 740E only) Deming Decorative stitches (Model 740E Only/ Details ol the machine Feed dog - tension Bobbin - upper thread 34 Tension , lower thread.. 26...
Manual - Page 5

..., then remove plug from outlet. 15. A double-insulated product is required around the sewing machine needle. 6. or dropped into any air openings black. Keep fingers away from all controls...To reduce the risk of the system. Always use bent needles. 8. Always unplug sewing machine from the electric outlet immediately after using and before using an electrical appliance. Servicing of...
Manual - Page 7

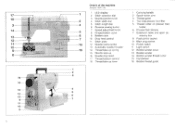
... 15 12 14 13 9 11 10 6 isaral ni•• 1 2 4 5 -6 7 -15 16 1 2 3 Details of the machine IA0F.7301 1 LED display 2 Stitch selection dial 3 Needle position knob 4 Stitch width dial 5 Stitch length dial 6 Reverse sewing button 7 Speed adjustment knob 8 Hinged bobbin cover 9 Bobbin case I0 Drop feed control I I Stitch plate 12 Needle clamp screw 13...
Manual - Page 11

... intended to the machine and Plug into the mains socket. lady useful for using with the speed con trot knob 'TY. (3) If it still does not fit, contact a qualified electrician to 50%. The speed control function is ideal for beginners. ► minimum ►► maximum Sewing light IModel 740E) Press power switch 'A". sewing corners. terns...
Manual - Page 12

...in a Wadied outlet only one blade wider than the other). Foot control The speeo 01 the machine can be regulated by applying pressure to install the proper outlet Do not modify the plug in ...ea the fisk of electric shock this plug is for using with Sewing Machine Model 715 and 730A 16 to the machine and plug 'B- Sewing light Modces 7.5. 733: If the plug does not fit fully in any way...
Manual - Page 14

... layers or thick fabrics, the presser loot can be in the fabric. Press13". r • • A B 1 • a 3 20 Automatic needle stop (WOW 740E orgy) When the machine stops. sewing corners. the feed-dog should be raised a second stage for needle down - darning or free-hand embroidery. the needle stops at its highest position. (1) Certain...
Manual - Page 25

... stitches. Release the button and the machine will sew forwards again. (1) Removing the work Turn the handwheel fontrardsto bring the thread take-up lever to its highest position, raise the presser foot ...Cutting the thread: Hold the threads behind the presser foot with both hands, guide them to the slit 'A' and press down. 42 I 41 1 2 Reverse sewing At the end of the seam, press the Reverse...
Manual - Page 31

... can be varied by adjusting the stitch length. Set the machine as illustrated. (1) Place patch in position. it is advisable to use a piece of fabric and damage, sew between 3 and 5 rows. (3) 2 3 54 Depending on lace and elastic, darning, mending, reinforcing edges. First sew over the centre and then overlap onboth sides. 00000 666466...
Manual - Page 33

t0 E for fine fabrics C for thick fabrics Both stitches aro suitable for sewing and neatening edges and visible • hems in ono operation. When nea- cs 540,AM:: 58 tening, the needle ...0 0 0 0 0 9 1 t 0 0 00* OIM I1till UD 11111012 II • r 7 1 1 41 2 1-1 Overlock (IOUS 230) Stretch warlock (Model 2301 Seams, neatening edges, visible hems. 0 Set machine as illustrated.
Manual - Page 34

... 0 0 0 fa 0 e • 9 I I 6 4 3 21 rTh 1 715/730 740 E I Stitch selection Triple straight stitch (Models 733740E on y) For hardwearing seams. Turn the stitch length dial (3) to ' . The machine sews two stitches forwards and one stitch backwards. This given triple reinforcement. Triple zig-zag is Suitable for firm fabrics like denim, corduroy. Turn the stitch...
Manual - Page 35

I rr to • o Stitch selection Triple straight stitch llkdel 715 only) For hardwearing seams. Set the machine as denim, corduroy. etc. 62 The machine sews two stitches forward and one stitch backwards. Triple zig-zag tiloded ris only) For hardwearing seams. hems and decorative seams. Triple zig-zag is ideal for firm fabrics such as illustrated. This gives triple reinforcement.
Manual - Page 36

... 0 000 000 00000 24132221 la le • IT • 16 14 MTh 1-10-, 0 • O 00000 • 0 }MUN I ) Sew at 1 cm (7.") from the fabric edge and Him the surplus fabric. (2J • 2 etc. Set the machine as for woven fabrics. (I ▪ 1 3 II 4 321 Smocking stitch Models raoiios wry) Seams, hems, T•shirts, underwear.
Manual - Page 38

... hems or decorative seams in StralCh fabrics. • Double arrow 7 lorty for Model 740E) For seams and hems. Tins stitch is suitable for sewing and neatening stretch fabrics and as Illustrated. Turn the stitch selection dial (1) until the red... HOZ/21N IS 0 II 5 14 131111•-lt-, 1 11 • • Practical stitches Set the machine as a decorative seam in thicker fabrics. 68
Manual - Page 42

...Our -e.. 1 O a 2 vc 3 76 000 . 00 00 t131§1i Buttonholes Set the machine as illustrated. 00000 nits 1413210 ao 00000000•0• of the pail lc and slide it lightly touches the... according to sew the buttonhole. Follow the sequence. 42) Position the button on the fool should sew over the gimp. Loosen the large screw t s" of ne s is now set for sewing perfectly even length...
Manual - Page 43

... firm nab• rics. fully along the edge of the fabric. Set the machine as illustrated with the wrong side uppermost. (2) Place the fabric under the foot. Turn thehandwheel forwardsbyhanduntil the needle swings fully to sew blind hems. Always make a sewing test first. 0 o 0 0 0 oineoe•nocioci 0 00 0 000 00 Milan 11 • Blind...
Manual - Page 45

... continue to sew. (2.3) To sew past the zip pull. lower the needle into the fabric, raise the presser loot and push the zip pull behind the presser foot. 0 000 2:122 24 ZIA II 21 0000 c QSOGO NOef61a Own 1 (t) 1 Sewing in zips Set the machine as illustrated. (It The zip foot can be inserted right a left...
Manual - Page 46

... that the needle goes cleanly into the lett hole of the button and sew. (3) For buttons with d holes, sew through the back two holes as illustrated.Lower the teed dog. Turn the hand • wheel to the button). and sew on buttons Imoce 140E ont, Set the machine as described. (3) 2 3 84 Needle position right (1) Position the work...
Manual - Page 47

... the back. Pell the thread slightly towards you and rower thepresser fool.Begin sewing, guiding the fabric into the scroll by about 3 mm (re") and Sew 4-5 stitches to the left (3) 2 3 86 At the beginning of the fabric. Set the machine as illustrated. (t) Neaten the edge of the hem, turn under the edge Twice...
Manual - Page 49

... hilly raised. Remove the hook race cover (4) and the hook (5) and clean with sewing machine oil. Important Fabric fluff and threads must always be disconnected from the mains socket. Turn... the handwheel until the needle is intretePosition Replace the hook (5). Your machine should be removed regularly. Open the hinged front cover and push the release lever upwards. ...

Similar Questions

Machine Not Working
my machine switches on and the light works, but when I push the pedal down nothing happens? is there...
(Posted by hubble29124 11 years ago)
Reverse Sewing
Should the 740E machine work in reverse?  How you you make it go in reverse?
(Posted by normrich 12 years ago)
My Sewing Machine Bernette 15 Stops Working
After 1 day using my Bernette 15 stops working - engine hoots but doesn't rotate spindle and hand wh...
(Posted by sgrayxx 12 years ago)
Ask a New Question
Use the box below to post a new question about this Bernina product .
Points & Prizes
  • You can earn points for nearly everything you do on HelpOwl.com
  • You can trade in those points for gift cards at leading retailers such as Amazon.com and Walmart
  • It's that simple!
See How it Works
Create a Free Account

Bernina Manuals

Find free Bernina Bernette 740E manuals and user guides available at ManualOwl.com. Try out our unique manual viewer allowing you to interact with manuals from directly within your browser!

Bernina Reviews

View thousands of Bernina user reviews and customer ratings available at ReviewOwl.com.

Contact Information

Complete Bernina customer service contact information including steps to reach representatives, hours of operation, customer support links and more from ContactHelp.com.

Scoreboard Ratings

See detailed Bernina customer service rankings, employee comments and much more from our sister site.