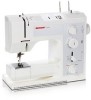
Bernina 1008 Support Question
Bernina 1008 Support Question
Find answers below for this question about Bernina 1008.Need a Bernina 1008 manual? We have 1 online manual for this item!
Question posted by pyoung on July 20th, 2013
My Stitch Length Adjuster Won't Move To A Long Stitch Position.
On my Bernina 1008, my stitch length adjuster won't move down to a longer stitch position. I live in a rural area and do not have easy access to a repair shop. Anything I can try DIY?
Current Answers
Related Bernina 1008 Manual Pages
Owners Manual - Page 4
... also use one -piece BERNINA® presser feet • Straight stitch throat plate available • Basting - maximum stitch length and loosened the needle tension helps in front of the needle are 5/8" from needle • Optional piecing guide attaches to thread the needle
Needle Positions Owner's manual pg. ____
• Five positions
Practical/Decorative Stitches Owner's manual pgs...
Owners Manual - Page 6
... fiber lengths are also left , giving better than polyester. • Rayon - Left twist -
the number of single strands twisted together to interlock firmly into a single ply. This will loosen. excellent for the hook point to form a single ply. To achieve quality stitches, a sewing machine needs three things: correct thread, correct size needle, and properly adjusted...
Owners Manual - Page 7

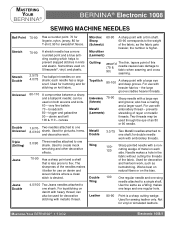
...inexpensive part in the groove to form a loop to assure stitch formation and avoid fabric damage Needle size - If it ...sewing project, three things must be considered:
Needle system - 130/705H Needle point - larger needle for your sewing projects and your sewing machine but is : Too small - Don't let false economy keep you from hook point; MASTERING YOUR BERNINA® 1/10/02
Electronic 1008...
Owners Manual - Page 8
... stitch is a sharp cutting wedge.
MASTERING YOUR BERNINA® 1/10/02
Electronic 1008/8 very fine batiste 70 - broadcloth 80 - Two needles attached to one 8.0/100 shank. The sharpness of the fabric; For use with embroidery thread - Metafil Double
3.0/75 Two Metafil needles attached to flex. MASTERING YOUR
BERNINA®
BERNINA® Electronic 1008
SEWING MACHINE NEEDLES...
Owners Manual - Page 11
... pg.____ • Place fabric pieces right sides together. • Select Straight Stitch #1;
Note: Loosening the top tension makes the stitches easier to 5mm • Baste a 5/8" seam along one edge of the fabric. adjust the length to remove. MASTERING YOUR
BERNINA®
BERNINA® Electronic 1008
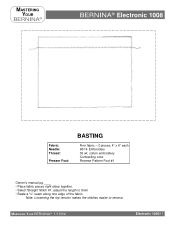
Fabric: Needle: Thread:
Presser Foot:
BASTING
Firm fabric - 2 pieces, 4" x 6" each 90...
Owners Manual - Page 12

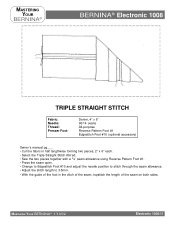
... of the foot in the ditch of the seam. • Select Triple Straight Stitch #9/red. • Move the needle position 1 place to the left (half left). • Sew the length of the seam. • Select the longest stitch length. • Move the needle position 2 places to the right (far right). • Start at the top of the...
Owners Manual - Page 14

... stitch length to satin stitch and the stitch width to 5.5mm. • Thread the bobbin thread through the hole in half to maximum. Then widen the stitch back to 3" x 6". Repeat until the stitching reaches the end of the fabric. • Position the fold of the fabric on the 3/8" line (on the right side of the stitch plate). • Sew...
Owners Manual - Page 18
... two pieces, 2" x 6" each. • Select the Triple Straight Stitch #9/red. • Sew the two pieces together with a 5/8" seam allowance using Reverse Pattern Foot #1. • Press the seam open. • Change to Edgestitch Foot #10 and adjust the needle position to stitch through the seam allowance. • Adjust the stitch length to 3.5mm.
• With the guide of the...
Owners Manual - Page 20
... pin of the fabric to the finished position.
stitch length and width can
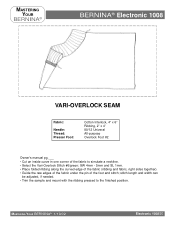
be adjusted, if needed. • Trim the sample and mount with the ribbing pressed to simulate a neckline. • Select the Vari-Overlock Stitch #6/green; MASTERING YOUR BERNINA® 1/10/02
Electronic 1008/20 MASTERING YOUR
BERNINA®
BERNINA® Electronic 1008
VARI-OVERLOCK SEAM
Fabric:
Needle: Thread...
Owners Manual - Page 27
MASTERING YOUR BERNINA® 1/10/02
Electronic 1008/27 MASTERING YOUR
BERNINA®
BERNINA® Electronic 1008
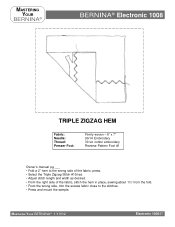
TRIPLE ZIGZAG HEM
Fabric: Needle: Thread: Presser Foot:
Firmly woven - 6" x 7" 90/14 Embroidery 30 wt. press. • Select the Triple Zigzag Stitch #10/red. • Adjust stitch length and width as desired. • From the right side of the fabric; cotton embroidery ...
Owners Manual - Page 29
...; Press and mount the sample. adjust length to 3mm. • Sew a 5/8" seam with buttonhole twist or cordonnet threads. It is also effective for topstitching with right sides together. • Press the seam to eliminate needle breakage. MASTERING YOUR BERNINA® 1/10/02
Electronic 1008/29
MASTERING YOUR
BERNINA®
BERNINA® Electronic 1008
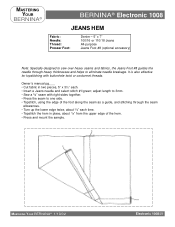
JEANS HEM
Fabric: Needle: Thread...
Owners Manual - Page 32
...length... - proper adhesion of iron-on stabilizers • Positioning: - using applique scissors • Height Compensation Tool...Adjustments • Testing: - seam sealant - with threads
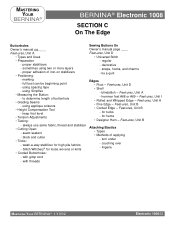
Sewing Buttons On Owner's manual page ____ Feet-ures, Unit D
• Universal Stitch - blindstitch - Feet-ures, Unit B • Corded Edge - lingerie
MASTERING YOUR BERNINA® 1/10/02
Electronic 1008...
Owners Manual - Page 34

... indicating
buttonhole length, making it easy to stitch a series of the older Automatic Buttonhole Feet #3A and #3C. Electronic 1008/34 MASTERING YOUR
BERNINA®
BERNINA® Electronic 1008
BUTTONHOLE FEET
...are available for machines with a light sensor that allows 9mm wide stitching. Works with models 135 PE/145 and 150-180. Works with any BERNINA® sewing machine. "C" indicates ...
Owners Manual - Page 36

...; Adjust stitch length to satin (0.5). • Position the foot over the first line and place the fold on the second line. • Cut one piece of the first bead and stop and touch quick reverse. • Sew the top bar tack. MASTERING YOUR BERNINA® 1/10/02
Electronic 1008/36 The fourth position sews the second bead, the fifth position sews...
Owners Manual - Page 38

.... • Adjust the stitch width if necessary. • Hold the thread tails as above. • Use a glue stick to position a button in half to the same
fabric. • Trim threads close and mount the sample. Use the Button Sew-On Foot #18 to sew on to sew.
MASTERING YOUR
BERNINA®
BERNINA® Electronic 1008
BUTTON SEW-ON STITCH
Fabric: Stabilizer...
Owners Manual - Page 40
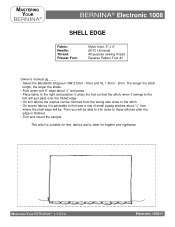
..., fabrics and is finished. • Trim and mount the sample. The longer the stitch
length, the larger the shells. • Fold under one 6" edge about ½" and press. • Place fabric to the right and position it under the foot so that the stitch, when it swings to the
left, will just pass over the...
Owners Manual - Page 43
MASTERING YOUR
BERNINA®
BERNINA® Electronic 1008
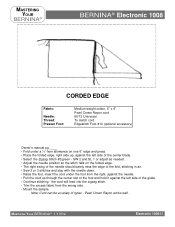
CORDED EDGE
Fabric:
Needle: Thread: Presser Foot:
Medium ...BERNINA® 1/10/02
Electronic 1008/43
SW 2 and SL 1 or adjust as needed. • Adjust the needle position so the stitch falls on the folded edge. • The right swing of the needle should barely miss the edge of the fold, stitching in air. • Sew 2 or 3 stitches...
Owners Manual - Page 45
MASTERING YOUR
BERNINA®
BERNINA® Electronic 1008
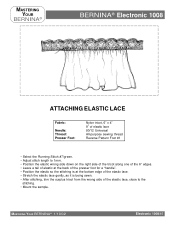
ATTACHING ELASTIC LACE
Fabric:
Needle: Thread: Presser Foot:
Nylon tricot, 6" x 4" 9" of elastic lace 80/12 Universal All-purpose sewing thread Reverse Pattern Foot #1
• Select the Running Stitch #7/green. • Adjust stitch length to 1mm. • Position the elastic wrong side down on the right side of the tricot along one ...
Owners Manual - Page 46

MASTERING YOUR BERNINA® 1/10/02
Electronic 1008/46
SW 2mm and SL 2mm. • Position the elastic on the wrong side of the fabric, along one 6" edge. ...the right side using Running
Stitch #7/green with a length of 1mm. • Adjust stitch length if elastic stretches out as it is the same procedure used to do a turned waistband, using wider elastic.
• Sew the elastic to the ...
Owners Manual - Page 55
... the Straight Stitch #1/green - The longer the stitch length, the deeper
the pleat. • Needle position is slightly beyond the needle. • Lower the foot and begin sewing. • If gathers are too deep, turn the
screw clockwise. if too shallow, turn the adjusting screw counter clockwise;
SL 1mm-5mm. MASTERING YOUR BERNINA® 1/10/02
Electronic 1008/55...
Similar Questions


Bernina 817 Needle Position Knob Won't Turn
My 817 zig zag knob turns but the inner needle position knob won't turn at all. Is there a trick to ...
My 817 zig zag knob turns but the inner needle position knob won't turn at all. Is there a trick to ...
(Posted by Anonymous-141034 9 years ago)

I Have A Bernina 1090s Sewing Machine. How You Turn Off The Button Stitch Settin
(Posted by frogg595 10 years ago)
How Can I Get A Replacement Stitch Plate For My Bernina 1260 Sewing Machine
My needle hit the switch plate in a thin section causing it to break and bend. now a section sticks ...
My needle hit the switch plate in a thin section causing it to break and bend. now a section sticks ...
(Posted by Damary312 11 years ago)

Stitch Length
stitches are a row of small and then a long one. How can one adjust stitch length And where on the m...
stitches are a row of small and then a long one. How can one adjust stitch length And where on the m...
(Posted by ginaflach13 12 years ago)