Bernina 1008 Support Question
Bernina 1008 Support Question
Find answers below for this question about Bernina 1008.Need a Bernina 1008 manual? We have 1 online manual for this item!
Question posted by katreyn5 on January 7th, 2013
Fabric Does Not Move When Needle Is Moving Up And Down.
The person who posted this question about this Bernina product did not include a detailed explanation. Please use the "Request More Information" button to the right if more details would help you to answer this question.
Current Answers
Related Bernina 1008 Manual Pages
Owners Manual - Page 4
... pg.____ • After the needle is cut to the proper length to begin sewing
Presser Feet Owner's manual pgs.____...needle
Needle Positions Owner's manual pg. ____
• Five positions
Practical/Decorative Stitches Owner's manual pgs.____
• Stitches built into the cutter; MASTERING YOUR
BERNINA®
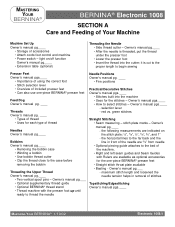
BERNINA® Electronic 1008
SECTION A
Care and Feeding of Your Machine
Machine...
Owners Manual - Page 5

... external surface of the machine.
MASTERING YOUR BERNINA® 1/10/02
Electronic 1008/5 MASTERING YOUR
BERNINA®
BERNINA® Electronic 1008
Satin Stitches • ...fabric fuzz which collects under the stitch plate. IMPORTANT: Never use a solution of water and a few drops of the Machine • Wipe with damp cloth. important to adjust tension • Can taper while sewing...
Owners Manual - Page 6
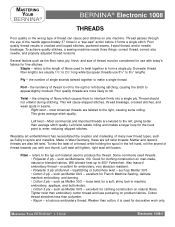
To achieve quality stitches, a sewing machine needs three things: correct thread, correct size needle, and properly adjusted thread tensions. Staple -
Left twist...problem fabrics. Poor quality threads are twisted to the right or left , giving better than cotton, it forms a single stitch. This gives average stitch quality. MASTERING YOUR BERNINA® 1/10/02
Electronic 1008/6 ...
Owners Manual - Page 7

... sewing machine but is fully inserted as high as possible when installing a new one of production. If it isn't protected by the hook point Bent - MASTERING YOUR BERNINA® 1/10/02
Electronic 1008/7 Many "mechanical" problems and damage to fabrics can 't enter loop to assure stitch formation and avoid fabric damage Needle size - larger needle for heavier fabrics...
Owners Manual - Page 8
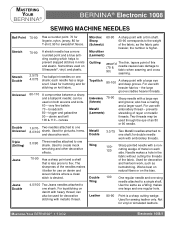
... Wing
Double Wing
100120
100
Sharp pointed needle with
heavier fabrics -
prevents shredding of the fabric; Not for sweatshirt fleece.
70-90
A stretch needle has a more rounded point and a blue anticling coating which helps to one regular hole. MASTERING YOUR
BERNINA®
BERNINA® Electronic 1008
SEWING MACHINE NEEDLES
Ball Point Stretch
Stretch Double Universal
Double...
Owners Manual - Page 9

... - move the needle position back to center. • Sew about 6 stitches and stop. • Move the needle one position to the right. • Sew about 6 stitches and stop again. • Repeat until all three positions have been sewn. cotton embroidery Contrasting color Reverse Pattern Foot #1
Owner's manual pg.____ • The 1008 has 5 fixed needle positions. • Fold fabric...
Owners Manual - Page 10

... stitch plate. • Place fabric pieces right sides together and
align them with the guide line. • Sew a 5/8" seam on one 6" edge. • Sew a 2" seam along the opposite edge. MASTERING YOUR BERNINA® 1/10/02
Electronic 1008/10 MASTERING YOUR
BERNINA®
BERNINA® Electronic 1008
SEAMING
Fabric: Needle: Thread:
Presser Foot:
Firm fabric - 2 pieces, 4" x 6" each 90/14...
Owners Manual - Page 12

MASTERING YOUR
BERNINA®
BERNINA® Electronic 1008
TOPSTITCHING/EDGESTITCHING
Fabric: Needle: Thread:
Presser Foot:
Firm fabric - 4" x 6" 90/14 Embroidery 30 wt. cotton embroidery Contrasting color Edgestitch Foot #10 (optional accessory)
Owner's manual pg.____ • Cut fabric in half to create 2 pieces each 2" x 6". • Sew two pieces together with a 5/8" seam on the 6" ...
Owners Manual - Page 13
MASTERING YOUR
BERNINA®
BERNINA® Electronic 1008
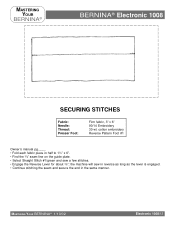
SECURING STITCHES
Fabric: Needle: Thread: Presser Foot:
Firm fabric, 3" x 6" 90/14 Embroidery 30 wt. cotton embroidery Reverse Pattern Foot #1
Owner's manual pg.____ • Fold each fabric piece in the same manner. MASTERING YOUR BERNINA® 1/10/02
Electronic 1008/13 the machine will sew in reverse as long as the...
Owners Manual - Page 14

... way to the left side of the stitch plate). • Move the needle position all the way to the right and stitch along the right side of the fabric, tapering and widening
the satin stitch while sewing. MASTERING YOUR BERNINA® 1/10/02
Electronic 1008/14 Change the stitch length to satin stitch and the...
Owners Manual - Page 17
... 1008
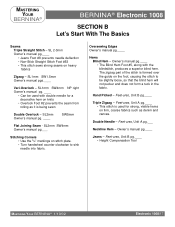
SECTION B Let's Start With The Basics
Seams Triple Straight Stitch - SL 2-3mm Owner's manual pg.____ • Jeans Foot #8 prevents needle deflection • Non-Stick Straight Stitch Foot #53 • This stitch sews strong seams on stitch plate. • Turn handwheel counter clockwise to be used for a decorative hem on firm, coarse fabrics...
Owners Manual - Page 18
...®
BERNINA® Electronic 1008
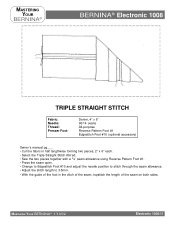
TRIPLE STRAIGHT STITCH
Fabric: Needle: Thread: Presser Foot:
Denim, 4" x 6" 90/14 Jeans All-purpose Reverse Pattern Foot #1 Edgestitch Foot #10 (optional accessory)
Owner's manual pg.___ • Cut the fabric in half lengthwise forming two pieces, 2" x 6" each. • Select the Triple Straight Stitch #9/red. • Sew the two pieces together...
Owners Manual - Page 28

... 1" guideline on working with Double and Triple needles. sew half of fabrics. • Press and mount the sample. Narrow the width as needed to "walk" the machine through the first stitch.
You can use when hemming T-shirts and pajamas.
MASTERING YOUR BERNINA® 1/10/02
Electronic 1008/28 stitch the remainder of the seam. •...
Owners Manual - Page 34

... Buttonhole Feet #3A and #3C. BUTTONHOLE FOOT #3 The standard 5mm buttonhole foot. Works with any BERNINA® sewing machine. Works with models 1130-1530 and 150-170QPE. Electronic 1008/34 Works with any BERNINA® sewing machine
BUTTONHOLE FOOT #3C The standard 9mm buttonhole foot. Works with a 9mm feed system, indicated by the letter "C". AUTOMATIC...
Owners Manual - Page 36

... to the beginning of the first bead and stop and touch quick reverse. • Sew the top bar tack. MASTERING YOUR BERNINA® 1/10/02
Electronic 1008/36 MASTERING YOUR
BERNINA®
BERNINA® Electronic 1008
MANUAL BUTTONHOLES
Fabric: Stabilizer: Needle: Thread: Presser Foot:
Heavy flannel, 6" x 6" 1 piece, 3" x 6" 90/14 Embroidery 30 weight cotton embroidery Standard...
Owners Manual - Page 37

The thickness of the cord depends on the fabric to the back with a large hand sewing needle and tie. • Trim and mount sample. Therefore it is on the 5/8" line behind the presser foot. • Lower the needle into the fabric on knits. MASTERING YOUR BERNINA® 1/10/02
Electronic 1008/37 MASTERING YOUR
BERNINA®
BERNINA...
Owners Manual - Page 38

MASTERING YOUR
BERNINA®
BERNINA® Electronic 1008
BUTTON SEW-ON STITCH
Fabric: Stabilizer: Needle: Thread: Presser Foot:
Heavy flannel, 6" x 6" 1 piece, 3" x 6" 90/14 Embroidery 30 weight cotton embroidery Button Sew-On Foot #18 (optional accessory)
Owner's manual pg.____ • Select Universal Stitch #4/green; Insert the stabilizer.
adjust width as above. • Use a ...
Owners Manual - Page 57

... to corner;
When turning a corner it is not possible, with a double needle, to turn remainder of corner. - Sew to corner; needle up. - MASTERING YOUR BERNINA® 1/10/02
Electronic 1008/57 MASTERING YOUR
BERNINA®
BERNINA® Electronic 1008
CORDED PINTUCKS
Fabric:
Needle: Thread: Presser Foot:
Lightweight cotton, 5" x 5", starched Gimp Cord Double 3.0/80 All-purpose...
Owners Manual - Page 58
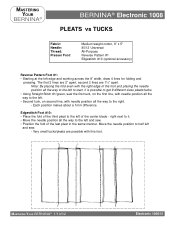
... sizes pleats/tucks.
• Using Straight Stitch #1/green, sew the first tuck, on the first line, with needle position all the way to half left and sew. • Position the fold of the center blade - MASTERING YOUR
BERNINA®
BERNINA® Electronic 1008
PLEATS vs TUCKS
Fabric: Needle: Thread: Presser Foot:
Medium weight cotton, 8" x 5" 80/12...
Owners Manual - Page 60
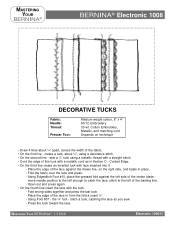
... of the center blade -
Fold wrong sides together and press the last tuck. -
move needle position to the left enough to the left side of the basting line. - stitch ...fabric. • On the first line - MASTERING YOUR
BERNINA®
BERNINA® Electronic 1008
DECORATIVE TUCKS
Fabric: Needle: Thread:
Presser Foot:
Medium weight cotton, 8" x 4" 80/12 Embroidery 30 wt. Fold the fabric ...
Similar Questions

Want To Know Why Does The Arm Of The Needle Move Side Ways?. Thank You. Tina.
the materiaal and needle then stuck and to release the materiaal the needle than break. Should the a...
the materiaal and needle then stuck and to release the materiaal the needle than break. Should the a...
(Posted by martinavanvuuren2016 5 years ago)


Bernina 1090 S Sewing Machine Manual
I Dont See The User Manual For This Machine For Free Downloading.what User Manual Are The Same As Th...
I Dont See The User Manual For This Machine For Free Downloading.what User Manual Are The Same As Th...
(Posted by cynthianel 10 years ago)

My Stitch Length Adjuster Won't Move To A Long Stitch Position.
On my Bernina 1008, my stitch length adjuster won't move down to a longer stitch position. I live in...
On my Bernina 1008, my stitch length adjuster won't move down to a longer stitch position. I live in...
(Posted by pyoung 10 years ago)

Bernina 1008 Cabinet
I want to get lockable cabinets for the 2 bernina 1008s that I purchased for the school where I teac...
I want to get lockable cabinets for the 2 bernina 1008s that I purchased for the school where I teac...
(Posted by dcarlson2 11 years ago)