Asus RT-N66U Support Question
Asus RT-N66U Support Question
Find answers below for this question about Asus RT-N66U.Need a Asus RT-N66U manual? We have 1 online manual for this item!
Question posted by osborjaca on June 14th, 2014
Asus-rt-n66u How To Reset Factory Default
The person who posted this question about this Asus product did not include a detailed explanation. Please use the "Request More Information" button to the right if more details would help you to answer this question.
Current Answers
Related Asus RT-N66U Manual Pages
User Manual - Page 1
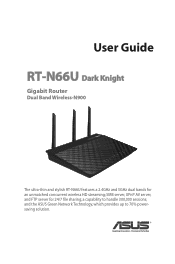
SMB server, UPnP AV server, and FTP server for an unmatched concurrent wireless HD streaming; and the ASUS Green Network Technology, which provides up to handle 300,000 sessions; a capability to 70% powersaving solution. User Guide
RT-N66U Dark Knight
Gigabit Router
Dual Band Wireless-N900
The ultra-thin and stylish RT-N66U features a 2.4GHz and 5GHz dual bands for 24/7 file sharing;
User Manual - Page 5
... 11 12
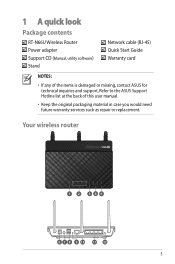
1 A quick look
Package contents
RT-N66U Wireless Router Power adapter Support CD (Manual, utility software) Stand
Network cable (RJ-45) Quick Start Guide Warranty card
NOTES:
• If any of the items is damaged or missing, contact ASUS for technical inquiries and support, Refer to the ASUS Support Hotline list at the back...
User Manual - Page 6

... 1 ~ 4 ports Connect network cables into these ports. On: Wireless system is ready. O n: Has physical connection to USB devices.
6 Power (DC-In) port Insert the bundled AC adapter into this port and connect your iPad.
9 Reset button This button resets or restores the system to its factory default settings.
10 WAN (Internet) port Connect a network cable...
User Manual - Page 8
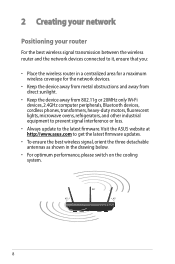
...ASUS website at http://www.asus.com to the latest firmware. 2 Creating your network
Positioning your router
For the best wireless signal transmission between the wireless router and the network devices connected to it, ensure that you:
• Place the wireless router in a centralized area for a maximum wireless....
• To ensure the best wireless signal, orient the three detachable antennas ...
User Manual - Page 10
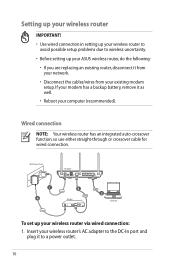
... has an integrated auto-crossover function, so use either straight-through or crossover cable for wired connection.
Wall Power Outlet
RT-N66U
1 4
Power
Power Modem
3
WAN
LAN
2
Computer
To set up your ASUS wireless router, do the following:
• If you are replacing an existing router, disconnect it from your network.
• Disconnect the...
User Manual - Page 17
... GUI
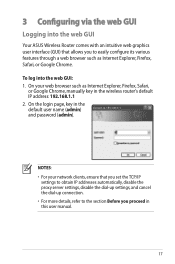
Logging into the web GUI: 1.
To log into the web GUI
Your ASUS Wireless Router comes with an intuitive web graphics user interface (GUI) that you proceed in the default user name (admin) and password (admin). On the login page, key in ... browser such as Internet Explorer, Firefox, Safari,
or Google Chrome, manually key in the wireless router's default IP address: 192.168.1.1 2.
User Manual - Page 18
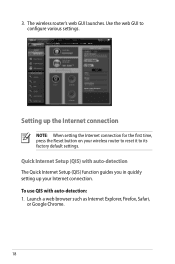
3. Setting up your wireless router to reset it to configure various settings.
The wireless router's web GUI launches. Use the web GUI to its factory default settings. Quick Internet Setup (QIS) with auto-detection: 1. Launch a web browser such as Internet ...connection
NOTE: When setting the Internet connection for the first time, press the Reset button on your Internet connection.
User Manual - Page 20
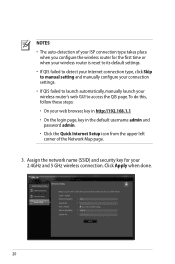
Assign the network name (SSID) and security key for the first time or when your wireless router is reset to its default settings. • If QIS failed to detect your Internet connection type, click Skip to manual setting and manually configure your connection settings. • If QIS ...
User Manual - Page 22

Key in the default user name (admin) and
password (admin), then click OK.The wireless router's web GUI launches. 3. NOTE: You can set up different wireless security settings for 2.4GHz and 5GHz bands.
2.4GHz security settings
22
On the Network Map screen, select the System status icon to configure its security ...
User Manual - Page 25
.... For more details, refer to the Plug-n-Share Disk Support List at http://event.asus.com/networks/disksupport IMPORTANT! NOTE: To use this user manual. Launch the wireless router's web GUI. 2.
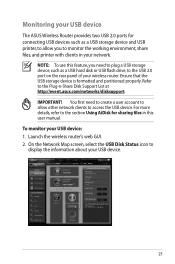
Monitoring your USB device
The ASUS Wireless Router provides two USB 2.0 ports for sharing files in your network. Ensure that the USB storage...
User Manual - Page 28
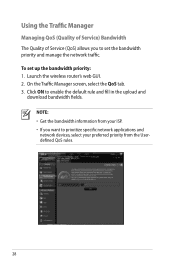
Click ON to set up the bandwidth priority: 1. Launch the wireless router's web GUI. 2. NOTE: • Get the bandwidth information from your preferred priority from ... network applications and network devices, select your ISP. • If you to enable the default rule and fill in the upload and
download bandwidth fields. To set the bandwidth priority and manage the network traffic.
User Manual - Page 35
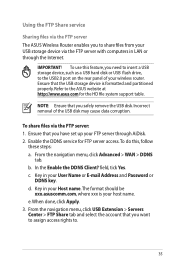
Using the FTP Share service
Sharing files via the FTP server The ASUS Wireless Router enables you to share files from your host name. Ensure that you need to ...USB storage device via the FTP server: 1. b. Refer to the ASUS website at http://www.asus com for FTP server access.To do this feature, you have set up your wireless router. In the Enable the DDNS Client? The format should be...
User Manual - Page 38

.... To set up to configure the advanced features of your screen. 2. Click Advanced Setting from your wireless router.
NOTE: The ASUS Wireless Router can automatically obtain IP addresses from the navigation menu at the left side of your wireless router. Setting up the DHCP Server You may enable the DHCP Server function in your...
User Manual - Page 40
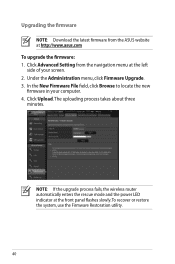
Click Upload. NOTE: If the upgrade process fails, the wireless router automatically enters the rescue mode and the power LED indicator at the left side of your computer. 4. Click Advanced Setting from the ASUS website at http://www.asus.com To upgrade the firmware: 1. Under the Administration menu, click Firmware Upgrade. 3. In the New...
User Manual - Page 41
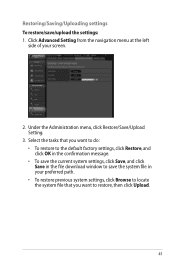
Select the tasks that you want to do: • To restore to the default factory settings, click Restore, and click OK in the confirmation message. • To save the current system settings, click Save, and click Save in the file ...
User Manual - Page 46
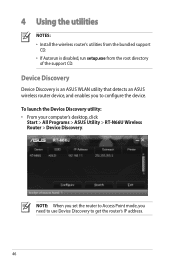
To launch the Device Discovery utility: • From your computer's desktop, click
Start > All Programs > ASUS Utility > RT-N66U Wireless Router > Device Discovery. NOTE: When you set the router to Access Point mode, you to get the router's IP address.
46 Device Discovery
Device Discovery ...
User Manual - Page 47
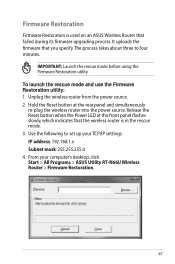
... on an ASUS Wireless Router that you specify. Firmware Restoration
Firmware Restoration is in the rescue mode. 3. Use the following to four minutes. It uploads the firmware that failed during its firmware upgrading process. The process takes about three to set up your computer's desktop, click Start > All Programs > ASUS Utility RT-N66U Wireless Router > Firmware...
User Manual - Page 49
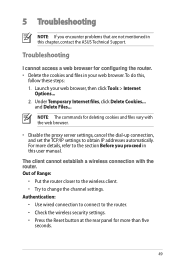
...Delete Files... Authentication: • Use wired connection to connect to the router. • Check the wireless security settings. • Press the Reset button at the rear panel for more details, refer to the section Before you encounter problems that ...deleting cookies and files vary with the router. To do this chapter, contact the ASUS Technical Support. For more than five
seconds.
49
User Manual - Page 51
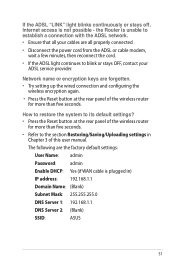
... setting up the wired connection and configuring the
wireless encryption again.
• Press the Reset button at the rear panel of the wireless router for more than five seconds.
•...2: (Blank)
SSID:
ASUS
51 The following are all your ADSL service provider. How to restore the system to blink or stays OFF, contact your cables are the factory default settings:
User Name:...
User Manual - Page 52
... your local service center for the router I bought six months ago. The DDNS service is embedded in your device, contact the service center. ASUS DDNS Service
RT-N66U supports the ASUS DDNS service.When exchanging devices at the service center, if you have not updated the registered information in 90 days, the system automatically...
Similar Questions


