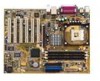
Asus P4PE-X TE Support Question
Asus P4PE-X TE Support Question
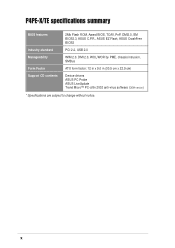
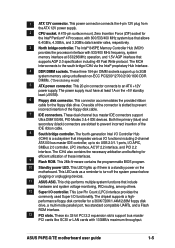
Find answers below for this question about Asus P4PE-X TE.Need a Asus P4PE-X TE manual? We have 2 online manuals for this item!
Question posted by brwirlitsch on April 3rd, 2022
Grafikkarte Wird Nach Batteriewechsel Nicht Erkannt
Current Answers
Answer #1: Posted by hzplj9 on April 4th, 2022 12:05 PM

Member since:
June 25th, 2012 Points: 4,873,510

Answer #2: Posted by SonuKumar on April 3rd, 2022 7:27 AM

Member since:
May 9th, 2021 Points: 16,617,810
1. Confirm that the computer has been installed correctly
Please follow the guideline from your PC components(such as motherboard, graphics card, power supply, case, screen, etc.) during the installation process to confirm that the related components are assembled correctly, and the components other than the graphics card can operate normally.
If there is still no display, please refer to the following steps.
2. Confirm that the monitor displays the output signal
Check the wiring connection between the graphics card and the monitor, make sure that the signal cable (VGA / DVI / HDMI / DisplayPort) is connected well on the monitor end, as shown in the figure below, and make sure that the input signal of the monitor is set correctly
3. Test boot with at least external equipments
Please refer to following instructions to remove all external devices and re-confirm
a. Keep the CPU, CPU cooling fan and a piece of memory that connected to the motherboard
b. Remove all USB devices and external cards from the motherboard, including mouse, keyboards, card reader, USB flash drive, external hard drive, other external PCI-E cards other than graphics card, etc.
c. Remove all cables connected to the motherboard, including network cables and audio cables, leaving only the display cable to ensure the display
d. Then try to turn on the computer. If it can display normally, maybe the problem comes from the removed external device or cable. Try to insert the external devices or cables one by one, until you find which external device or cable causes no display problem
4. Confirm the PCI-E interface of the graphics card (golden finger)
Please shut down the computer and unplug the computer power plug, re-install the graphics card, and check whether your graphics card is correctly installed (the golden finger part of the PCI-E interface must be completely installed in the PCIE interface)
5. Confirm the power cord of the graphics card
If the connected graphics card needs to be connected to a 6Pin or 8Pin power cord, make sure that the power cord is plugged in correctly, as shown in the figure below:
6. Confirm the dust and foreign objects in the PCI-E slot of the motherboard
If it is found that there is dust or foreign matter in the PCI-E slot of the motherboard, please clean it up in time before inserting the graphics card
7. If your motherboard in the computer has an integrated graphics processor (internal display), please try to start the system without a graphics card
Turn off the computer, unplug the computer power supply, take out the graphics card, and connect the monitor signal line to the corresponding display output interface on the motherboard to check whether the display can integrate display output signals from the motherboard
If it still can't boot up and display normally, you can refer to FAQ: Troubleshooting - No Power/No Boot/No Display
If it can display normally, you can turn off the power and then re-connect the graphics card to confirm whether it is a graphics card problem
8. If the motherboard supports multiple PCI-E slots, you can try to install the graphics card in other PCI-E slots and try again.
9. Check whether the power supply can meet the requirements of the graphics card
Confirm whether the power of the power supply you purchased meets the recommended power on the official website
(The following example: ROG-STRIX-RTX3080-O10G-GAMING, the recommended power supply for this graphics card is 850W, so you need to install a power supply of 850W or more than 850W)
or
https://www.manualslib.com/manual/444603/Asus-P4pe-X-Te.html
Please respond to my effort to provide you with the best possible solution by using the "Acceptable Solution" and/or the "Helpful" buttons when the answer has proven to be helpful.
Regards,
Sonu
Your search handyman for all e-support needs!!
Related Asus P4PE-X TE Manual Pages


Similar Questions

how you can update the BIOS on the Asus Z97-K motherboard.

is there any Bios update or any other way to boot P4pe-X TE motherboard From a usb Flash memory?P4PE...

I have a M4A88TD-M-USB3-ASUS-1501.ROM motherboard. How would I know if this motherboard was configur...
Can a GeForce GTX 970 Graphics Card work on this motherboard? ASUS P5N D> Rev 1.02G LGA 775 ATX

how I receive driver for motherboard asus p5n72-t(I'm sory,my english is very bad,kako da dobijem dr...