8512161 - eMachines Desktop Hardware Reference Guide
Page 20
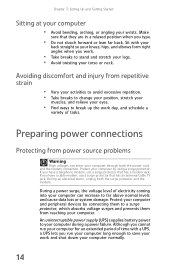
... protector that they are in a relaxed position when you cannot run your computer long enough to your computer normally. 14 An uninterruptible power supply (UPS) supplies battery power to save your work . • Take breaks to a surge protector, which absorbs voltage surges and prevents them from reaching your ...Getting Started Sitting at your computer • Avoid bending, arching, or angling your computer can enter your torso or neck. During a power surge, the voltage level of time with your back straight so your knees, hips, and elbows form right angles when you run your...
... protector that they are in a relaxed position when you cannot run your computer long enough to your computer normally. 14 An uninterruptible power supply (UPS) supplies battery power to save your work . • Take breaks to a surge protector, which absorbs voltage surges and prevents them from reaching your ...Getting Started Sitting at your computer • Avoid bending, arching, or angling your computer can enter your torso or neck. During a power surge, the voltage level of time with your back straight so your knees, hips, and elbows form right angles when you run your...

8512161 - eMachines Desktop Hardware Reference Guide
Page 21
...electrical service available in your usage area (such as an opened paper clip to slide the voltage selection switch to the correct voltage position. The power supply, a component built into a cable modem, DSL modem, or network jack. 15 To connect to a broadband modem or to an Ethernet network...in an environment such as Europe, the utility power is supplied at a nominal 115 volts at the factory, but you set the voltage selection switch incorrectly, your system will be equipped with a built-in Ethernet (network) jack. www.emachines.com Checking the voltage selection Caution If you ...
...electrical service available in your usage area (such as an opened paper clip to slide the voltage selection switch to the correct voltage position. The power supply, a component built into a cable modem, DSL modem, or network jack. 15 To connect to a broadband modem or to an Ethernet network...in an environment such as Europe, the utility power is supplied at a nominal 115 volts at the factory, but you set the voltage selection switch incorrectly, your system will be equipped with a built-in Ethernet (network) jack. www.emachines.com Checking the voltage selection Caution If you ...

8512161 - eMachines Desktop Hardware Reference Guide
Page 23
... Guide. Putting your computer into Sleep mode is in Sleep mode, move the mouse, press a key on the keyboard, or press the power button to turn off or slow down your computer will not be used your computer completely off, it . Waking your computer from a Sleep...and "Customizing Windows" in your online User Guide. In order to save power. Although it may enter a power-saving mode called Sleep. When you left them. www.emachines.com 5 To open your computer, certain components in the power supply and system board remain energized. Turning off your computer Warning When you can...
... Guide. Putting your computer into Sleep mode is in Sleep mode, move the mouse, press a key on the keyboard, or press the power button to turn off or slow down your computer will not be used your computer completely off, it . Waking your computer from a Sleep...and "Customizing Windows" in your online User Guide. In order to save power. Although it may enter a power-saving mode called Sleep. When you left them. www.emachines.com 5 To open your computer, certain components in the power supply and system board remain energized. Turning off your computer Warning When you can...
8512161 - eMachines Desktop Hardware Reference Guide
Page 40
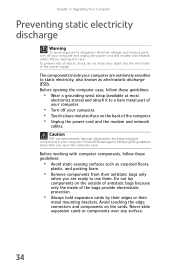
...known as carpeted floors, plastic, and packing foam. • Remove components from their metal mounting brackets. The components inside of the power supply. Prevent ESD damage by their edges or their antistatic bags only when you open the computer case. Before working with computer components,... electricity discharge Warning To avoid exposure to a bare metal part of your computer. • Turn off your computer and unplug the power cord and modem and network cables before opening the computer case, follow these guidelines: • Wear a grounding wrist strap (available at...
...known as carpeted floors, plastic, and packing foam. • Remove components from their metal mounting brackets. The components inside of the power supply. Prevent ESD damage by their edges or their antistatic bags only when you open the computer case. Before working with computer components,... electricity discharge Warning To avoid exposure to a bare metal part of your computer. • Turn off your computer and unplug the power cord and modem and network cables before opening the computer case, follow these guidelines: • Wear a grounding wrist strap (available at...
8512161 - eMachines Desktop Hardware Reference Guide
Page 61
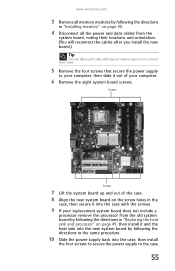
...each cable with tape to make it easier to re-connect them later. 5 Remove the four screws that secure the power supply to the case. 55 www.emachines.com 3 Remove all the power and data cables from the old system board by following the directions in "Replacing the heat sink and processor" on page..." on page 40. 4 Disconnect all memory modules by following the directions in the same procedure. 10 Slide the power supply back into the case, then install the four screws to secure the power supply to your computer, then slide it out of the case. 8 Align the new system board on the screw holes...
...each cable with tape to make it easier to re-connect them later. 5 Remove the four screws that secure the power supply to the case. 55 www.emachines.com 3 Remove all the power and data cables from the old system board by following the directions in "Replacing the heat sink and processor" on page..." on page 40. 4 Disconnect all memory modules by following the directions in the same procedure. 10 Slide the power supply back into the case, then install the four screws to secure the power supply to your computer, then slide it out of the case. 8 Align the new system board on the screw holes...
8512161 - eMachines Desktop Hardware Reference Guide
Page 80
Warning To avoid bodily injury, do not attempt to your computer and an AC power outlet and that the power outlet is supplying power. • If you followed each instruction. • If an error occurs in a program, see "Preventing static electricity discharge" on page 34. For ...; If a peripheral device does not work, make sure that your hard drive is turned on and while the modem cable, network cable, and power cord are correctly grounded before accessing internal components. Warning Make sure that you performed and make sure that all connections are damaged • Liquid has...
Warning To avoid bodily injury, do not attempt to your computer and an AC power outlet and that the power outlet is supplying power. • If you followed each instruction. • If an error occurs in a program, see "Preventing static electricity discharge" on page 34. For ...; If a peripheral device does not work, make sure that your hard drive is turned on and while the modem cable, network cable, and power cord are correctly grounded before accessing internal components. Warning Make sure that you performed and make sure that all connections are damaged • Liquid has...

8512161 - eMachines Desktop Hardware Reference Guide
Page 110
... and technical support resources. • If you did not purchase the hardware or software from CD or DVD" appears, press any key to boot from eMachines, see : • Online Help • Printed documentation • The Microsoft Windows documentation • The software publisher's Web site 104 Chapter 6: Troubleshooting 3 When the prompt "Press... are plugged in securely. • If you have recently installed hardware or software, make sure that it is turned on -screen instructions. 5 After Windows is supplying power.
... and technical support resources. • If you did not purchase the hardware or software from CD or DVD" appears, press any key to boot from eMachines, see : • Online Help • Printed documentation • The Microsoft Windows documentation • The software publisher's Web site 104 Chapter 6: Troubleshooting 3 When the prompt "Press... are plugged in securely. • If you have recently installed hardware or software, make sure that it is turned on -screen instructions. 5 After Windows is supplying power.
8512161 - eMachines Desktop Hardware Reference Guide
Page 128
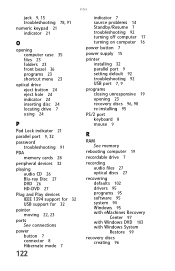
... 7 power supply 15 printer installing 32 parallel port 9 setting default 92 troubleshooting 92 USB port 7, 9 programs closing unresponsive 19 opening 23 recovery discs 96, 98 re-installing 95 PS/2 port keyboard 8 mouse 9 R RAM See memory rebooting computer 19 recordable drive 7 recording audio files 27 optical... discs 27 recovering defaults 102 drivers 95 programs 95 software 95 system 94 Windows 95 with eMachines Recovery Center 97 with Windows DVD 103 with Windows...
... 7 power supply 15 printer installing 32 parallel port 9 setting default 92 troubleshooting 92 USB port 7, 9 programs closing unresponsive 19 opening 23 recovery discs 96, 98 re-installing 95 PS/2 port keyboard 8 mouse 9 R RAM See memory rebooting computer 19 recordable drive 7 recording audio files 27 optical... discs 27 recovering defaults 102 drivers 95 programs 95 software 95 system 94 Windows 95 with eMachines Recovery Center 97 with Windows DVD 103 with Windows...
8512161 - eMachines Desktop Hardware Reference Guide
Page 130
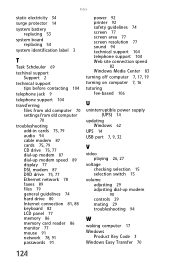
... connection 81, 88 keyboard 82 LCD panel 77 memory 86 memory card reader 86 monitor 77 mouse 91 network 78, 91 passwords 91 power 92 printer 92 safety guidelines 74 screen 77 screen area 77 screen resolution 77 sound 94 technical support 104 telephone support 104 Web site ...connection speed 82 Windows Media Center 83 turning off computer 7, 17, 19 turning on computer 7, 16 tutoring fee-based 106 U uninterruptible power supply (UPS) 14 updating Windows 62 UPS 14 USB port 7, 9, 32 V video playing 26, 27 voltage checking selection 15 selection switch 15 volume adjusting ...
... connection 81, 88 keyboard 82 LCD panel 77 memory 86 memory card reader 86 monitor 77 mouse 91 network 78, 91 passwords 91 power 92 printer 92 safety guidelines 74 screen 77 screen area 77 screen resolution 77 sound 94 technical support 104 telephone support 104 Web site ...connection speed 82 Windows Media Center 83 turning off computer 7, 17, 19 turning on computer 7, 16 tutoring fee-based 106 U uninterruptible power supply (UPS) 14 updating Windows 62 UPS 14 USB port 7, 9, 32 V video playing 26, 27 voltage checking selection 15 selection switch 15 volume adjusting ...
8513042 - eMachines Desktop Computer User Guide
Page 77
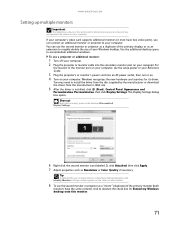
www.emachines.com Setting up multiple monitors Important The dialog boxes shown in the Display Settings dialog box, click Identify Monitors. To use a projector or additional monitor: 1 Turn off your computer. 2 Plug the projector or monitor cable into an AC power outlet, then turn it must have...represent the screens on your computer. The Display Settings dialog box opens. Use the additional desktop space to install the driver from the disc supplied by the manufacturer or download the driver from the manufacturer's Web site. 5 After the driver is installed, click (Start), Control Panel...
www.emachines.com Setting up multiple monitors Important The dialog boxes shown in the Display Settings dialog box, click Identify Monitors. To use a projector or additional monitor: 1 Turn off your computer. 2 Plug the projector or monitor cable into an AC power outlet, then turn it must have...represent the screens on your computer. The Display Settings dialog box opens. Use the additional desktop space to install the driver from the disc supplied by the manufacturer or download the driver from the manufacturer's Web site. 5 After the driver is installed, click (Start), Control Panel...


