Zanussi ZOF35601WK Support and Manuals
Get Help and Manuals for this Zanussi item
View All Support Options Below
Free Zanussi ZOF35601WK manuals!
Problems with Zanussi ZOF35601WK?
Ask a Question
Free Zanussi ZOF35601WK manuals!
Problems with Zanussi ZOF35601WK?
Ask a Question
Popular Zanussi ZOF35601WK Manual Pages
Specification Sheet - Page 1

...it easy to preprogram the cooking time.
Product Benefits & Features
Make cooking a more enjoyable part of life with a multifunction oven. The fastest way to grill and brown your oven Catalytic... oven with ring element offers the ideal cooking function for cooking.
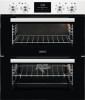
Built-in Oven ZOF35601WK
Get twice the cooking capacity with this oven takes the guesswork out of preparing frozen...
User Manual - Page 1

EASY.
User Manual
GETTING STARTED? ZOF35601WK ZOF35601XK
EN User Manual Built-In Double Oven
User Manual - Page 2

...8226; Only a qualified person must install this appliance and replace the cable.
2 VISIT OUR WEBSITE FOR:
Get usage advice, brochures, trouble shooter, service and repair information: www.zanussi.com/support
SAFETY INFORMATION Before the installation and use of incorrect installation or usage. The manufacturer is not responsible for future reference. Accessible parts become hot during use of...
User Manual - Page 3

...replaced by the handle. • Install the appliance in a safe and suitable place that the appliance is switched off before replacing...INSTRUCTIONS
INSTALLATION WARNING! • WARNING: The appliance and its Authorised Service Centre or similarly qualified persons to avoid an electrical hazard. • To remove the shelf supports first pull the front of the shelf support... installation ...
User Manual - Page 6

...The display works only with the Grill- / roasting pan.
To set a clock function. B
C
6 To set the time.
Sensor field / Button
Description
To set the time. Use the trivet only with the main oven. PRODUCT... Knob for the main oven temperature 8 Heating element 9 Lamp 10 Fan 11 Shelf support, removable 12 Shelf positions
ACCESSORIES • Wire shelf
For cookware, cake tins, roasts....
User Manual - Page 7

... 3 Step 4
Remove all accessories and re- Step 1 Remove all accessories and removable shelf supports from the oven. Let the oven operate for the function: .
Set the maximum temperature for 1 h. Timer
BEFORE FIRST USE
WARNING! C. INITIAL CLEANING
Step 2
, - press to set the hour. Press: . INITIAL PREHEATING
Step 2 Clean the oven and the accessories with...
User Manual - Page 11

... time for the temperature to stop the signal.
starts to cancel: Clock functions
Step 1 Step 2
- Press any button to the off .
When the set time the signal sounds and the oven turns off position. How to flash. , -
The indentations are also anti-tip devices. Turn the knob for the ...
User Manual - Page 12

... pan.
Grilling and toasting thin pieces of the shelf support.
Wire shelf: Push the shelf between the guide bars of food in large quantities.
12 Roasting larger pieces of the shelf support. Deep pan: Push the deep pan between the guide bars of the shelf support and the wire shelf on the recommended shelf position...
User Manual - Page 13

.... The oven temperature is too high and the baking time is too high. Make sure the supports of the wire shelf point down . You can extend the baking time by 10 - 15 ...oven cool. The shelf position is particularly suitable for cooking larger quantities of food. Next time set slightly lower oven temperature.
ADDITIONAL FUNCTIONS
COOLING FAN When the oven operates, the cooling fan turns...
User Manual - Page 14

...
75 - 90
2
- Shortbread
130 - 150
45 - 65
2
Casseroles:
- The cake bakes unevenly. Sponges
160 - 175
20 - 30
2
- The oven temperature is too long. Next time set higher oven temperature. Small & Queen
160 - 170
18 - 25
2
- Madeira
140 - 150
75 - 90
2
- The baking time is too low. The oven temperature is too...
User Manual - Page 21

... panels to the oven walls. The catalytic panels are not attached to clean the oven. Install the shelf supports in place.
Remove all accessories and removable shelf supports. To clean the main oven set the function: .
Step 2 Set the maximum oven temperature. Duration: 1 h
Step 3 After cleaning, turn
the knob for the oven functions to the...
User Manual - Page 22

HOW TO REMOVE AND INSTALL: DOOR You can break.
A... above steps in the dishwasher. Carefully handle the glass, especially around the edges of the guide. Hold the door with water and soap.
Dry the glass panel carefully. WARNING! Put...a soft cloth on the two door hinges. The door is different for different models.
CAUTION! B
Step 6 Hold the door glass panels on each side and pull ...
User Manual - Page 23

... is the cause of the door may overheat. Replace the lamp with a suitable 300 °C heat-resistant lamp.
The necessary settings are correct. Make sure that the settings are not set . The oven is incorrectly connected to the connection diagram if available). Activate the oven. Step 9
Install the smaller panel first, then the larger and...
User Manual - Page 24

...find a solution to the problem yourself, contact your dealer or an Authorised Service Centre. PRODUCT INFORMATION AND PRODUCT INFORMATION SHEET*
Supplier's name
Zanussi
Model identification
ZOF35601WK 944171714 ZOF35601XK 944171713
Energy ...cooking process ends. Do not remove the rating plate from the oven cavity. Replace the lamp.
The display shows "12.00". Do not leave the dishes ...
Product information sheet - Page 1

...
A
Energy consumption with a standard load, Main Oven
fan-forced mode (kWh/cycle) -
0.71
Number of cavities
2
Heat source
Electricity
Volume (l) - product information sheet
Trade Mark
Zanussi
Model
ZOF35601WK 944171714
Energy Efficiency index EEI -
Zanussi ZOF35601WK Reviews
We have not received any reviews for Zanussi yet.