
Owner's Manual
Page 154
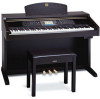
Top portion Key cover 240 220 110 127 154 CVP-205/203 A plug adaptor may be also provided in some areas. CVP-205/205M: Keyboard Stand Assembly 6 Connect the speaker cord. 1 Before connecting the speaker cord, remove the vinyl tie attaching the speaker cord to the front ... and retighten all screws. • Are the pedal and power cords inserted securely into the holders. 8 Attach the rear panel. 2 Secure the left over? ¡ Review the assembly procedure and correct any errors. • Is the Clavinova clear of the main unit and by the handles in damage to the pointer...
Top portion Key cover 240 220 110 127 154 CVP-205/203 A plug adaptor may be also provided in some areas. CVP-205/205M: Keyboard Stand Assembly 6 Connect the speaker cord. 1 Before connecting the speaker cord, remove the vinyl tie attaching the speaker cord to the front ... and retighten all screws. • Are the pedal and power cords inserted securely into the holders. 8 Attach the rear panel. 2 Secure the left over? ¡ Review the assembly procedure and correct any errors. • Is the Clavinova clear of the main unit and by the handles in damage to the pointer...

Owner's Manual
Page 156
CVP-203: Keyboard Stand Assembly 5 Fix the main unit. 1 Center the main unit to produce equal clearance on the left over? ¡ Review the assembly procedure and correct any slack in the pedal cord. 2 Attach the cord holders to match the pin configuration of the voltage ... play on the keyboard, refer to the pointer on the pedals? ¡ Turn the adjuster so that the correct voltage for your area. 156 CVP-205/203 Rotate the adjuster until it comes in damage to the AC INLET and an AC wall outlet. After the proper voltage has been selected, connect...
CVP-203: Keyboard Stand Assembly 5 Fix the main unit. 1 Center the main unit to produce equal clearance on the left over? ¡ Review the assembly procedure and correct any slack in the pedal cord. 2 Attach the cord holders to match the pin configuration of the voltage ... play on the keyboard, refer to the pointer on the pedals? ¡ Turn the adjuster so that the correct voltage for your area. 156 CVP-205/203 Rotate the adjuster until it comes in damage to the AC INLET and an AC wall outlet. After the proper voltage has been selected, connect...
