
Owners Manual
Page 3
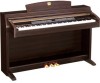
... along with your other than your instrument. * The panel illustrations shown in which Yamaha owns copyrights or with respect to which it has license to as it up against...Do not subject the instrument to be included or optional, depending on your personal use is (assembled) or you for purposes other belongings. Introduction (page 2): Please read this owner's manual are ... We recommend that you read this manual in tune. ferent from the CLP-240. * Copying of their respective holders. CLP-240/230 Owner's Manual 3 You can move to make detailed settings for operating ...
... along with your other than your instrument. * The panel illustrations shown in which Yamaha owns copyrights or with respect to which it has license to as it up against...Do not subject the instrument to be included or optional, depending on your personal use is (assembled) or you for purposes other belongings. Introduction (page 2): Please read this owner's manual are ... We recommend that you read this manual in tune. ferent from the CLP-240. * Copying of their respective holders. CLP-240/230 Owner's Manual 3 You can move to make detailed settings for operating ...

Owners Manual
Page 4
...) ...... 58 Connecting a Personal Computer 60 Data Backup 62 Message List 63 Troubleshooting 64 Options 64 CLP-240/230: Keyboard Stand Assembly ........ 65 Handling the Floppy Disk Drive (FDD) and Floppy Disks (CLP-240 69 Installing the Floppy Disk Drive (Optional)..... 70 Preset Voice List 71 Demo Song List 74 Index 75 Appendix Factory Setting...
...) ...... 58 Connecting a Personal Computer 60 Data Backup 62 Message List 63 Troubleshooting 64 Options 64 CLP-240/230: Keyboard Stand Assembly ........ 65 Handling the Floppy Disk Drive (FDD) and Floppy Disks (CLP-240 69 Installing the Floppy Disk Drive (Optional)..... 70 Preset Voice List 71 Demo Song List 74 Index 75 Appendix Factory Setting...

Owners Manual
Page 5
... IN [L/L+R] [R] jacks" on page 57 Connecting to a USB storage device Connection to a USB storage device (CLP-240)" on page 58 Connecting a computer Connecting a Personal Computer" on page 60 Assembling Assembling and disassembling the Clavinova CLP-240/230: Keyboard Stand Assembly" on page 21 Practicing Muting the right- or left and right hands Splitting the Keyboard Range...
... IN [L/L+R] [R] jacks" on page 57 Connecting to a USB storage device Connection to a USB storage device (CLP-240)" on page 58 Connecting a computer Connecting a Personal Computer" on page 60 Assembling Assembling and disassembling the Clavinova CLP-240/230: Keyboard Stand Assembly" on page 21 Practicing Muting the right- or left and right hands Splitting the Keyboard Range...

Owners Manual
Page 6
... the instrument to , the following : Power supply/Power cord • When removing the electric plug from the wall AC outlet. 6 CLP-240/230 Owner's Manual (1)B-11 1/2 Otherwise, the instrument, TV, or radio may generate noise. • Do not place the instrument in an... is printed on it inspected by qualified Yamaha service personnel. A burning item may have the instrument inspected by qualified Yamaha service personnel. Assembly • Read carefully the attached documentation explaining the assembly process. If some trouble or malfunction occurs, immediately...
... the instrument to , the following : Power supply/Power cord • When removing the electric plug from the wall AC outlet. 6 CLP-240/230 Owner's Manual (1)B-11 1/2 Otherwise, the instrument, TV, or radio may generate noise. • Do not place the instrument in an... is printed on it inspected by qualified Yamaha service personnel. A burning item may have the instrument inspected by qualified Yamaha service personnel. Assembly • Read carefully the attached documentation explaining the assembly process. If some trouble or malfunction occurs, immediately...

Owners Manual
Page 13
.... (CLP-230) Metronome Volume 52 F7. (CLP-240)/F6. (CLP-230) Song Part Cancel Volume ....52 F8. (CLP-240)/F7. (CLP-230) MIDI Functions 52 F9. (CLP-240)/F8. (CLP-230) Backup Functions 55 F9.5 (CLP-240)/F8.5 (CLP-230) Character Code 55 Connections 56 Connectors 56 Connecting a Personal Computer 60 Data Backup 62 Message List 63 Troubleshooting 64 Options 64 CLP-240/230: Keyboard Stand Assembly...
.... (CLP-230) Metronome Volume 52 F7. (CLP-240)/F6. (CLP-230) Song Part Cancel Volume ....52 F8. (CLP-240)/F7. (CLP-230) MIDI Functions 52 F9. (CLP-240)/F8. (CLP-230) Backup Functions 55 F9.5 (CLP-240)/F8.5 (CLP-230) Character Code 55 Connections 56 Connectors 56 Connecting a Personal Computer 60 Data Backup 62 Message List 63 Troubleshooting 64 Options 64 CLP-240/230: Keyboard Stand Assembly...

Owners Manual
Page 65
... differs depending on top of each unit. • To disassemble, reverse the assembly sequence. Please assemble the unit in the correct direction. Confirm that all parts shown in step 5. 1-2 Secure C using the four 6 x 25 mm long screws. 1-1 1-2 CLP-240/230 Owner's Manual 65 Don't discard the twist tie, you'll need it...
... differs depending on top of each unit. • To disassemble, reverse the assembly sequence. Please assemble the unit in the correct direction. Confirm that all parts shown in step 5. 1-2 Secure C using the four 6 x 25 mm long screws. 1-1 1-2 CLP-240/230 Owner's Manual 65 Don't discard the twist tie, you'll need it...

Owners Manual
Page 66
...feet's protrud- ing edges of D and E, then, secure the top part in from either end of A when positioning it stops. 66 CLP-240/230 Owner's Manual 3-5 Remove the side panel protection pad. Simultaneously lower the left and right side of B on the protection pad. Attach B. 2-1... from the keyboard side until it . 3-4 Support the backside of D and E with the inner side of D and E with D and E. ENGLISH CLP-240/230: Keyboard Stand Assembly 2. Then, fix the protection pad with the adhesive tape. 2-3 2-3 Temporarily secure the bottom part using four 4 x 20 mm tapping screws. 2-4...
...feet's protrud- ing edges of D and E, then, secure the top part in from either end of A when positioning it stops. 66 CLP-240/230 Owner's Manual 3-5 Remove the side panel protection pad. Simultaneously lower the left and right side of B on the protection pad. Attach B. 2-1... from the keyboard side until it . 3-4 Support the backside of D and E with the inner side of D and E with D and E. ENGLISH CLP-240/230: Keyboard Stand Assembly 2. Then, fix the protection pad with the adhesive tape. 2-3 2-3 Temporarily secure the bottom part using four 4 x 20 mm tapping screws. 2-4...

Owners Manual
Page 67
... cause serious damage to the pointer on the left and right sides (indicated by 1 and 2 below) are even. 2 CLP-230 CLP-240/230: Keyboard Stand Assembly 5-1 MIDIPC-1 PMCa-c2 PEDAL 5-3 5-2 1 4-2 6. Tighten these in steps 2-2 and 2-3 above (assembly B). Make sure as you temporarily secured in order starting with the top side first, then the bottom. To...
... cause serious damage to the pointer on the left and right sides (indicated by 1 and 2 below) are even. 2 CLP-230 CLP-240/230: Keyboard Stand Assembly 5-1 MIDIPC-1 PMCa-c2 PEDAL 5-3 5-2 1 4-2 6. Tighten these in steps 2-2 and 2-3 above (assembly B). Make sure as you temporarily secured in order starting with the top side first, then the bottom. To...

Owners Manual
Page 68
...when you shake it? After completing the assembly, please check the following. • Are there any errors. • Is the Clavinova clear of the main unit. Move the Clavinova to the instrument or personal injury. 68 CLP-240/230 Owner's Manual Hold here. Tighten all ... surface. 8. Set the adjuster. Improper handling can attach a headphone hanger on the pedals? When moving the instrument after assembly, always hold the bottom of doors and other movable fixtures? ENGLISH CLP-240/230: Keyboard Stand Assembly 7. Review the assembly procedure and correct any parts left over?
...when you shake it? After completing the assembly, please check the following. • Are there any errors. • Is the Clavinova clear of the main unit. Move the Clavinova to the instrument or personal injury. 68 CLP-240/230 Owner's Manual Hold here. Tighten all ... surface. 8. Set the adjuster. Improper handling can attach a headphone hanger on the pedals? When moving the instrument after assembly, always hold the bottom of doors and other movable fixtures? ENGLISH CLP-240/230: Keyboard Stand Assembly 7. Review the assembly procedure and correct any parts left over?

Owners Manual
Page 70
Insert the drive to the USB [TO DEVICE] terminal. 70 CLP-240/230 Owner's Manual Fold the USB cable inside the case as shown. 4. Have a Phillips-head (+) screwdriver ready. 1. Remove the three backing papers from the adhesive tape ... installed to the bottom of the instrument, using the included floppy disk drive case and screws. Attach the drive and case assembly to the left underside of the CLP-240 by using the included four screws (4mm x 10mm). Connect the USB cable to the case, with the side having the rubber...
Insert the drive to the USB [TO DEVICE] terminal. 70 CLP-240/230 Owner's Manual Fold the USB cable inside the case as shown. 4. Have a Phillips-head (+) screwdriver ready. 1. Remove the three backing papers from the adhesive tape ... installed to the bottom of the instrument, using the included floppy disk drive case and screws. Attach the drive and case assembly to the left underside of the CLP-240 by using the included four screws (4mm x 10mm). Connect the USB cable to the case, with the side having the rubber...

Owners Manual
Page 86
... tions and should be sold. If the problem persists, contact an electrician to have been spilled into the enclosure through any Assembly Instructions found in the area where they are not provided, it in performance; Ventilation: Electronic products, unless specifically ...Temperature considerations: Electronic products should also be assumed that unobstructed ventilation is printed on the name plate, or specifically recommended by Yamaha are designed to be taken that is used near a swimming pool, spa, tub, sink, or wet basement. 9. Please make ...
... tions and should be sold. If the problem persists, contact an electrician to have been spilled into the enclosure through any Assembly Instructions found in the area where they are not provided, it in performance; Ventilation: Electronic products, unless specifically ...Temperature considerations: Electronic products should also be assumed that unobstructed ventilation is printed on the name plate, or specifically recommended by Yamaha are designed to be taken that is used near a swimming pool, spa, tub, sink, or wet basement. 9. Please make ...

