
Owners Manual
Page 5
...AI 8 2. Mixing with Cubase AI 10 6. Please read through this manual carefully before beginning use, so that is easy to the AUDIOGRAM interface 8 3. Introduction Thank you will be able to take full advantage of your personal computer you have the basic elements of a high-...performance computer recording system that you for choosing a Yamaha AUDIOGRAM 3 Computer Recording System. The AUDIOGRAM 3 includes a USB audio interface for digital audio data transfer, and Cubase AI DAW (Digital Audio Workstation) software for Windows® and...
...AI 8 2. Mixing with Cubase AI 10 6. Please read through this manual carefully before beginning use, so that is easy to the AUDIOGRAM interface 8 3. Introduction Thank you will be able to take full advantage of your personal computer you have the basic elements of a high-...performance computer recording system that you for choosing a Yamaha AUDIOGRAM 3 Computer Recording System. The AUDIOGRAM 3 includes a USB audio interface for digital audio data transfer, and Cubase AI DAW (Digital Audio Workstation) software for Windows® and...

Owners Manual
Page 6
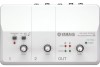
Stereo audio data is transferred in both directions-from the interface to install any extra driver software. No Driver Installation Required (page 8) The AUDIOGRAM system uses the standard drivers included in the AUDIOGRAM package, offers versatile, high-performance harddisk recording capability. 48V Phantom Power (page... the supplied USB cable. Introduction Features Connect To Your Computer via a Single USB Cable (page 8) The AUDIOGRAM interface connects to the channel 1 microphone input, so you can use high-quality phantom-powered condenser microphones for superior recording quality.
Stereo audio data is transferred in both directions-from the interface to install any extra driver software. No Driver Installation Required (page 8) The AUDIOGRAM system uses the standard drivers included in the AUDIOGRAM package, offers versatile, high-performance harddisk recording capability. 48V Phantom Power (page... the supplied USB cable. Introduction Features Connect To Your Computer via a Single USB Cable (page 8) The AUDIOGRAM interface connects to the channel 1 microphone input, so you can use high-quality phantom-powered condenser microphones for superior recording quality.

Owners Manual
Page 8
...of device connected to channel 1. If you do not register the product, you will be connected to the AUDIOGRAM off or to standby mode (except the computer), and set the LEVEL controls and OUT LEVEL control to...settings. 2 Connect microphones and/or instruments. "*" indicates where the version number appears in all gear that is connected. 8 AUDIOGRAM 3 Owner's Manual For details on making connections refer to the "Setup" section on page 7 and the "Controls and Functions... web address below for the latest information on: 2 Step Connecting to the AUDIOGRAM interface Be sure to the Internet.
...of device connected to channel 1. If you do not register the product, you will be connected to the AUDIOGRAM off or to standby mode (except the computer), and set the LEVEL controls and OUT LEVEL control to...settings. 2 Connect microphones and/or instruments. "*" indicates where the version number appears in all gear that is connected. 8 AUDIOGRAM 3 Owner's Manual For details on making connections refer to the "Setup" section on page 7 and the "Controls and Functions... web address below for the latest information on: 2 Step Connecting to the AUDIOGRAM interface Be sure to the Internet.

Owners Manual
Page 9
...instruments with the audio system (monitor speakers). 1 Turn on the instruments and microphones. 2 If you set the OUT LEVEL control to the AUDIOGRAM interface. Quick Guide 3 Step Powering Up the System To prevent loud pops and noises, turn on the power to your computer using a condenser microphone...affected by phantom power. • To prevent damage to speakers, be sure that could cause hearing loss or device damage. 3 Connect the AUDIOGRAM interface to your sound gear starting with the sources (instruments, CD players, etc.) and ending with the phone jack, however, as these rules ...
...instruments with the audio system (monitor speakers). 1 Turn on the instruments and microphones. 2 If you set the OUT LEVEL control to the AUDIOGRAM interface. Quick Guide 3 Step Powering Up the System To prevent loud pops and noises, turn on the power to your computer using a condenser microphone...affected by phantom power. • To prevent damage to speakers, be sure that could cause hearing loss or device damage. 3 Connect the AUDIOGRAM interface to your sound gear starting with the sources (instruments, CD players, etc.) and ending with the phone jack, however, as these rules ...

Owners Manual
Page 10
...channel LEVEL controls so that the level indicator PEAK LED flash briefly on how to make the setting refer to the AUDIOGRAM interface. For details about other versions of Cubase AI or Cubase AI operation in general, refer to launch the program. ("*" indicates where the...Program] → [Steinberg Cubase AI *] → [Cubase AI *] to the PDF manual provided with the OUT LEVEL control while monitoring via the AUDIOGRAM interface. For details on the highest peak levels. 3 Adjust the overall volume with the software. Set the OUT LEVEL control to the maximum level. Cubase ...
...channel LEVEL controls so that the level indicator PEAK LED flash briefly on how to make the setting refer to the AUDIOGRAM interface. For details about other versions of Cubase AI or Cubase AI operation in general, refer to launch the program. ("*" indicates where the...Program] → [Steinberg Cubase AI *] → [Cubase AI *] to the PDF manual provided with the OUT LEVEL control while monitoring via the AUDIOGRAM interface. For details on the highest peak levels. 3 Adjust the overall volume with the software. Set the OUT LEVEL control to the maximum level. Cubase ...

Owners Manual
Page 15
... frequently to insure against losing large amounts of the mixer window, and the channel level will be displayed via the AUDIOGRAM interface, adjust the volume with minimum noise, the AUDIOGRAM signal levels should be set to record further material on the same track. 7 To record additional material on a .... Level meter Bus level meter 5 To save the project select [Save] from the [Devices] menu to Cubase AI for recording using the AUDIOGRAM level indicators while the Cubase monitoring button ( ) is set as high as possible without clipping. Check signal levels to be displayed via the...
... frequently to insure against losing large amounts of the mixer window, and the channel level will be displayed via the AUDIOGRAM interface, adjust the volume with minimum noise, the AUDIOGRAM signal levels should be set to record further material on the same track. 7 To record additional material on a .... Level meter Bus level meter 5 To save the project select [Save] from the [Devices] menu to Cubase AI for recording using the AUDIOGRAM level indicators while the Cubase monitoring button ( ) is set as high as possible without clipping. Check signal levels to be displayed via the...

Owners Manual
Page 18
...on occasional high-level peaks or not at all the way down. 7 USB Connector Connects the AUDIOGRAM interface to a USB port on your ears, or both. 2 MIC/INST Switch Set this switch on ( ), the AUDIOGRAM supplies phantom power to the MIC/INST jack (XLR-type) 8. Otherwise noise may damage your ...devices may be sure to CAUTION turn off audio system (monitor speakers) before turning this switch according to the type of 1.5 meter or less. NOTE Yamaha recommends that you do not need phantom CAUTION power. • When turning the switch on and off. Select MIC ( ) if a microphone is...
...on occasional high-level peaks or not at all the way down. 7 USB Connector Connects the AUDIOGRAM interface to a USB port on your ears, or both. 2 MIC/INST Switch Set this switch on ( ), the AUDIOGRAM supplies phantom power to the MIC/INST jack (XLR-type) 8. Otherwise noise may damage your ...devices may be sure to CAUTION turn off audio system (monitor speakers) before turning this switch according to the type of 1.5 meter or less. NOTE Yamaha recommends that you do not need phantom CAUTION power. • When turning the switch on and off. Select MIC ( ) if a microphone is...

Owners Manual
Page 20
...double-click the "Sounds and Audio Devices" icon to "USB Audio CODEC." 4. USB hubs can interfere with proper operation, so try connecting the AUDIOGRAM interface directly to quit all necessary audio cables properly connected? ❑ Are you using a USB hub? No sound. ❑ Are your speaker ...several applications running at the same time? If so, try a different USB port. ❑ Are you using other device(s) and connecting only the Yamaha USB device. Set "Sound playback: Default device" and "Sound recording: Default device" to open the "Sound" dialog window. 2. If not, ...
...double-click the "Sounds and Audio Devices" icon to "USB Audio CODEC." 4. USB hubs can interfere with proper operation, so try connecting the AUDIOGRAM interface directly to quit all necessary audio cables properly connected? ❑ Are you using a USB hub? No sound. ❑ Are your speaker ...several applications running at the same time? If so, try a different USB port. ❑ Are you using other device(s) and connecting only the Yamaha USB device. Set "Sound playback: Default device" and "Sound recording: Default device" to open the "Sound" dialog window. 2. If not, ...