
Statement of Volatility
Page 1
...) Phaser 8560 Model Number 8560/N 8560/DN 8560/DP 8560/DT 8560/DX 8560/DX 8560/DT 8560/DP All models All models All models All models All models Memory Size Standard/ Maximum 256/1GB 256/1GB 256/1GB 256/1GB 256/1GB 40GB 40GB 40GB 8K (Head) 32 Byte (Maintenance kit) ... Non-Volatile No*** Non-Volatile No*** Non-Volatile No*** Non-Volatile No*** Note: Flash is used for the Xerox Phaser 8560 printer. Please note, there are no remnants of customer print data retained in the printer when both of Volatility The chart below shows the corresponding memory types for Firmware code and contains no...
...) Phaser 8560 Model Number 8560/N 8560/DN 8560/DP 8560/DT 8560/DX 8560/DX 8560/DT 8560/DP All models All models All models All models All models Memory Size Standard/ Maximum 256/1GB 256/1GB 256/1GB 256/1GB 256/1GB 40GB 40GB 40GB 8K (Head) 32 Byte (Maintenance kit) ... Non-Volatile No*** Non-Volatile No*** Non-Volatile No*** Non-Volatile No*** Note: Flash is used for the Xerox Phaser 8560 printer. Please note, there are no remnants of customer print data retained in the printer when both of Volatility The chart below shows the corresponding memory types for Firmware code and contains no...
User Guide
Page 5
Contents 5 Maintenance Maintenance and Cleaning 5-2 Routine Maintenance 5-2 Cleaning the Paper Release Blade 5-10 Cleaning the Maintenance Kit Wiper Blade 5-12 Cleaning the Outside of the Printer 5-14 Ordering Supplies 5-15 Consumables 5-15 Routine Maintenance Items 5-15 When to Order Supplies 5-16 Recycling Supplies 5-16 Moving and Repacking the Printer 5-17 Precautions for Moving the Printer 5-17 Moving the Printer Within the...
Contents 5 Maintenance Maintenance and Cleaning 5-2 Routine Maintenance 5-2 Cleaning the Paper Release Blade 5-10 Cleaning the Maintenance Kit Wiper Blade 5-12 Cleaning the Outside of the Printer 5-14 Ordering Supplies 5-15 Consumables 5-15 Routine Maintenance Items 5-15 When to Order Supplies 5-16 Recycling Supplies 5-16 Moving and Repacking the Printer 5-17 Precautions for Moving the Printer 5-17 Moving the Printer Within the...

User Guide
Page 8
Two RAM slots 2 1 8560p-046 Phaser® 8560 Color Printer 1-3 Power cord connection 4. Power switch 5. Optional hard drive 2. Waste tray 3. USB connection 6. Right Side View 1 Parts of the Printer 2 34 5 6 7 1. Maintenance kit 2. Configuration card 7. Ethernet 10/100 Base-T connection Rear View 8560p-045 1.
Two RAM slots 2 1 8560p-046 Phaser® 8560 Color Printer 1-3 Power cord connection 4. Power switch 5. Optional hard drive 2. Waste tray 3. USB connection 6. Right Side View 1 Parts of the Printer 2 34 5 6 7 1. Maintenance kit 2. Configuration card 7. Ethernet 10/100 Base-T connection Rear View 8560p-045 1.

User Guide
Page 96
Select Information Pages, and then press the OK button. Select Print Quality Problems, and then press the OK button. c. The printer cleans the ink from appearing on the page: 1. b. On the control panel, select Information, and then press the OK button. c. Repeat Step 2 ... paper type. b. See also: Manual 2-Sided Printing on page 3-27 Cleaning the Maintenance Kit Wiper Blade on supported paper types and weights, print the Paper Tips page: a. For information on page 5-12 Phaser® 8560 Color Printer 4-7 Select Paper Tips Page, and then press the OK button. 2. Open the ...
Select Information Pages, and then press the OK button. Select Print Quality Problems, and then press the OK button. c. The printer cleans the ink from appearing on the page: 1. b. On the control panel, select Information, and then press the OK button. c. Repeat Step 2 ... paper type. b. See also: Manual 2-Sided Printing on page 3-27 Cleaning the Maintenance Kit Wiper Blade on supported paper types and weights, print the Paper Tips page: a. For information on page 5-12 Phaser® 8560 Color Printer 4-7 Select Paper Tips Page, and then press the OK button. 2. Open the ...

User Guide
Page 98
... paper release blade with a lint-free cloth. b. Remove the maintenance kit. Open the door on the page: 1. c. b. If the problem continues, follow the steps for Random Light Stripes. To prevent predominate light stripes from the paper-exit area. Close the exit cover. 3. d. Phaser® 8560 Color Printer 4-9 Close the door. 4. Predominate Light Stripes Solving Print...
... paper release blade with a lint-free cloth. b. Remove the maintenance kit. Open the door on the page: 1. c. b. If the problem continues, follow the steps for Random Light Stripes. To prevent predominate light stripes from the paper-exit area. Close the exit cover. 3. d. Phaser® 8560 Color Printer 4-9 Close the door. 4. Predominate Light Stripes Solving Print...
User Guide
Page 102
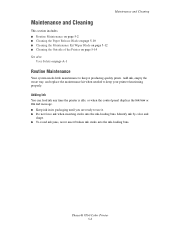
... tray, and replace the maintenance kit when needed to keep it . ■ Do not force ink when inserting sticks into the ink-loading bins. Identify ink by color and shape. ■ To avoid ink jams, never insert broken ink sticks into the ink-loading bins. Phaser® 8560 Color Printer 5-2 Maintenance and Cleaning Maintenance and Cleaning This section includes: ■ Routine Maintenance on page 5-2 ■...
... tray, and replace the maintenance kit when needed to keep it . ■ Do not force ink when inserting sticks into the ink-loading bins. Identify ink by color and shape. ■ To avoid ink jams, never insert broken ink sticks into the ink-loading bins. Phaser® 8560 Color Printer 5-2 Maintenance and Cleaning Maintenance and Cleaning This section includes: ■ Routine Maintenance on page 5-2 ■...

User Guide
Page 108
Replace it when the control panel prompts you to www.xerox.com/office/8560Psupplies. To order a replacement maintenance kit, contact your local reseller or go to replace the maintenance kit. Remove the maintenance kit (labeled A) from the maintenance kit slot. 8560p-032 Phaser® 8560 Color Printer 5-8 Note: Order a new maintenance kit when the control panel displays a message that keeps the surface of the imaging...
Replace it when the control panel prompts you to www.xerox.com/office/8560Psupplies. To order a replacement maintenance kit, contact your local reseller or go to replace the maintenance kit. Remove the maintenance kit (labeled A) from the maintenance kit slot. 8560p-032 Phaser® 8560 Color Printer 5-8 Note: Order a new maintenance kit when the control panel displays a message that keeps the surface of the imaging...

User Guide
Page 109
Close the side door. 8560p-038 Phaser® 8560 Color Printer 5-9 Follow the illustrated instructions included with the maintenance kit for full installation and disposal information. 4. Insert the replacement maintenance kit and push it completely into the maintenance kit slot. Maintenance and Cleaning 3.
Close the side door. 8560p-038 Phaser® 8560 Color Printer 5-9 Follow the illustrated instructions included with the maintenance kit for full installation and disposal information. 4. Insert the replacement maintenance kit and push it completely into the maintenance kit slot. Maintenance and Cleaning 3.

User Guide
Page 112
To clean the maintenance kit wiper blade: 1. Remove the maintenance kit (labeled A) from the maintenance kit slot. 8560p-032 Phaser® 8560 Color Printer 5-12 Maintenance and Cleaning Cleaning the Maintenance Kit Wiper Blade The maintenance kit contains a wiper blade that removes excess ink. Open the side door. 8560p-034 2.
To clean the maintenance kit wiper blade: 1. Remove the maintenance kit (labeled A) from the maintenance kit slot. 8560p-032 Phaser® 8560 Color Printer 5-12 Maintenance and Cleaning Cleaning the Maintenance Kit Wiper Blade The maintenance kit contains a wiper blade that removes excess ink. Open the side door. 8560p-034 2.

User Guide
Page 113
Close the door. 8560p-033 8560p-038 Phaser® 8560 Color Printer 5-13 Insert the maintenance kit and push it completely into the maintenance kit slot. 5. Use a lint-free cloth to clean the top and upper edges of the flexible plastic wiper blade located next to the roller. 8560p-070 4. Maintenance and Cleaning 3.
Close the door. 8560p-033 8560p-038 Phaser® 8560 Color Printer 5-13 Insert the maintenance kit and push it completely into the maintenance kit slot. 5. Use a lint-free cloth to clean the top and upper edges of the flexible plastic wiper blade located next to the roller. 8560p-070 4. Maintenance and Cleaning 3.

User Guide
Page 115
... only consumable for specific use with this printer. To view information about minimizing ink usage, go to www.xerox.com/office/ 8560Psupplies. Consumables Solid ink is the only ink designed and manufactured under strict quality controls by Xerox for the Phaser 8560 printer. The maintenance kit is the only routine maintenance item for the Phaser 8560 printer. Select Supplies Info, and then press the...
... only consumable for specific use with this printer. To view information about minimizing ink usage, go to www.xerox.com/office/ 8560Psupplies. Consumables Solid ink is the only ink designed and manufactured under strict quality controls by Xerox for the Phaser 8560 printer. The maintenance kit is the only routine maintenance item for the Phaser 8560 printer. Select Supplies Info, and then press the...

User Guide
Page 119
... the repackaging kit. Additional instructions for Shipment Before shipping the printer: 1. The Total Satisfaction Guarantee is not covered by the warranty, service agreement, or Total Satisfaction Guarantee. please contact your local Xerox service representative. Coverage may vary outside these areas; Pack the printer. Turn off the printer. Remove the maintenance kit and waste tray. Phaser® 8560 Color Printer 5-19
... the repackaging kit. Additional instructions for Shipment Before shipping the printer: 1. The Total Satisfaction Guarantee is not covered by the warranty, service agreement, or Total Satisfaction Guarantee. please contact your local Xerox service representative. Coverage may vary outside these areas; Pack the printer. Turn off the printer. Remove the maintenance kit and waste tray. Phaser® 8560 Color Printer 5-19

User Guide
Page 120
Remove the maintenance kit (labeled A) and place it in a plastic bag for storage. 8560p-032 Phaser® 8560 Color Printer 5-20 Open the door on the right side of the printer. 8560p-034 2. Moving and Repacking the Printer Removing the Maintenance Kit and Waste Tray Before turning off the printer, remove the maintenance kit and waste tray: 1.
Remove the maintenance kit (labeled A) and place it in a plastic bag for storage. 8560p-032 Phaser® 8560 Color Printer 5-20 Open the door on the right side of the printer. 8560p-034 2. Moving and Repacking the Printer Removing the Maintenance Kit and Waste Tray Before turning off the printer, remove the maintenance kit and waste tray: 1.

User Guide
Page 121
Phaser® 8560 Color Printer 5-21 Close the printer's door and covers. handle it carefully. 4. Empty the waste, and then place the tray in a plastic bag for storage. 8560p-036 Caution: Shipping the printer with the maintenance kit and waste tray installed can damage the printer. 5. Moving and Repacking the Printer 3. Remove the waste tray (labeled B) from the waste tray slot. 8560p-035 Warning: The waste tray may be hot;
Phaser® 8560 Color Printer 5-21 Close the printer's door and covers. handle it carefully. 4. Empty the waste, and then place the tray in a plastic bag for storage. 8560p-036 Caution: Shipping the printer with the maintenance kit and waste tray installed can damage the printer. 5. Moving and Repacking the Printer 3. Remove the waste tray (labeled B) from the waste tray slot. 8560p-035 Warning: The waste tray may be hot;
User Guide
Page 146
...9632; Do not place the printer on a level, solid, non-vibrating surface with adequate strength to meet strict safety requirements. Phaser® 8560 Color Printer A-3 These include safety agency examination, approval, and compliance with the surface. Printer Location ■ Place the printer in a dust-free area within....00 cm (7.5 in.) above the printer ■ 10.16 cm (4.0 in.) behind the printer ■ 10.16 cm (4.0 in.) on the left side of your printer. Your attention to the following safety guidelines helps to the maintenance kit and waste tray Operational Guidelines ■...
...9632; Do not place the printer on a level, solid, non-vibrating surface with adequate strength to meet strict safety requirements. Phaser® 8560 Color Printer A-3 These include safety agency examination, approval, and compliance with the surface. Printer Location ■ Place the printer in a dust-free area within....00 cm (7.5 in.) above the printer ■ 10.16 cm (4.0 in.) behind the printer ■ 10.16 cm (4.0 in.) on the left side of your printer. Your attention to the following safety guidelines helps to the maintenance kit and waste tray Operational Guidelines ■...

User Guide
Page 151
... the IP address using CentreWare IS, 2-8 choosing a network connection, 2-3 cleaning maintenance kit wiper blade, 5-12 paper release blade, 5-10 printer, 5-2 the outside of the printer, 5-14 CMYK sampler pages, 1-9 color correction, 4-4 color sampler pages, 1-9 colored paper, 3-9 colors adjusting, 4-4 automatic correction, 4-4 Black and White, 4-4 incorrect, 4-10 Office Color, 4-4 PANTONE colors do not match, 4-11 predominant light stripes, 4-9 Press Match, 4-4 random light...
... the IP address using CentreWare IS, 2-8 choosing a network connection, 2-3 cleaning maintenance kit wiper blade, 5-12 paper release blade, 5-10 printer, 5-2 the outside of the printer, 5-14 CMYK sampler pages, 1-9 color correction, 4-4 color sampler pages, 1-9 colored paper, 3-9 colors adjusting, 4-4 automatic correction, 4-4 Black and White, 4-4 incorrect, 4-10 Office Color, 4-4 PANTONE colors do not match, 4-11 predominant light stripes, 4-9 Press Match, 4-4 random light...
User Guide
Page 154
..., 3-23 Xerox Support Centre, 1-11 Macintosh OS X, version 10.2 and 10.3 printer drivers, 2-11 Macintosh OS X, version 10.4, 2-11 printer drivers, 2-11 maintenance and cleaning, 5-2 maintenance kit, 1-3, 4-9, 5-2, 5-15, 5-19, 5-20 extended-capacity kits, 5-15 ...PrintingScout, 6-18 metal clasp envelopes, 3-4 minimizing ink usage, 5-15 mode Enhanced, 4-2 Fast Color, 4-2 High-Resolution/Photo, 4-2 print quality, 4-2 Standard, 4-2 modifying the IP address using CentreWare IS, 2-8 moving the printer, A-5 precautions, 5-17 preparing for shipment, ...DNS server, 2-7 Phaser® 8560 Color Printer Index-4
..., 3-23 Xerox Support Centre, 1-11 Macintosh OS X, version 10.2 and 10.3 printer drivers, 2-11 Macintosh OS X, version 10.4, 2-11 printer drivers, 2-11 maintenance and cleaning, 5-2 maintenance kit, 1-3, 4-9, 5-2, 5-15, 5-19, 5-20 extended-capacity kits, 5-15 ...PrintingScout, 6-18 metal clasp envelopes, 3-4 minimizing ink usage, 5-15 mode Enhanced, 4-2 Fast Color, 4-2 High-Resolution/Photo, 4-2 print quality, 4-2 Standard, 4-2 modifying the IP address using CentreWare IS, 2-8 moving the printer, A-5 precautions, 5-17 preparing for shipment, ...DNS server, 2-7 Phaser® 8560 Color Printer Index-4
User Guide
Page 156
...), 1-4 printer adjusting color settings, 4-4 advanced features, 1-5 changing or modifying the IP address using CentreWare IS, 2-8 cleaning the outside, 5-14 clearance, A-3 configuration card, 1-3 Configuration page, 1-5 configurations, 1-4, 1-5 connection, 1-4 control panel, 1-2 features, 1-6 Ethernet connection, 1-3 exit cover, 1-2 exit cover release, 1-2 features, 1-4 fonts, 1-4 front cover release, 1-2 front-right view, 1-2 information resources, 1-10 ink loader, 1-2 interface cover, 1-2 location, A-3 maintenance, 5-2 maintenance kit, 1-3 maximum...
...), 1-4 printer adjusting color settings, 4-4 advanced features, 1-5 changing or modifying the IP address using CentreWare IS, 2-8 cleaning the outside, 5-14 clearance, A-3 configuration card, 1-3 Configuration page, 1-5 configurations, 1-4, 1-5 connection, 1-4 control panel, 1-2 features, 1-6 Ethernet connection, 1-3 exit cover, 1-2 exit cover release, 1-2 features, 1-4 fonts, 1-4 front cover release, 1-2 front-right view, 1-2 information resources, 1-10 ink loader, 1-2 interface cover, 1-2 location, A-3 maintenance, 5-2 maintenance kit, 1-3 maximum...
User Guide
Page 157
..., A-7 recycling supplies, 5-16, 6-19 registering your printer, 6-19 repackaging kit, 5-19 repacking the printer, 5-19 replacing the maintenance kit, 5-8 resolution maximum, 1-4 resources information, 1-10 RGB sampler pages, 1-9 router address IP address, 2-6 routine maintenance, 5-2 routine maintenance items, 5-15 S safety electrical, A-1 information, 6-19 maintenance, A-2 operational, A-3 printing guidelines, A-4 user, A-1 sales and support center, 6-19 sample pages color sampler pages, 1-9 printing, 1-8 selecting 2-sided...
..., A-7 recycling supplies, 5-16, 6-19 registering your printer, 6-19 repackaging kit, 5-19 repacking the printer, 5-19 replacing the maintenance kit, 5-8 resolution maximum, 1-4 resources information, 1-10 RGB sampler pages, 1-9 router address IP address, 2-6 routine maintenance, 5-2 routine maintenance items, 5-15 S safety electrical, A-1 information, 6-19 maintenance, A-2 operational, A-3 printing guidelines, A-4 user, A-1 sales and support center, 6-19 sample pages color sampler pages, 1-9 printing, 1-8 selecting 2-sided...

Quick Use Guide
Page 2
Interface Cover Front Cover Side Door Maintenance Kit Waste Tray www.xerox.com/office/8560Psupport Control Panel Buttons Cancel Up Arrow OK Back Help Down Arrow Help Information Provides information about the message or menu. Printer Tour 1 2 34 Exit Cover Ink Loader See label. Paper Tray Setup Use these tools to setup Help Button: Press at any time to display additional information about the printer.
Interface Cover Front Cover Side Door Maintenance Kit Waste Tray www.xerox.com/office/8560Psupport Control Panel Buttons Cancel Up Arrow OK Back Help Down Arrow Help Information Provides information about the message or menu. Printer Tour 1 2 34 Exit Cover Ink Loader See label. Paper Tray Setup Use these tools to setup Help Button: Press at any time to display additional information about the printer.