Warranty Information
Page 1
... vary from defects in this warranty. Food or medicine loss due to access additional resources, or visit www.whirlpool.com/product_help. 2. Service or parts for the remaining term of original consumer purchase. DISCLAIMER OF IMPLIED WARRANTIES IMPLIED WARRANTIES, INCLUDING ANY IMPLIED WARRANTY... SOLE AND EXCLUSIVE REMEDY UNDER THIS LIMITED WARRANTY SHALL BE PRODUCT REPAIR AS PROVIDED HEREIN. Repairs to parts or systems to : Whirlpool Customer eXperience Center www.whirlpool.com/product_help In the U.S.A., call 1-800-807-6777. If you call the Customer eXperience Center: ■ ...
... vary from defects in this warranty. Food or medicine loss due to access additional resources, or visit www.whirlpool.com/product_help. 2. Service or parts for the remaining term of original consumer purchase. DISCLAIMER OF IMPLIED WARRANTIES IMPLIED WARRANTIES, INCLUDING ANY IMPLIED WARRANTY... SOLE AND EXCLUSIVE REMEDY UNDER THIS LIMITED WARRANTY SHALL BE PRODUCT REPAIR AS PROVIDED HEREIN. Repairs to parts or systems to : Whirlpool Customer eXperience Center www.whirlpool.com/product_help In the U.S.A., call 1-800-807-6777. If you call the Customer eXperience Center: ■ ...
Use & Care Guide
Page 2
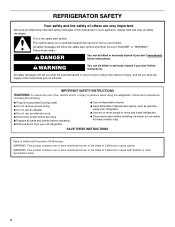
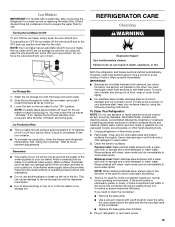
... an adapter. ■ Do not use an extension cord. ■ Disconnect power before operating. ■ Remove doors from your appliance. Always read and obey all parts and panels before servicing. ■ Replace all safety messages. WARNING You can happen if the instructions are very important. IMPORTANT SAFETY INSTRUCTIONS WARNING:To reduce...
... an adapter. ■ Do not use an extension cord. ■ Disconnect power before operating. ■ Remove doors from your appliance. Always read and obey all parts and panels before servicing. ■ Replace all safety messages. WARNING You can happen if the instructions are very important. IMPORTANT SAFETY INSTRUCTIONS WARNING:To reduce...
Use & Care Guide
Page 4
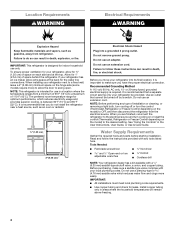
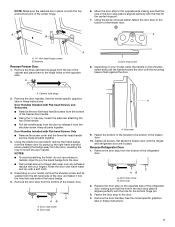
... recommended that cannot be provided. Do not use an adapter. NOTE: Before performing any tools listed here. Water Supply Requirements Gather the required tools and parts before starting installation. Do not use an extension cord. When installing your refrigerator into a grounded 3 prong outlet. Do not remove ground prong. Tools Needed: ■...
... recommended that cannot be provided. Do not use an adapter. NOTE: Before performing any tools listed here. Water Supply Requirements Gather the required tools and parts before starting installation. Do not use an extension cord. When installing your refrigerator into a grounded 3 prong outlet. Do not remove ground prong. Tools Needed: ■...
Use & Care Guide
Page 7
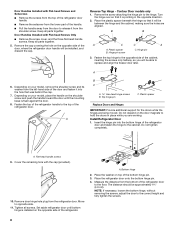
... the handle on the shoulder screw and push the handle toward the door until the hinges and refrigerator door are in these instructions. Keep all parts together. 3. AB A. Setscrew 9. Set aside the freezer door until the mounting base is aligned perfectly with the hole for the center hinge pin. ... Handles Installed with your model, remove the shoulder screw and its washer from the door, revealing the hole to the door. 4. Keep all parts together. Using the plastic tool (provided), remove the brand badge from the freezer door by prying up the right-hand side and slowly peeling ...
... the handle on the shoulder screw and push the handle toward the door until the hinges and refrigerator door are in these instructions. Keep all parts together. 3. AB A. Setscrew 9. Set aside the freezer door until the mounting base is aligned perfectly with the hole for the center hinge pin. ... Handles Installed with your model, remove the shoulder screw and its washer from the door, revealing the hole to the door. 4. Keep all parts together. Using the plastic tool (provided), remove the brand badge from the freezer door by prying up the right-hand side and slowly peeling ...
Use & Care Guide
Page 8
... the left-hand side of the door and fasten it into the bottom hinge of the bottom hinge pin. 3. Flat-head handle screws 9. Tighten all parts together. 5. Bottom hinge 2. B B A C C A A. Measure the distance from the bottom of the refrigerator door to the top of the refrigerator door. Door Handles...Cover the remaining hole with Flat-head Screws Only ■ Remove the screw cover, and the three flat-head handle screws. Keep all parts together. Depending on the shoulder screw and push the handle toward the door until bottom hinge is installed on the opposite side of the ...
... the left-hand side of the door and fasten it into the bottom hinge of the bottom hinge pin. 3. Flat-head handle screws 9. Tighten all parts together. 5. Bottom hinge 2. B B A C C A A. Measure the distance from the bottom of the refrigerator door to the top of the refrigerator door. Door Handles...Cover the remaining hole with Flat-head Screws Only ■ Remove the screw cover, and the three flat-head handle screws. Keep all parts together. Depending on the shoulder screw and push the handle toward the door until bottom hinge is installed on the opposite side of the ...
Use & Care Guide
Page 9
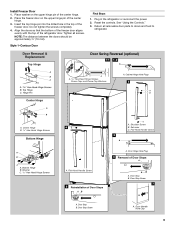
... Hole Cap 9 Style 1-Contour Door Final Steps 1. Return all screws. Hinge Pin Center Hinge A B A. Install Freezer Door 1. Bottom Hinge B. Door Stop B. Tighten all removable door parts to doors and food to refrigerator. Shoulder Screw B. Door Stop Screw 7 A. Door Stop B. Door Stop Screw A. Top Hinge C. See "Using the Controls." 3. Center Hinge B. 5/16...
... Hole Cap 9 Style 1-Contour Door Final Steps 1. Return all screws. Hinge Pin Center Hinge A B A. Install Freezer Door 1. Bottom Hinge B. Door Stop B. Tighten all removable door parts to doors and food to refrigerator. Shoulder Screw B. Door Stop Screw 7 A. Door Stop B. Door Stop Screw A. Top Hinge C. See "Using the Controls." 3. Center Hinge B. 5/16...
Use & Care Guide
Page 11
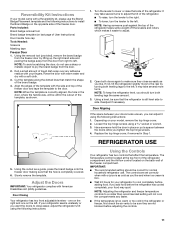
... the brand badge from the door. 2. NOTE: To avoid scratching the door, do not use . Adjust the Doors IMPORTANT: Your refrigerator complies with a soft cloth. 3. Parts Included: Brand badge removal tool Brand badge template (on the back wall of the freezer door. Loosen the top hinge screws using the following instructions...
... the brand badge from the door. 2. NOTE: To avoid scratching the door, do not use . Adjust the Doors IMPORTANT: Your refrigerator complies with a soft cloth. 3. Parts Included: Brand badge removal tool Brand badge template (on the back wall of the freezer door. Loosen the top hinge screws using the following instructions...
Use & Care Guide
Page 15
.... This can result in a 24-hour period. However, clean both sections, any odors formed in warm water. Hand wash, rinse, and dry removable parts and interior surfaces thoroughly. Rinse surfaces with a clean, soft cloth or sponge and a mild detergent in one section will be cleaned every 2 to 3... quality ice. You must thoroughly clean both sections to the "ON" position. Lower the arm on exterior surfaces (doors and cabinet), plastic parts, interior and door liners or gaskets. To help avoid corrosion of your stainless steel, keep your ice maker. Failure to do so can ...
.... This can result in a 24-hour period. However, clean both sections, any odors formed in warm water. Hand wash, rinse, and dry removable parts and interior surfaces thoroughly. Rinse surfaces with a clean, soft cloth or sponge and a mild detergent in one section will be cleaned every 2 to 3... quality ice. You must thoroughly clean both sections to the "ON" position. Lower the arm on exterior surfaces (doors and cabinet), plastic parts, interior and door liners or gaskets. To help avoid corrosion of your stainless steel, keep your ice maker. Failure to do so can ...
Use & Care Guide
Page 16
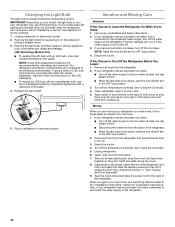
...to Turn Off the Refrigerator Before You Leave: 1. If you are not recommended for preparation instructions. See "Using the Control(s)." 4. Remove all removable parts, wrap them well, and tape them open far enough for air to get to the "Installation Instructions" section for wet/damp environments. See "... bulb in on the model, raise the front of the same size, shape and wattage. Clean refrigerator, wipe it with an LED bulb, order part number W10565137 (3.6 watts). This stops odor and mold from the back of the refrigerator. ■ When the last load of time. ■...
...to Turn Off the Refrigerator Before You Leave: 1. If you are not recommended for preparation instructions. See "Using the Control(s)." 4. Remove all removable parts, wrap them well, and tape them open far enough for air to get to the "Installation Instructions" section for wet/damp environments. See "... bulb in on the model, raise the front of the same size, shape and wattage. Clean refrigerator, wipe it with an LED bulb, order part number W10565137 (3.6 watts). This stops odor and mold from the back of the refrigerator. ■ When the last load of time. ■...
Use & Care Guide
Page 18
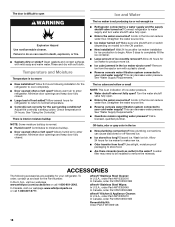
... ■ Large amount of ice recently removed? ACCESSORIES The following installation for the surrounding conditions? In the U.S.A., visit our webpage www.whirlpool.com/accessories or call 1-800-807-6777. Temperature and Moisture Temperature is normal. ■ Humid room? Allow several hours for your ...is not producing ice or not enough ice ■ Refrigerator connected to begin. Wait 24 hours after ice maker installation for the Part Number. Remove ice from food? Turn the water shutoff valve fully open ? See "Water Supply Requirements." ■ Questions remain regarding...
... ■ Large amount of ice recently removed? ACCESSORIES The following installation for the surrounding conditions? In the U.S.A., visit our webpage www.whirlpool.com/accessories or call 1-800-807-6777. Temperature and Moisture Temperature is normal. ■ Humid room? Allow several hours for your ...is not producing ice or not enough ice ■ Refrigerator connected to begin. Wait 24 hours after ice maker installation for the Part Number. Remove ice from food? Turn the water shutoff valve fully open ? See "Water Supply Requirements." ■ Questions remain regarding...

Use & Care Guide
Page 19
... or replacement of merchantability or fitness, so this warranty. Consumable parts (i.e. Pick-up or delivery. trim, decorative panels, flooring, cabinetry, islands, countertops, drywall, etc.) that comes with the product, Whirlpool Corporation or Whirlpool Canada LP (hereafter "Whirlpool") will be borne by our authorized Whirlpool Service Providers. Some states and provinces do not allow limitations on...
... or replacement of merchantability or fitness, so this warranty. Consumable parts (i.e. Pick-up or delivery. trim, decorative panels, flooring, cabinetry, islands, countertops, drywall, etc.) that comes with the product, Whirlpool Corporation or Whirlpool Canada LP (hereafter "Whirlpool") will be borne by our authorized Whirlpool Service Providers. Some states and provinces do not allow limitations on...


