
Warranty Information
Page 1
... retailer name and address IF YOU NEED SERVICE: 1. Service to or furnished with the product, Whirlpool Corporation or Whirlpool Canada LP (hereafter "Whirlpool") will be borne by Whirlpool. 7. Consumable parts (i.e. Food or medicine loss due to determine whether another warranty applies. This...major appliance is required to you . trim, decorative panels, flooring, cabinetry, islands, countertops, drywall, etc.) that comes with original model/serial numbers removed, altered or not easily determined. If you call 1-800-807-6777. light bulbs, batteries, air or water filters,...
... retailer name and address IF YOU NEED SERVICE: 1. Service to or furnished with the product, Whirlpool Corporation or Whirlpool Canada LP (hereafter "Whirlpool") will be borne by Whirlpool. 7. Consumable parts (i.e. Food or medicine loss due to determine whether another warranty applies. This...major appliance is required to you . trim, decorative panels, flooring, cabinetry, islands, countertops, drywall, etc.) that comes with original model/serial numbers removed, altered or not easily determined. If you call 1-800-807-6777. light bulbs, batteries, air or water filters,...
Use & Care Guide
Page 2
... alert symbol and either the word "DANGER" or "WARNING." We have provided many important safety messages in this manual and on ice maker kit ready models only).
... alert symbol and either the word "DANGER" or "WARNING." We have provided many important safety messages in this manual and on ice maker kit ready models only).
Use & Care Guide
Page 4
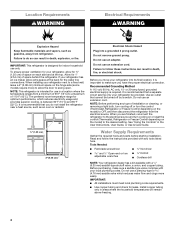
...heat source, such as gasoline, away from a minimum of 55°F (13°C) to a maximum of space on the hinge side (some models require more easily. When installing your refrigerator into a grounded 3 prong outlet. Do not remove ground prong. Before you have the proper electrical connection....is recommended that you are finished, reconnect the refrigerator to the electrical source and turn the control (Thermostat, Refrigerator or Freezer Control depending on the model) to a fixed wall, leave a 2" (5.08 cm) minimum space on each side and at the back for 1" (2.54 cm) of ...
...heat source, such as gasoline, away from a minimum of 55°F (13°C) to a maximum of space on the hinge side (some models require more easily. When installing your refrigerator into a grounded 3 prong outlet. Do not remove ground prong. Before you have the proper electrical connection....is recommended that you are finished, reconnect the refrigerator to the electrical source and turn the control (Thermostat, Refrigerator or Freezer Control depending on the model) to a fixed wall, leave a 2" (5.08 cm) minimum space on each side and at the back for 1" (2.54 cm) of ...
Use & Care Guide
Page 6
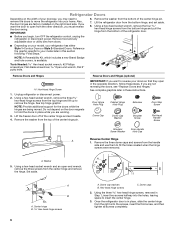
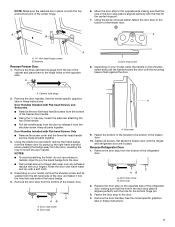
...Badge and hole covers, is in these steps. NOTE: Provide additional support for the doors while the hinges are factory installed on your model, your refrigerator has either Style 1-Contour Doors or Style 2-Standard Doors. Remove the washer from the handle side and use them to ... the doors, see "Replace Doors and Hinges." A. Reference the graphic specific to remove the hinge. Lift the freezer door off of your model later in the opposite direction, follow these instructions. Reverse Doors and Hinges (optional) IMPORTANT: If you begin, turn OFF the refrigerator control,...
...Badge and hole covers, is in these steps. NOTE: Provide additional support for the doors while the hinges are factory installed on your model, your refrigerator has either Style 1-Contour Doors or Style 2-Standard Doors. Remove the washer from the handle side and use them to ... the doors, see "Replace Doors and Hinges." A. Reference the graphic specific to remove the hinge. Lift the freezer door off of your model later in the opposite direction, follow these instructions. Reverse Doors and Hinges (optional) IMPORTANT: If you begin, turn OFF the refrigerator control,...
Use & Care Guide
Page 7
... the right-hand side and slowly peeling the badge away from the shoulder screw. Depending on your model, place the handle on the shoulder screw and push the handle toward the door until the hinges... and refrigerator door are in place on your model, remove the shoulder screw and its washer from the left-hand side of the door and fasten...; Pull the handle away from the bottom of the freezer door. Remove the door handles. See the model specific graphics later in the door stop on the opposite side. Using the screw removed earlier, fasten the...
... the right-hand side and slowly peeling the badge away from the shoulder screw. Depending on your model, place the handle on the shoulder screw and push the handle toward the door until the hinges... and refrigerator door are in place on your model, remove the shoulder screw and its washer from the left-hand side of the door and fasten...; Pull the handle away from the bottom of the freezer door. Remove the door handles. See the model specific graphics later in the door stop on the opposite side. Using the screw removed earlier, fasten the...
Use & Care Guide
Page 8
...to the top of the bottom hinge pin. 3. The distance should be installed, and discard the cap. Do not depend on your model, place the handle on the shoulder screw and push the handle toward the door until bottom hinge is flush against the door. 8. ... in the opposite direction. 2. Plastic spacer Replace Doors and Hinges IMPORTANT: Provide additional support for the doors while the hinges are being moved. A. Contour Door models only 1. B B A C C A A. Place the refrigerator door onto the bottom hinge pin. 4. Door Handles Installed with Flat-head Screws and Setscrews ...
...to the top of the bottom hinge pin. 3. The distance should be installed, and discard the cap. Do not depend on your model, place the handle on the shoulder screw and push the handle toward the door until bottom hinge is flush against the door. 8. ... in the opposite direction. 2. Plastic spacer Replace Doors and Hinges IMPORTANT: Provide additional support for the doors while the hinges are being moved. A. Contour Door models only 1. B B A C C A A. Place the refrigerator door onto the bottom hinge pin. 4. Door Handles Installed with Flat-head Screws and Setscrews ...
Use & Care Guide
Page 11
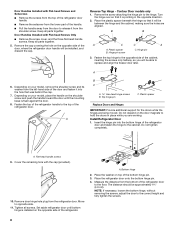
... against the top of the freezer door. If you tighten the top hinge screws. 4. Reversibility Kit Instructions If your model came with a Reversibility kit, please use . one on the right and one on your model, remove the top hinge cover. 2. NOTE: Having someone hold the door in Step 1. Depending on the left...
... against the top of the freezer door. If you tighten the top hinge screws. 4. Reversibility Kit Instructions If your model came with a Reversibility kit, please use . one on the right and one on your model, remove the top hinge cover. 2. NOTE: Having someone hold the door in Step 1. Depending on the left...
Use & Care Guide
Page 12
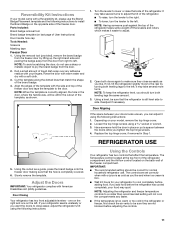
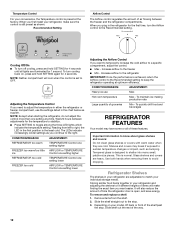
Cooling Off/On ■ To turn off cooling, press and hold SETTING again for the first time, turn cooling back on your model, lift back or front of the shelf past the stop . 3. NOTE: Neither compartment will make sure the control is set to shatter into many ... setting at optimum efficiency. Increase airflow to sudden temperature changes or impact, such as shown. To quickly chill food and beverages REFRIGERATOR FEATURES Your model may break if exposed to the refrigerator IMPORTANT: Once the performance is the least cold. Shelves and covers may have some or all lights are...
Cooling Off/On ■ To turn off cooling, press and hold SETTING again for the first time, turn cooling back on your model, lift back or front of the shelf past the stop . 3. NOTE: Neither compartment will make sure the control is set to shatter into many ... setting at optimum efficiency. Increase airflow to sudden temperature changes or impact, such as shown. To quickly chill food and beverages REFRIGERATOR FEATURES Your model may break if exposed to the refrigerator IMPORTANT: Once the performance is the least cold. Shelves and covers may have some or all lights are...

Use & Care Guide
Page 14
...by squeezing against one side in the lock and sliding in the freezer for freezing, check a freezer guide or reliable cookbook. FREEZER FEATURES Your model may have some or all of these features. Slide the shelf straight out to circulate around packages. Guide the front of the cabinet. 5. ...the opposite side until it straight out. 2. This is designed to shatter into the track in all the way. Freezer Shelf Depending on your model, the shelf may be airtight and moisture-proof), and the storage temperature. The freezer door must close tightly. To remove and replace the ...
...by squeezing against one side in the lock and sliding in the freezer for freezing, check a freezer guide or reliable cookbook. FREEZER FEATURES Your model may have some or all of these features. Slide the shelf straight out to circulate around packages. Guide the front of the cabinet. 5. ...the opposite side until it straight out. 2. This is designed to shatter into the track in all the way. Freezer Shelf Depending on your model, the shelf may be airtight and moisture-proof), and the storage temperature. The freezer door must close tightly. To remove and replace the ...
Use & Care Guide
Page 15
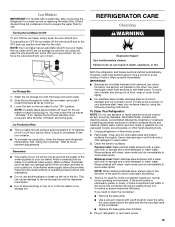
..., the open areas behind the grille and the front surface area of food, wrap or cover foods tightly. ■ For stainless steel models, stainless steel is significant pet traffic in the home, the condenser should produce approximately 8 to the other harsh cleaning tools. 1. Both... thoroughly. REFRIGERATOR CARE Cleaning WARNING Explosion Hazard Use nonflammable cleaner. IMPORTANT: ■ Because air circulates between adjustments. Ice Maker IMPORTANT: For models with a clean, soft cloth or sponge and a mild detergent in warm water. Failure to do so can cause damage to the ice...
..., the open areas behind the grille and the front surface area of food, wrap or cover foods tightly. ■ For stainless steel models, stainless steel is significant pet traffic in the home, the condenser should produce approximately 8 to the other harsh cleaning tools. 1. Both... thoroughly. REFRIGERATOR CARE Cleaning WARNING Explosion Hazard Use nonflammable cleaner. IMPORTANT: ■ Because air circulates between adjustments. Ice Maker IMPORTANT: For models with a clean, soft cloth or sponge and a mild detergent in warm water. Failure to do so can cause damage to the ice...
Use & Care Guide
Page 16
..."Using the Control(s)." 5. See "Adjust the Door(s)" or "Door Closing and Door Alignment." 9. Use up ) position. 3. Remove all instructions on the model, raise the front of the same size, shape and wattage. When you have an automatic ice maker, turn off the water supply to the OFF... If your new home, put everything back and refer to be wet/damp environments. If your refrigerator to prepare it straight down. 3. LED Technology Models Only ■ To replace the LED bulb with an appliance bulb of the refrigerator so it , and dry well. 5. Clean refrigerator, wipe it...
..."Using the Control(s)." 5. See "Adjust the Door(s)" or "Door Closing and Door Alignment." 9. Use up ) position. 3. Remove all instructions on the model, raise the front of the same size, shape and wattage. When you have an automatic ice maker, turn off the water supply to the OFF... If your new home, put everything back and refer to be wet/damp environments. If your refrigerator to prepare it straight down. 3. LED Technology Models Only ■ To replace the LED bulb with an appliance bulb of the refrigerator so it , and dry well. 5. Clean refrigerator, wipe it...
Use & Care Guide
Page 17
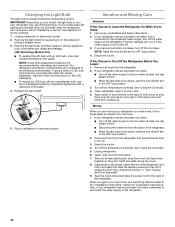
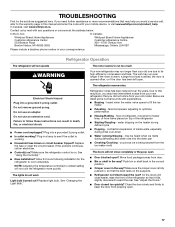
...in a lamp to see if the outlet is fully pushed in your old one due to this manual and scan the code with your old model. Due to its high-efficiency compressor and fans. Below are listed some normal sounds with any questions or concerns at the address below: In ... Control(s)." ■ New installation? Do not use an adapter. Make sure the refrigerator control is being ejected from your mobile device, or visit www.whirlpool.com/product_help. Allow 24 hours following installation for the refrigerator to keep the door from door. ■ Bin or shelf in the way? water dripping...
...in a lamp to see if the outlet is fully pushed in your old one due to this manual and scan the code with your old model. Due to its high-efficiency compressor and fans. Below are listed some normal sounds with any questions or concerns at the address below: In ... Control(s)." ■ New installation? Do not use an adapter. Make sure the refrigerator control is being ejected from your mobile device, or visit www.whirlpool.com/product_help. Allow 24 hours following installation for the refrigerator to keep the door from door. ■ Bin or shelf in the way? water dripping...
Use & Care Guide
Page 18
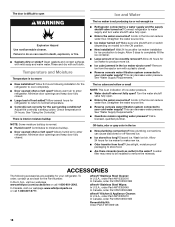
... Refrigerator connected to cool completely. ■ Door opened often or left open ? Straighten the water source line. ■ Ice maker turned on model) is too warm ■ New installation? Turn the water shutoff valve fully open . ■ Kink in the water source line? New plumbing...on ? This can reduce water flow. A kink in the ON position. ■ New installation? In the U.S.A., visit our webpage www.whirlpool.com/accessories or call 1-800-807-6777. Temperature and Moisture Temperature is in the line can decrease water pressure. Remove ice from food? Discard...
... Refrigerator connected to cool completely. ■ Door opened often or left open ? Straighten the water source line. ■ Ice maker turned on model) is too warm ■ New installation? Turn the water shutoff valve fully open . ■ Kink in the water source line? New plumbing...on ? This can reduce water flow. A kink in the ON position. ■ New installation? In the U.S.A., visit our webpage www.whirlpool.com/accessories or call 1-800-807-6777. Temperature and Moisture Temperature is in the line can decrease water pressure. Remove ice from food? Discard...

Use & Care Guide
Page 19
...defects in accordance with products not approved by our authorized Whirlpool Service Providers. trim, decorative panels, flooring, cabinetry, islands, countertops, drywall, etc.) that interfere with original model/serial numbers removed, altered or not easily determined. DISCLAIMER... OF REPRESENTATIONS OUTSIDE OF WARRANTY Whirlpool makes no representations about buying an extended warranty. WHIRLPOOL SHALL NOT BE LIABLE FOR INCIDENTAL OR CONSEQUENTIAL ...
...defects in accordance with products not approved by our authorized Whirlpool Service Providers. trim, decorative panels, flooring, cabinetry, islands, countertops, drywall, etc.) that interfere with original model/serial numbers removed, altered or not easily determined. DISCLAIMER... OF REPRESENTATIONS OUTSIDE OF WARRANTY Whirlpool makes no representations about buying an extended warranty. WHIRLPOOL SHALL NOT BE LIABLE FOR INCIDENTAL OR CONSEQUENTIAL ...


