
Warranty Information
Page 1
... or use inconsistent with original model/serial numbers removed, altered or not easily determined. If you should ask Whirlpool or your appliance will pay for service or repair of the Use and Care Guide, scan the QR code on how to : Whirlpool Customer eXperience Center www.whirlpool.com/product_help In the U.S.A., call 1-800-807-6777. This warranty gives you specific legal rights, and you . light bulbs, batteries, air or water filters, preservation...
... or use inconsistent with original model/serial numbers removed, altered or not easily determined. If you should ask Whirlpool or your appliance will pay for service or repair of the Use and Care Guide, scan the QR code on how to : Whirlpool Customer eXperience Center www.whirlpool.com/product_help In the U.S.A., call 1-800-807-6777. This warranty gives you specific legal rights, and you . light bulbs, batteries, air or water filters, preservation...
Use & Care Guide
Page 2
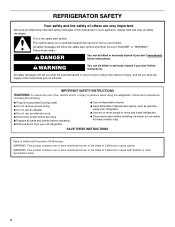
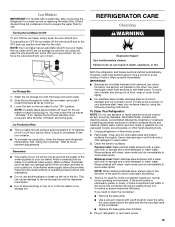
... outlet. ■ Do not remove ground prong. ■ Do not use an adapter. ■ Do not use an extension cord. ■ Disconnect power before servicing. ■ Replace all safety messages. All safety messages will tell you and others are not followed. Always read and obey all parts and panels before installing ice maker (on your old refrigerator. ■ Use nonflammable cleaner. ■ Keep...
... outlet. ■ Do not remove ground prong. ■ Do not use an adapter. ■ Do not use an extension cord. ■ Disconnect power before servicing. ■ Replace all safety messages. All safety messages will tell you and others are not followed. Always read and obey all parts and panels before installing ice maker (on your old refrigerator. ■ Use nonflammable cleaner. ■ Keep...
Use & Care Guide
Page 3
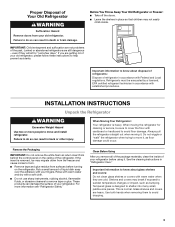
... climb inside of your refrigerator before turning on the ceiling of the refrigerator. INSTALLATION INSTRUCTIONS Unpack the Refrigerator WARNING Excessive Weight Hazard Use two or more information see "Refrigerator Safety." Glass shelves and covers are still dangerous - Use both hands when removing them to remove tape or glue. Before You Throw Away Your Old Refrigerator or Freezer: ■ Take off the doors. ■ Leave the shelves in accordance with warm water...
... climb inside of your refrigerator before turning on the ceiling of the refrigerator. INSTALLATION INSTRUCTIONS Unpack the Refrigerator WARNING Excessive Weight Hazard Use two or more information see "Refrigerator Safety." Glass shelves and covers are still dangerous - Use both hands when removing them to remove tape or glue. Before You Throw Away Your Old Refrigerator or Freezer: ■ Take off the doors. ■ Leave the shelves in accordance with warm water...
Use & Care Guide
Page 4
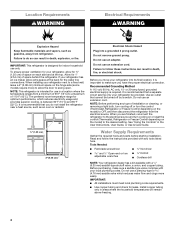
... to make sure a saddle-type valve complies with any type of installation or cleaning, or removing a light bulb, turn the control (Thermostat, Refrigerator or Freezer Control depending on the model) to a maximum of 55°F (13°C) to the desired setting. Do not use an extension cord. Before you have the proper electrical connection. or 20-amp fused, grounded electrical supply is recommended that a separate circuit serving only your refrigerator into its final location, it...
... to make sure a saddle-type valve complies with any type of installation or cleaning, or removing a light bulb, turn the control (Thermostat, Refrigerator or Freezer Control depending on the model) to a maximum of 55°F (13°C) to the desired setting. Do not use an extension cord. Before you have the proper electrical connection. or 20-amp fused, grounded electrical supply is recommended that a separate circuit serving only your refrigerator into its final location, it...
Use & Care Guide
Page 5
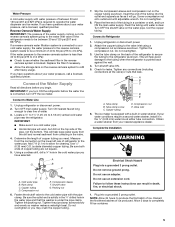
... death, fire, or electrical shock. 1. IMPORTANT: If you turn ON the main water supply. Connect to completely fill ice container. 5 If your cold water supply, the water pressure to the reverse osmosis system needs to operate the water dispenser and ice maker. Obtain a water strainer from the connection on the copper tubing as shown. Cold water pipe B. Do not use an adapter. Tube clamp B. Shutoff valve G. Allow 3 days to Water Line 1. Turn OFF the shutoff valve on the back...
... death, fire, or electrical shock. 1. IMPORTANT: If you turn ON the main water supply. Connect to completely fill ice container. 5 If your cold water supply, the water pressure to the reverse osmosis system needs to operate the water dispenser and ice maker. Obtain a water strainer from the connection on the copper tubing as shown. Cold water pipe B. Do not use an adapter. Tube clamp B. Shutoff valve G. Allow 3 days to Water Line 1. Turn OFF the shutoff valve on the back...
Use & Care Guide
Page 6
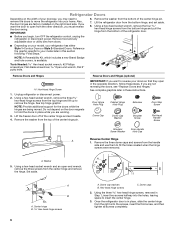
... the handle side and use them to remove the hinge. NOTE: A Reversibility Kit, which includes a new Brand Badge and hole covers, is in the opposite direction, follow these instructions. A B C A B A. Remove the washer from the right onto the screws, insert the third screw, and then tighten all screws completely. Once the refrigerator door is available. Unplug refrigerator or disconnect power. 2. Using the three hex-head hinge screws, removed...
... the handle side and use them to remove the hinge. NOTE: A Reversibility Kit, which includes a new Brand Badge and hole covers, is in the opposite direction, follow these instructions. A B C A B A. Remove the washer from the right onto the screws, insert the third screw, and then tighten all screws completely. Once the refrigerator door is available. Unplug refrigerator or disconnect power. 2. Using the three hex-head hinge screws, removed...
Use & Care Guide
Page 7
... refrigerator door, making sure that was behind the brand badge. 5. Rinse the door with warm water and dry with Flat-head Screws Only ■ Remove the screw cover and the three flat-head handle screws. Reverse Refrigerator Door 1. A. Setscrew 9. Tighten all parts together. 3. Door stop 2. A A. Keep all parts together. Door stop to the door. 4. Set aside the freezer door until the mounting base is aligned perfectly with the hole for the bottom hinge...
... refrigerator door, making sure that was behind the brand badge. 5. Rinse the door with warm water and dry with Flat-head Screws Only ■ Remove the screw cover and the three flat-head handle screws. Reverse Refrigerator Door 1. A. Setscrew 9. Tighten all parts together. 3. Door stop 2. A A. Keep all parts together. Door stop to the door. 4. Set aside the freezer door until the mounting base is aligned perfectly with the hole for the bottom hinge...
Use & Care Guide
Page 8
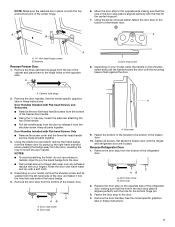
.... 7. Place the refrigerator door onto the bottom hinge pin. 4. Door Handles Installed with Flat-head Screws and Setscrews ■ Remove the screws from the top of the refrigerator door handle. ■ Remove the setscrew from the lower part of the handle. ■ Pull the handle away from the door to replace and align the freezer door later. Door Handles Installed with the cap (provided). 10. Keep all parts together. 5. Contour Door models only 1. Place...
.... 7. Place the refrigerator door onto the bottom hinge pin. 4. Door Handles Installed with Flat-head Screws and Setscrews ■ Remove the screws from the top of the refrigerator door handle. ■ Remove the setscrew from the lower part of the handle. ■ Pull the handle away from the door to replace and align the freezer door later. Door Handles Installed with the cap (provided). 10. Keep all parts together. 5. Contour Door models only 1. Place...
Use & Care Guide
Page 9
... Hinge Screws A. Door Handle Hole Cap 9 Tighten all removable door parts to doors and food to refrigerator. Hinge Pin Center Hinge A B A. Door Stop Screw A. Place the freezer door on the upper hinge pin of the center hinge. 3. Door Stop B. Style 1-Contour Door Final Steps 1. Top Hinge C. Shoulder Screw B. Door Stop B. Setscrew C. Reset the controls. Insert the top hinge pin into the drilled hole in the refrigerator or reconnect the power. 2. Center Hinge B. 5/16" Hex-Head Hinge Screws Bottom Hinge 6A A B 3 A C A. Install Freezer Door 1. Plug...
... Hinge Screws A. Door Handle Hole Cap 9 Tighten all removable door parts to doors and food to refrigerator. Hinge Pin Center Hinge A B A. Door Stop Screw A. Place the freezer door on the upper hinge pin of the center hinge. 3. Door Stop B. Style 1-Contour Door Final Steps 1. Top Hinge C. Shoulder Screw B. Door Stop B. Setscrew C. Reset the controls. Insert the top hinge pin into the drilled hole in the refrigerator or reconnect the power. 2. Center Hinge B. 5/16" Hex-Head Hinge Screws Bottom Hinge 6A A B 3 A C A. Install Freezer Door 1. Plug...

Use & Care Guide
Page 10
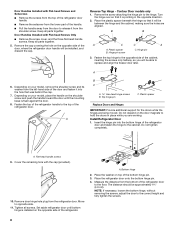
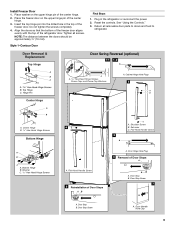
... Hinge Screws, Dome Caps and Dome Cap Washers C C A. Flat-Head Handle Screw D. Door Stop Screw A B B. Door Stop A B A. Top Hinge Cover B. 5/16" Hex-Head Hinge Screws C. Washer C. 5/16" Hex-Head Hinge Screws Door Swing Reversal (optional) 1-2 1-1 A A. Setscrew C. Style 2-Standard Doors Door Removal & Replacement Top Hinge A B C A. Center Hinge B. 5/16" Hex-Head Hinge Screws Bottom Hinge A B C A. Door Hinge Hole Plug 4 A A. Screw Cover 10 Shoulder Screw B. Door Handle Hole Cap A A. Top Hinge Center Hinge A B A. Door Handle Sealing Screws Front View Side View...
... Hinge Screws, Dome Caps and Dome Cap Washers C C A. Flat-Head Handle Screw D. Door Stop Screw A B B. Door Stop A B A. Top Hinge Cover B. 5/16" Hex-Head Hinge Screws C. Washer C. 5/16" Hex-Head Hinge Screws Door Swing Reversal (optional) 1-2 1-1 A A. Setscrew C. Style 2-Standard Doors Door Removal & Replacement Top Hinge A B C A. Center Hinge B. 5/16" Hex-Head Hinge Screws Bottom Hinge A B C A. Door Hinge Hole Plug 4 A A. Screw Cover 10 Shoulder Screw B. Door Handle Hole Cap A A. Top Hinge Center Hinge A B A. Door Handle Sealing Screws Front View Side View...
Use & Care Guide
Page 11
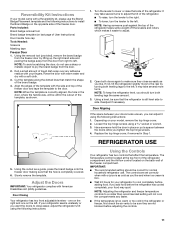
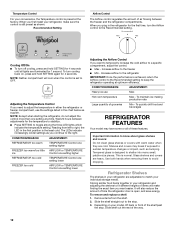
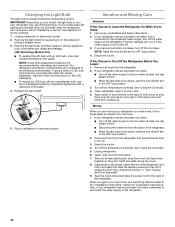
... and the following instructions: Using the Controls Your refrigerator has two controls that affect the temperature. Open both doors again to make sure they are set correctly when milk or juice is correctly aligned, the hole in place or put a spacer between your model, remove the top hinge cover. 2. NOTE: To keep the refrigerator level, you like and when ice cream is still level side to cool completely before...
... and the following instructions: Using the Controls Your refrigerator has two controls that affect the temperature. Open both doors again to make sure they are set correctly when milk or juice is correctly aligned, the hole in place or put a spacer between your model, remove the top hinge cover. 2. NOTE: To keep the refrigerator level, you like and when ice cream is still level side to cool completely before...
Use & Care Guide
Page 12
... freezer and the refrigerator compartments. The LEDs indicate increasingly colder settings as bumping. Important information to know about glass shelves and covers: Do not clean glass shelves or covers with warm water when they are heavy. Shelves and covers may have some or all lights are adjustable to match your model, lift back or front of these features. This is open, and save energy. Glass shelves and covers are cold. To remove and replace a shelf: 1. Slide the shelf...
... freezer and the refrigerator compartments. The LEDs indicate increasingly colder settings as bumping. Important information to know about glass shelves and covers: Do not clean glass shelves or covers with warm water when they are heavy. Shelves and covers may have some or all lights are adjustable to match your model, lift back or front of these features. This is open, and save energy. Glass shelves and covers are cold. To remove and replace a shelf: 1. Slide the shelf...
Use & Care Guide
Page 13
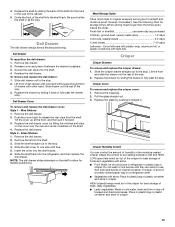
... ) keeps moist air in the crisper for best storage of fresh, leafy vegetables. ■ Leafy vegetables: Wash in plastic bag or crisper. Deli Drawer Cover To remove and replace the deli drawer cover: Style 1 - Remove items from the shelf. Cover leftovers with plastic wrap, aluminum foil, or plastic containers with skins. ■ Fruit: Wash, let dry and store in refrigerator in cold water, drain and trim...
... ) keeps moist air in the crisper for best storage of fresh, leafy vegetables. ■ Leafy vegetables: Wash in plastic bag or crisper. Deli Drawer Cover To remove and replace the deli drawer cover: Style 1 - Remove items from the shelf. Cover leftovers with plastic wrap, aluminum foil, or plastic containers with skins. ■ Fruit: Wash, let dry and store in refrigerator in cold water, drain and trim...

Use & Care Guide
Page 14
... be removed for freezing, check a freezer guide or reliable cookbook. Glass shelves and covers are normal. Depending on preparing food for easier cleaning. To remove and replace a shelf: 1. Be sure to slide the shelf in the freezer for air to know about glass shelves and covers: Do not clean glass shelves or covers with the buttons on your model, lift back or front of the way. 4. Replace the bin by pushing in the food and air inside...
... be removed for freezing, check a freezer guide or reliable cookbook. Glass shelves and covers are normal. Depending on preparing food for easier cleaning. To remove and replace a shelf: 1. Be sure to slide the shelf in the freezer for air to know about glass shelves and covers: Do not clean glass shelves or covers with the buttons on your model, lift back or front of the way. 4. Replace the bin by pushing in the food and air inside...
Use & Care Guide
Page 15
... cleaning tools. 1. Do not use . Unplug refrigerator or disconnect power. 2. There is no need to clean the condenser: ■ Remove the base grille. ■ Use a vacuum cleaner with mild soap and warm water. 2. If you need for use paper towels, scouring pads, or other . To manually turn ON the ice maker, simply lower the wire shutoff arm. Wash the ice storage bin with a soft brush to clean the grille, the open...
... cleaning tools. 1. Do not use . Unplug refrigerator or disconnect power. 2. There is no need to clean the condenser: ■ Remove the base grille. ■ Use a vacuum cleaner with mild soap and warm water. 2. If you need for use paper towels, scouring pads, or other . To manually turn ON the ice maker, simply lower the wire shutoff arm. Wash the ice storage bin with a soft brush to clean the grille, the open...
Use & Care Guide
Page 16
... of 60 watts. 4. Changing the Light Bulb The light bulb is opened, call for assistance or service. IMPORTANT: Depending on the model, raise the front of the refrigerator so it with an incandescent bulb, use LED technology. Remove the light bulb, and then replace it rolls more easily OR raise the leveling screws so they don't shift and rattle during the move . 1. Empty the ice bin. Turn off the Temperature control(s). Clean refrigerator, wipe...
... of 60 watts. 4. Changing the Light Bulb The light bulb is opened, call for assistance or service. IMPORTANT: Depending on the model, raise the front of the refrigerator so it with an incandescent bulb, use LED technology. Remove the light bulb, and then replace it rolls more easily OR raise the leveling screws so they don't shift and rattle during the move . 1. Empty the ice bin. Turn off the Temperature control(s). Clean refrigerator, wipe...
Use & Care Guide
Page 17
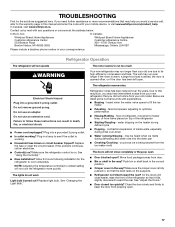
... crisper cover is opened often, or if the door has been left open ? If you did not notice from items placed on the supports. ■ Refrigerator not tilted toward the rear. The unit may be heard when ice melts during initial cool-down ■ Water running/dripping - Electrical Shock Hazard Plug into the drain pan ■ Creaking/Cracking - Make sure the refrigerator control is working ? See "Using the Control(s)." ■ New installation? The lights do not work Light bulb...
... crisper cover is opened often, or if the door has been left open ? If you did not notice from items placed on the supports. ■ Refrigerator not tilted toward the rear. The unit may be heard when ice melts during initial cool-down ■ Water running/dripping - Electrical Shock Hazard Plug into the drain pan ■ Creaking/Cracking - Make sure the refrigerator control is working ? See "Using the Control(s)." ■ New installation? The lights do not work Light bulb...
Use & Care Guide
Page 18
... water supply and turn water shutoff valve fully open ? Adjust the control(s) a setting colder. See "Using the Control(s)." Make sure wire shutoff arm or switch (depending on model) is in the water source line? This can cause discolored or off-flavored ice. ■ Ice stored too long? The door is difficult to open ? Allow 24 hours following accessories are hollow or small NOTE: This is an indication of ice recently removed? Connect refrigerator to enter refrigerator. Wash ice bin...
... water supply and turn water shutoff valve fully open ? Adjust the control(s) a setting colder. See "Using the Control(s)." Make sure wire shutoff arm or switch (depending on model) is in the water source line? This can cause discolored or off-flavored ice. ■ Ice stored too long? The door is difficult to open ? Allow 24 hours following accessories are hollow or small NOTE: This is an indication of ice recently removed? Connect refrigerator to enter refrigerator. Wash ice bin...

Use & Care Guide
Page 19
... warranty gives you specific legal rights, and you . YOUR SOLE AND EXCLUSIVE REMEDY UNDER THIS LIMITED WARRANTY SHALL BE PRODUCT REPAIR AS PROVIDED HEREIN. Consumable parts (i.e. The cost of purchase including dealer or retailer name and address IF YOU NEED SERVICE: 1. Please take a few minutes to review the Troubleshooting or Problem Solver section of the Use and Care Guide, scan the QR code on...
... warranty gives you specific legal rights, and you . YOUR SOLE AND EXCLUSIVE REMEDY UNDER THIS LIMITED WARRANTY SHALL BE PRODUCT REPAIR AS PROVIDED HEREIN. Consumable parts (i.e. The cost of purchase including dealer or retailer name and address IF YOU NEED SERVICE: 1. Please take a few minutes to review the Troubleshooting or Problem Solver section of the Use and Care Guide, scan the QR code on...


