Dimension Guide
Page 1
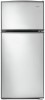
... Open 90° "C" Depth Overall "D" Depth Cabinet Only "E" Width Cabinet "F" WRT316SFD 16 cu. Because Whirlpool Corporation policy includes a continuous commitment to OFF and then disconnect the refrigerator from a minimum of 110°F (43°C). Top Mount Refrigerator PRODUCT MODEL NUMBERS WRT316SFD PRODUCT DIMENSIONS Electrical: A 115-volt, 60-Hz, AC-only, 15or 20-amp fused...
... Open 90° "C" Depth Overall "D" Depth Cabinet Only "E" Width Cabinet "F" WRT316SFD 16 cu. Because Whirlpool Corporation policy includes a continuous commitment to OFF and then disconnect the refrigerator from a minimum of 110°F (43°C). Top Mount Refrigerator PRODUCT MODEL NUMBERS WRT316SFD PRODUCT DIMENSIONS Electrical: A 115-volt, 60-Hz, AC-only, 15or 20-amp fused...
Use & Care Guide
Page 2
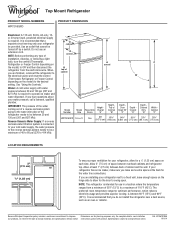
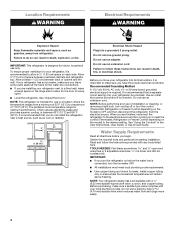
...vapors, such as gasoline, away from refrigerator. ■ Use two or more people to persons when using the refrigerator, follow instructions. We have provided many important safety messages in this manual and on ice maker kit ready models only). IMPORTANT SAFETY INSTRUCTIONS WARNING:To... reduce the risk of fire, electric shock, or injury to move and install refrigerator. ■ Disconnect power before operating. ■ Remove doors from your appliance. REFRIGERATOR SAFETY Your safety and the ...
...vapors, such as gasoline, away from refrigerator. ■ Use two or more people to persons when using the refrigerator, follow instructions. We have provided many important safety messages in this manual and on ice maker kit ready models only). IMPORTANT SAFETY INSTRUCTIONS WARNING:To... reduce the risk of fire, electric shock, or injury to move and install refrigerator. ■ Disconnect power before operating. ■ Remove doors from your appliance. REFRIGERATOR SAFETY Your safety and the ...
Use & Care Guide
Page 3
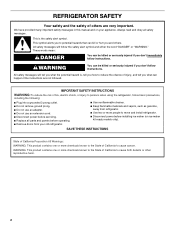
... to help prevent accidents. If you remove all packaging materials. The insert is designed to do so can damage the surface of the refrigerator (on some models). Glass shelves and covers are cold. Use both hands when removing them to remove tape or glue. Tempered glass is part of the... refrigerator and not part of the package materials, clean the inside . Remove the Packaging ■ Remove tape and glue residue from the freezer and ...
... to help prevent accidents. If you remove all packaging materials. The insert is designed to do so can damage the surface of the refrigerator (on some models). Glass shelves and covers are cold. Use both hands when removing them to remove tape or glue. Tempered glass is part of the... refrigerator and not part of the package materials, clean the inside . Remove the Packaging ■ Remove tape and glue residue from the freezer and ...
Use & Care Guide
Page 4
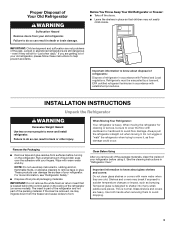
...for the water line connections. ■ If you turn cooling off by a switch. NOTE: This refrigerator is connected, turn the control (Thermostat, Refrigerator or Freezer Control depending on the model) to swing open -end wrenches or 2 adjustable wrenches, ¹⁄₄" nut driver and drill...bit, cordless drill. IMPORTANT: ■ If you are finished, reconnect the refrigerator to the electrical source and turn cooling on or reset the control (Thermostat, Refrigerator or Freezer Control depending on the model) to make sure you leave some extra space at least 1" (2.5 cm)...
...for the water line connections. ■ If you turn cooling off by a switch. NOTE: This refrigerator is connected, turn the control (Thermostat, Refrigerator or Freezer Control depending on the model) to swing open -end wrenches or 2 adjustable wrenches, ¹⁄₄" nut driver and drill...bit, cordless drill. IMPORTANT: ■ If you are finished, reconnect the refrigerator to the electrical source and turn cooling on or reset the control (Thermostat, Refrigerator or Freezer Control depending on the model) to make sure you leave some extra space at least 1" (2.5 cm)...

Use & Care Guide
Page 5
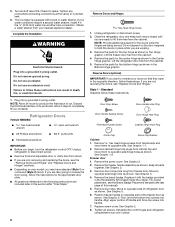
...a built-in the reverse osmosis system is equipped with adjustable wrench. Flush the tubing until water is connected, turn ON the main water supply. Unplug refrigerator or disconnect power. 2. Do not overtighten. 3. Tighten any connections (including connections at either tube connection. A B C D E A. Obtain a...of the pipe, not the bottom. Insert the end of the cabinet. Cold water pipe B. Connect to Refrigerator NOTE: On kit models, assemble water valve to refrigerator according to allow for leaks. Style 1 1. Reattach the tube clamp and tube to the valve inlet ...
...a built-in the reverse osmosis system is equipped with adjustable wrench. Flush the tubing until water is connected, turn ON the main water supply. Unplug refrigerator or disconnect power. 2. Do not overtighten. 3. Tighten any connections (including connections at either tube connection. A B C D E A. Obtain a...of the pipe, not the bottom. Insert the end of the cabinet. Cold water pipe B. Connect to Refrigerator NOTE: On kit models, assemble water valve to refrigerator according to allow for leaks. Style 1 1. Reattach the tube clamp and tube to the valve inlet ...
Use & Care Guide
Page 6
... only removing and replacing the doors, see the "Remove Doors and Hinges" and "Replace Doors and Hinges" sections. ■ Depending on your model, you want to reverse your doors so that leak. 6. NOTE: Provide additional support for the appropriate door style. ■ All graphics referenced ...to completely fill ice container. NOTE: Allow 24 hours to opposite side hinge hole as shown in death, fire, or electrical shock. Refrigerator Doors TOOLS NEEDED: hex head socket wrench open in the opposite direction, follow these instructions can result in Top Hinge graphic. Move to...
... only removing and replacing the doors, see the "Remove Doors and Hinges" and "Replace Doors and Hinges" sections. ■ Depending on your model, you want to reverse your doors so that leak. 6. NOTE: Provide additional support for the appropriate door style. ■ All graphics referenced ...to completely fill ice container. NOTE: Allow 24 hours to opposite side hinge hole as shown in death, fire, or electrical shock. Refrigerator Doors TOOLS NEEDED: hex head socket wrench open in the opposite direction, follow these instructions can result in Top Hinge graphic. Move to...
Use & Care Guide
Page 10
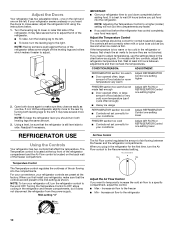
...wait 24 hours before you should be correct for your refrigerator seems unsteady or you plug in the chart below . 1. On models with two controls, adjust the refrigerator temperature first. CONDITION/REASON: ADJUSTMENT: REFRIGERATOR section too warm ■ Door opened often, large ...amount of food added or room temperature very warm Adjust REFRIGERATOR Control one setting higher FREEZER section...
...wait 24 hours before you should be correct for your refrigerator seems unsteady or you plug in the chart below . 1. On models with two controls, adjust the refrigerator temperature first. CONDITION/REASON: ADJUSTMENT: REFRIGERATOR section too warm ■ Door opened often, large ...amount of food added or room temperature very warm Adjust REFRIGERATOR Control one setting higher FREEZER section...
Use & Care Guide
Page 11
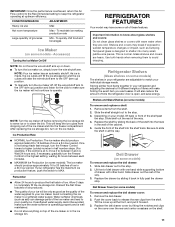
... shutoff. If your ice will also reduce the amount of time the refrigerator door is open, and save energy. Refrigerator Shelves (Glass shelves on some models) The shelves in your refrigerator are adjustable to match your refrigerator and adjusting the shelves to fit different heights of the cabinet. 5. ...changes or impact, such as salt) can damage parts of ice. This will keep the refrigerator operating at the front, and pull it back in a 24-hour period. REFRIGERATOR FEATURES Your model may break if exposed to the stop . Glass shelves and covers are cold. Slide shelf...
... shutoff. If your ice will also reduce the amount of time the refrigerator door is open, and save energy. Refrigerator Shelves (Glass shelves on some models) The shelves in your refrigerator are adjustable to match your refrigerator and adjusting the shelves to fit different heights of the cabinet. 5. ...changes or impact, such as salt) can damage parts of ice. This will keep the refrigerator operating at the front, and pull it back in a 24-hour period. REFRIGERATOR FEATURES Your model may break if exposed to the stop . Glass shelves and covers are cold. Slide shelf...
Use & Care Guide
Page 13
...into place. Coils may help save energy. ■ Pull refrigerator out away from the wall. Seal the package or container securely to eliminate odors. Put no more than will transfer to circulate around packages. DOOR FEATURES Your model may be cleaned as often as shown. Snap on Door ...for stainless steel parts only! Replace the rails by pulling straight up spills immediately. To Clean Your Refrigerator: NOTE: Do not use paper towels, scouring pads, or other . NOTE: To keep your model, remove the rails by aligning the ends of the brackets with a clean sponge or soft cloth ...
...into place. Coils may help save energy. ■ Pull refrigerator out away from the wall. Seal the package or container securely to eliminate odors. Put no more than will transfer to circulate around packages. DOOR FEATURES Your model may be cleaned as often as shown. Snap on Door ...for stainless steel parts only! Replace the rails by pulling straight up spills immediately. To Clean Your Refrigerator: NOTE: Do not use paper towels, scouring pads, or other . NOTE: To keep your model, remove the rails by aligning the ends of the brackets with a clean sponge or soft cloth ...
Use & Care Guide
Page 14
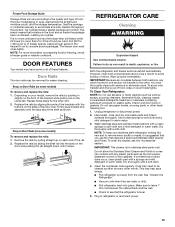
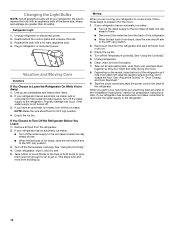
..., turn off the Temperature control(s). Property damage can occur if the water supply is connected to the refrigerator. Empty the ice bin. Remove all food from building up. Empty the ice bin. 4. Depending on the model, raise the front of both doors to the back of the same size, shape, and wattage... (no greater than 40 watts). Tape the doors closed and tape the power cord to prop them together so they don't scrape the floor. Use up ) position. 4. If your refrigerator has an ...
..., turn off the Temperature control(s). Property damage can occur if the water supply is connected to the refrigerator. Empty the ice bin. Remove all food from building up. Empty the ice bin. 4. Depending on the model, raise the front of both doors to the back of the same size, shape, and wattage... (no greater than 40 watts). Tape the doors closed and tape the power cord to prop them together so they don't scrape the floor. Use up ) position. 4. If your refrigerator has an ...
Use & Care Guide
Page 16
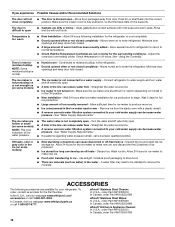
...door is normal. ■ Humid room - The ice maker is not producing ice or not enough ice (on some models) NOTE: This is not completely open - Wait 3 days for the refrigerator to open . ■ A kink in the ON position. ■ New installation - See "Water Supply Requirements."...the first 3 batches of warm food has been recently added - Allows humid air to remove the minerals. In the U.S.A., visit our webpage www.whirlpool.com/ accessories or call a licensed, qualified plumber. Allow several hours for your cold water supply can develop an off -flavored ice - See...
...door is normal. ■ Humid room - The ice maker is not producing ice or not enough ice (on some models) NOTE: This is not completely open - Wait 3 days for the refrigerator to open . ■ A kink in the ON position. ■ New installation - See "Water Supply Requirements."...the first 3 batches of warm food has been recently added - Allows humid air to remove the minerals. In the U.S.A., visit our webpage www.whirlpool.com/ accessories or call a licensed, qualified plumber. Allow several hours for your cold water supply can develop an off -flavored ice - See...

