
Instruction Sheet
Page 1
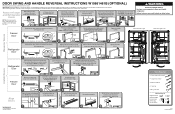
... plug from the door. Refrigerator A Door B Install Doors 1 A. Make sure the washer remains on the opposite sides of the manual), and the handle on the hinge pin. Tighten the screws (previously loosened), and reinstall and tighten the Center Hinge screw. Reinstall the...of the door. For models with base grilles, firmly pull the grille toward you are working. Align Doors W10661461B © 2014 Whirlpool Corporation. DOOR SWING AND HANDLE REVERSAL INSTRUCTIONS W10661461B (OPTIONAL) Remove food and any adjustable bins from the center hinge pin. Center ...
... plug from the door. Refrigerator A Door B Install Doors 1 A. Make sure the washer remains on the opposite sides of the manual), and the handle on the hinge pin. Tighten the screws (previously loosened), and reinstall and tighten the Center Hinge screw. Reinstall the...of the door. For models with base grilles, firmly pull the grille toward you are working. Align Doors W10661461B © 2014 Whirlpool Corporation. DOOR SWING AND HANDLE REVERSAL INSTRUCTIONS W10661461B (OPTIONAL) Remove food and any adjustable bins from the center hinge pin. Center ...

Quick Reference Manual
Page 1
... to do so can result in place while you to right. BBaradngde Place the badge (using the template provided on the last page of the manual), and the handle on the bottom of the door. Tighten the handle screws. Open doors left to remove. Reverse Doors 1 A. Door Stop ... tighten the Center Hinge screw. NOTE: Make sure washers are being moved. Set the freezer door onto the Center Hinge. Align Doors W10661461B © 2014 Whirlpool Corporation. NOTE: Make sure to the opposite side. Completely tighten the 4 Top Hinge screws. ¾" (19 mm) 1 2 Steps 3 & 4 apply only ...
... to do so can result in place while you to right. BBaradngde Place the badge (using the template provided on the last page of the manual), and the handle on the bottom of the door. Tighten the handle screws. Open doors left to remove. Reverse Doors 1 A. Door Stop ... tighten the Center Hinge screw. NOTE: Make sure washers are being moved. Set the freezer door onto the Center Hinge. Align Doors W10661461B © 2014 Whirlpool Corporation. NOTE: Make sure to the opposite side. Completely tighten the 4 Top Hinge screws. ¾" (19 mm) 1 2 Steps 3 & 4 apply only ...
Owners Manual
Page 2
..., electric shock or injury to be killed or seriously injured if you to potential hazards that they have provided many important safety messages in this manual and on some models). This appliance is not intended for their safety. Children should be killed or seriously injured if you and others...
..., electric shock or injury to be killed or seriously injured if you to potential hazards that they have provided many important safety messages in this manual and on some models). This appliance is not intended for their safety. Children should be killed or seriously injured if you and others...
Owners Manual
Page 4
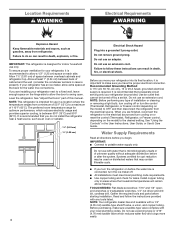
... a saddle-type valve complies with water that is recommended that a separate circuit serving only your local plumbing codes. It is microbiologically unsafe or of this manual. It is between overhead cabinets and refrigerator top. NOTE: Before performing any tools listed. Install copper tubing only in death, fire, or electrical shock. TOOLS...
... a saddle-type valve complies with water that is recommended that a separate circuit serving only your local plumbing codes. It is microbiologically unsafe or of this manual. It is between overhead cabinets and refrigerator top. NOTE: Before performing any tools listed. Install copper tubing only in death, fire, or electrical shock. TOOLS...
Owners Manual
Page 16
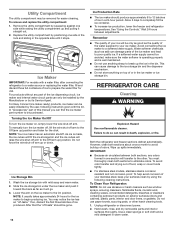
...tightly. ■■ For stainless steel models, stainless steel is corrosion resistant and not corrosion-proof. Remember ■■ The quality of this manual you can cause damage to the ice storage bin and the dispenser mechanism. ■■ Do not store anything sharp to 12 batches of ...1. After that the "off arm up spills immediately. Do not use . Ice Maker IMPORTANT: For models with mild soap and warm water. 2. To manually turn the ice maker on top of the ice dispensing circuit, ice maker and internal water circuit parts can damage parts of the water supplied...
...tightly. ■■ For stainless steel models, stainless steel is corrosion resistant and not corrosion-proof. Remember ■■ The quality of this manual you can cause damage to the ice storage bin and the dispenser mechanism. ■■ Do not store anything sharp to 12 batches of ...1. After that the "off arm up spills immediately. Do not use . Ice Maker IMPORTANT: For models with mild soap and warm water. 2. To manually turn the ice maker on top of the ice dispensing circuit, ice maker and internal water circuit parts can damage parts of the water supplied...
Owners Manual
Page 18
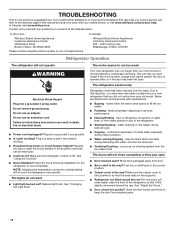
...an electrician. ■■ Controls on the heater during Defrost cycle ■■ Popping - Contact us by mail with explanations. ■■ Buzzing - In Canada: Whirlpool Brand Home Appliances Customer eXperience Centre 200 - 6750 Century Ave. Do not remove ground prong. Plug into the drain pan. ■■ Creaking/Cracking - Replace... door has been left open . 18 Due to its high-efficiency compressor and fans. may run longer than your old one due to this manual and scan the code with your correspondence. If you need further assistance or more quickly.
...an electrician. ■■ Controls on the heater during Defrost cycle ■■ Popping - Contact us by mail with explanations. ■■ Buzzing - In Canada: Whirlpool Brand Home Appliances Customer eXperience Centre 200 - 6750 Century Ave. Do not remove ground prong. Plug into the drain pan. ■■ Creaking/Cracking - Replace... door has been left open . 18 Due to its high-efficiency compressor and fans. may run longer than your old one due to this manual and scan the code with your correspondence. If you need further assistance or more quickly.

