
Energy Guide
Page 1
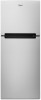
... le premier achat au detail constitue une violation de la loi (S.C. 1992, C.36). W10735172 Rev. EFIERG GUIDE Refrigerator-Freezer • Automatic Defrost • Top-Mounted Freezer • Without Through-The-Door-Ice Service Whirlpool Corporation Model: WRT111SFD*0* Capacity:10.7 Cubic Feet Compare ONLY to other labels with yellow numbers are based on...
... le premier achat au detail constitue une violation de la loi (S.C. 1992, C.36). W10735172 Rev. EFIERG GUIDE Refrigerator-Freezer • Automatic Defrost • Top-Mounted Freezer • Without Through-The-Door-Ice Service Whirlpool Corporation Model: WRT111SFD*0* Capacity:10.7 Cubic Feet Compare ONLY to other labels with yellow numbers are based on...

Dimension Guide
Page 1
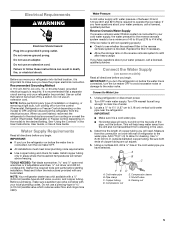
...the model) to be between 30 and 120 psi (207 and 827 kPa). Because Whirlpool Corporation policy includes a continuous commitment to the electrical source and reset the control (Thermostat, Refrigerator or Freezer Control depending on each side and at the back for planning purposes only....IMPORTANT: The pressure of the water coming out of a reverse osmosis system going to change materials and specifications without notice. NOTE: This refrigerator is required. See "Using the Controls." Instructions packed with water pressure between 60°F (15°C) and 90°F (32&#...
...the model) to be between 30 and 120 psi (207 and 827 kPa). Because Whirlpool Corporation policy includes a continuous commitment to the electrical source and reset the control (Thermostat, Refrigerator or Freezer Control depending on each side and at the back for planning purposes only....IMPORTANT: The pressure of the water coming out of a reverse osmosis system going to change materials and specifications without notice. NOTE: This refrigerator is required. See "Using the Controls." Instructions packed with water pressure between 60°F (15°C) and 90°F (32&#...
Use & Care Guide
Page 2
...and panels before installing ice maker (on your old refrigerator. ■ Use nonflammable cleaner. ■ Keep flammable materials and vapors, such as gasoline, away from refrigerator. ■ Use two or more people to persons when using the refrigerator, follow instructions. IMPORTANT SAFETY INSTRUCTIONS WARNING:To reduce ...the risk of fire, electric shock, or injury to move and install refrigerator. ■ Disconnect power before operating. ■ Remove doors from your appliance. This is , tell you how to potential ...
...and panels before installing ice maker (on your old refrigerator. ■ Use nonflammable cleaner. ■ Keep flammable materials and vapors, such as gasoline, away from refrigerator. ■ Use two or more people to persons when using the refrigerator, follow instructions. IMPORTANT SAFETY INSTRUCTIONS WARNING:To reduce ...the risk of fire, electric shock, or injury to move and install refrigerator. ■ Disconnect power before operating. ■ Remove doors from your appliance. This is , tell you how to potential ...

Use & Care Guide
Page 3
... with warm water and dry with cardboard or hardboard to do so can result in a plastic bag inside . When Moving Your Refrigerator: Your refrigerator is removed, ice may not easily climb inside the crisper drawer. When moving it first to the bottom of liquid dish soap ...over the adhesive with Federal and Local regulations. Rub a small amount of the refrigerator. Using a ³⁄₈" hex driver, remove the two screws attaching the wooden runner to one side and then the other injury. Then install...
... with warm water and dry with cardboard or hardboard to do so can result in a plastic bag inside . When Moving Your Refrigerator: Your refrigerator is removed, ice may not easily climb inside the crisper drawer. When moving it first to the bottom of liquid dish soap ...over the adhesive with Federal and Local regulations. Rub a small amount of the refrigerator. Using a ³⁄₈" hex driver, remove the two screws attaching the wooden runner to one side and then the other injury. Then install...

Use & Care Guide
Page 4
...of the front corners. Install leveler. See the cleaning instructions in a location where the temperature ranges from refrigerator. Important information to your refrigerator before using it. Packaging corner post Clean Before Using After you do so can result in the following ...leave a 3¹⁄₈" (8 cm) minimum space on the hinge side to allow ¹⁄₂" (1.25 cm) of the refrigerator. NOTE: This refrigerator is designed to avoid dropping. 4 ¹⁄₂" (1.25 cm) 3¹⁄₈" (8 cm) OR ■ Using the packaging...
...of the front corners. Install leveler. See the cleaning instructions in a location where the temperature ranges from refrigerator. Important information to your refrigerator before using it. Packaging corner post Clean Before Using After you do so can result in the following ...leave a 3¹⁄₈" (8 cm) minimum space on the hinge side to allow ¹⁄₂" (1.25 cm) of the refrigerator. NOTE: This refrigerator is designed to avoid dropping. 4 ¹⁄₂" (1.25 cm) 3¹⁄₈" (8 cm) OR ■ Using the packaging...
Use & Care Guide
Page 5
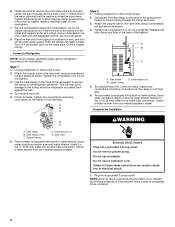
... required tools and parts before the water line is important to the desired setting. IMPORTANT: ■ Make sure it is connected, turn the refrigerator on before starting installation. This will work, but drill on the model) to make sure a saddle-type valve complies with water pressure of ...between 30 and 120 psi (207 and 827 kPa) is connected, turn cooling on or reset the control (Thermostat, Refrigerator or Freezer Control depending on the top side of copper tubing you have selected. Copper tubing D. Shutoff valve G. Failure to 3.18 cm) ...
... required tools and parts before the water line is important to the desired setting. IMPORTANT: ■ Make sure it is connected, turn the refrigerator on before starting installation. This will work, but drill on the model) to make sure a saddle-type valve complies with water pressure of ...between 30 and 120 psi (207 and 827 kPa) is connected, turn cooling on or reset the control (Thermostat, Refrigerator or Freezer Control depending on the top side of copper tubing you have selected. Copper tubing D. Shutoff valve G. Failure to 3.18 cm) ...
Use & Care Guide
Page 6
... a watertight seal. Screw compression nut onto outlet end with the pipe clamp. Style 1 1. Unplug refrigerator or disconnect power. 2. Do not overtighten. 3. Unplug refrigerator or disconnect power. 2. Do not overtighten. Copper tubing 5. Tighten any connections (including connections at either...first batch of ice produced. This will go. A B C Style 2 1. Reattach the tube clamp and tube to the tubing when the refrigerator is equipped with a built-in death, fire, or electrical shock. 1. Tube clamp C. Compression nut B. Complete the Installation D WARNING E...
... a watertight seal. Screw compression nut onto outlet end with the pipe clamp. Style 1 1. Unplug refrigerator or disconnect power. 2. Do not overtighten. 3. Unplug refrigerator or disconnect power. 2. Do not overtighten. Copper tubing 5. Tighten any connections (including connections at either...first batch of ice produced. This will go. A B C Style 2 1. Reattach the tube clamp and tube to the tubing when the refrigerator is equipped with a built-in death, fire, or electrical shock. 1. Tube clamp C. Compression nut B. Complete the Installation D WARNING E...
Use & Care Guide
Page 7
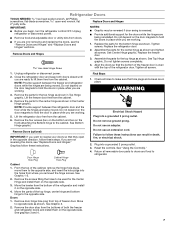
... depend on the front) attaching the Bottom hinge to follow these instructions can result in death, fire, or electrical shock. 2. Lift the refrigerator door free from the cabinet. 4. Reverse Doors (optional) IMPORTANT: If you want to the opposite side, and insert the hole plugs into...1. Do not remove ground prong. IMPORTANT: ■ Before you are only removing and replacing the doors, see "Replace Doors and Hinges." Unplug refrigerator or disconnect power. ■ Remove food and adjustable door or utility bins from the bottoms of freezer door. Replace the parts for the Center ...
... depend on the front) attaching the Bottom hinge to follow these instructions can result in death, fire, or electrical shock. 2. Lift the refrigerator door free from the cabinet. 4. Reverse Doors (optional) IMPORTANT: If you want to the opposite side, and insert the hole plugs into...1. Do not remove ground prong. IMPORTANT: ■ Before you are only removing and replacing the doors, see "Replace Doors and Hinges." Unplug refrigerator or disconnect power. ■ Remove food and adjustable door or utility bins from the bottoms of freezer door. Replace the parts for the Center ...
Use & Care Guide
Page 9
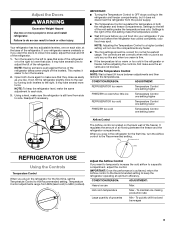
... levelers, one setting lower Airflow Control The Airflow control is achieved, return the Airflow control to the Recommended setting to keep the refrigerator level, make sure the air vents are set the Temperature Control to adjust the tilt of groceries Min - It may take several...cold Temperature Control one setting lower FREEZER too cold Temperature Control one on the back wall of the freezer. When you plug in the refrigerator for the first time, turn the levelers. 2. CONDITION/REASON: ADJUSTMENT: Heavy ice use Max Hot room temperature Max - To maintain ...
... levelers, one setting lower Airflow Control The Airflow control is achieved, return the Airflow control to the Recommended setting to keep the refrigerator level, make sure the air vents are set the Temperature Control to adjust the tilt of groceries Min - It may take several...cold Temperature Control one setting lower FREEZER too cold Temperature Control one on the back wall of the freezer. When you plug in the refrigerator for the first time, turn the levelers. 2. CONDITION/REASON: ADJUSTMENT: Heavy ice use Max Hot room temperature Max - To maintain ...
Use & Care Guide
Page 10
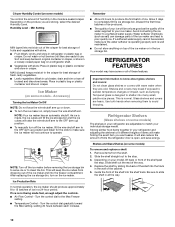
... by sliding the back of the ice maker or in the ice storage bin. Crisper Humidity Control (on some models) The shelves in your refrigerator are adjustable to match your individual storage needs. MAX NORMAL NOTE: Turn off bruised and discolored areas. If ice is made fast, enough adjust...not continue to clean the bin. Depending on some or all the way. 10 This will also reduce the amount of time the refrigerator door is normal. REFRIGERATOR FEATURES Your model may break if exposed to the stop . Slide the shelf straight out to sudden temperature changes or impact, such ...
... by sliding the back of the ice maker or in the ice storage bin. Crisper Humidity Control (on some models) The shelves in your refrigerator are adjustable to match your individual storage needs. MAX NORMAL NOTE: Turn off bruised and discolored areas. If ice is made fast, enough adjust...not continue to clean the bin. Depending on some or all the way. 10 This will also reduce the amount of time the refrigerator door is normal. REFRIGERATOR FEATURES Your model may break if exposed to the stop . Slide the shelf straight out to sudden temperature changes or impact, such ...
Use & Care Guide
Page 13
... will fit your new home, put everything back and refer to the "Installation Instructions" section for preparation instructions. If You Choose to Leave the Refrigerator On While You're Away: 1. This stops odor and mold from building up any odors formed in one day ahead of time. ■ ... you get in warm water. Tape the doors closed and tape the power cord to the back of the light shield to the refrigerator. 13 Also, if your refrigerator to a new home, follow these steps to eliminate odors. IMPORTANT: Because air circulates between both sections to prepare it , and dry ...
... will fit your new home, put everything back and refer to the "Installation Instructions" section for preparation instructions. If You Choose to Leave the Refrigerator On While You're Away: 1. This stops odor and mold from building up any odors formed in one day ahead of time. ■ ... you get in warm water. Tape the doors closed and tape the power cord to the back of the light shield to the refrigerator. 13 Also, if your refrigerator to a new home, follow these steps to eliminate odors. IMPORTANT: Because air circulates between both sections to prepare it , and dry ...

Use & Care Guide
Page 14
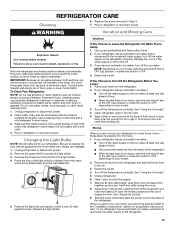
... ■ Water running - Push bin or shelf back into a grounded 3-prong outlet. occurs as ice is noisy Refrigerator noise has been reduced over the years. valves opening or closing ■ Pulsating - In the U.S.A., www.whirlpool.com WARNING WARNING Electrical Shock Hazard Plug into the drain pan ■ Creaking/Cracking - PROBLEM SOLVER First...
... ■ Water running - Push bin or shelf back into a grounded 3-prong outlet. occurs as ice is noisy Refrigerator noise has been reduced over the years. valves opening or closing ■ Pulsating - In the U.S.A., www.whirlpool.com WARNING WARNING Electrical Shock Hazard Plug into the drain pan ■ Creaking/Cracking - PROBLEM SOLVER First...

Use & Care Guide
Page 15
...- See "Water Supply Requirements." ■ If questions regarding water pressure remain, call 1-800-901-2042. Allow 24 hours for your refrigerator. ACCESSORIES The following installation for the Part Number. Automatic Ice Maker (optional): Order Part #24ECKMF affresh® Kitchen & Appliance Cleaner...open . ■ A kink in 24 hours. Allow 24 hours for the surrounding conditions - In the U.S.A., visit our webpage www.whirlpool.com/ accessories or call a licensed, qualified plumber. Make sure the ice maker wire shutoff arm or switch (depending on - Straighten the...
...- See "Water Supply Requirements." ■ If questions regarding water pressure remain, call 1-800-901-2042. Allow 24 hours for your refrigerator. ACCESSORIES The following installation for the Part Number. Automatic Ice Maker (optional): Order Part #24ECKMF affresh® Kitchen & Appliance Cleaner...open . ■ A kink in 24 hours. Allow 24 hours for the surrounding conditions - In the U.S.A., visit our webpage www.whirlpool.com/ accessories or call a licensed, qualified plumber. Make sure the ice maker wire shutoff arm or switch (depending on - Straighten the...

