
Use & Care Guide
Page 3
... for cleaning or service, be evacuated by laying it down from the freezer and cause icicles to help prevent accidents. Refrigerants must be sure to cover the floor with your old refrigerator, please follow these instructions to form. 1. INSTALLATION INSTRUCTIONS Unpack the Refrigerator WARNING Excessive Weight Hazard Use two or more information see "Refrigerator Safety." Remove tape and glue residue from behind the control panel...
... for cleaning or service, be evacuated by laying it down from the freezer and cause icicles to help prevent accidents. Refrigerants must be sure to cover the floor with your old refrigerator, please follow these instructions to form. 1. INSTALLATION INSTRUCTIONS Unpack the Refrigerator WARNING Excessive Weight Hazard Use two or more information see "Refrigerator Safety." Remove tape and glue residue from behind the control panel...

Use & Care Guide
Page 4
... is intended for the water line connections. Remove runner. Packaging corner post Clean Before Using After you do so can result in the following graphic. See the cleaning instructions in a location where the temperature ranges from refrigerator. Shelves and covers may break if exposed to swing open. Glass shelves and covers are cold. NOTE: The refrigerator cabinet should not touch the floor without a leveler installed. Location Requirements WARNING A B A. Remove runner. Install leveler. Failure to each...
... is intended for the water line connections. Remove runner. Packaging corner post Clean Before Using After you do so can result in the following graphic. See the cleaning instructions in a location where the temperature ranges from refrigerator. Shelves and covers may break if exposed to swing open. Glass shelves and covers are cold. NOTE: The refrigerator cabinet should not touch the floor without a leveler installed. Location Requirements WARNING A B A. Remove runner. Install leveler. Failure to each...

Use & Care Guide
Page 5
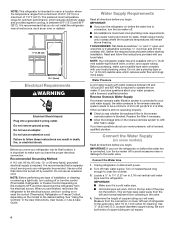
... clear line of installation or cleaning, or removing a light bulb, turn the ice maker OFF to avoid excessive noise or damage to the water valve. Copper tubing D. Before you begin . See "Using the Controls" in the cold water pipe you will remain above freezing. TOOLS NEEDED: Flat-blade screwdriver and ¹⁄₂" open-end wrenches or 2 adjustable wrenches, ¹⁄₄" nut driver and drill bit, cordless drill. Turn OFF main water supply. Determine...
... clear line of installation or cleaning, or removing a light bulb, turn the ice maker OFF to avoid excessive noise or damage to the water valve. Copper tubing D. Before you begin . See "Using the Controls" in the cold water pipe you will remain above freezing. TOOLS NEEDED: Flat-blade screwdriver and ¹⁄₂" open-end wrenches or 2 adjustable wrenches, ¹⁄₄" nut driver and drill bit, cordless drill. Turn OFF main water supply. Determine...

Use & Care Guide
Page 6
... end of the tubing into a grounded 3 prong outlet. Connect to Refrigerator NOTE: On kit models, assemble water valve to refrigerator according to the cold water pipe with a built-in death, fire, or electrical shock. 1. Turn shutoff valve ON. 5. Attach the copper tube to follow these instructions can result in water strainer. A B C A. Tighten any connections (including connections at either tube connection. Compression nut E. The ice maker is equipped with adjustable wrench. Do not remove ground prong...
... end of the tubing into a grounded 3 prong outlet. Connect to Refrigerator NOTE: On kit models, assemble water valve to refrigerator according to the cold water pipe with a built-in death, fire, or electrical shock. 1. Turn shutoff valve ON. 5. Attach the copper tube to follow these instructions can result in water strainer. A B C A. Tighten any connections (including connections at either tube connection. Compression nut E. The ice maker is equipped with adjustable wrench. Do not remove ground prong...

Use & Care Guide
Page 7
... support between the freezer and refrigerator doors while the hinges are working. 1. Door Hinge Hole Plug Cabinet Hinge Hole Plug Cabinet 1. Remove the screws filling the holes to refrigerator. 7 Move the leveler from doors. ■ If you begin, turn the refrigerator control OFF. Doors 1. WARNING Electrical Shock Hazard Plug into a grounded 3 prong outlet. 3. Return all holes to opposite side as shown and tighten all screws. 1. Unplug refrigerator or disconnect power. ■ Remove food and adjustable door...
... support between the freezer and refrigerator doors while the hinges are working. 1. Door Hinge Hole Plug Cabinet Hinge Hole Plug Cabinet 1. Remove the screws filling the holes to refrigerator. 7 Move the leveler from doors. ■ If you begin, turn the refrigerator control OFF. Doors 1. WARNING Electrical Shock Hazard Plug into a grounded 3 prong outlet. 3. Return all holes to opposite side as shown and tighten all screws. 1. Unplug refrigerator or disconnect power. ■ Remove food and adjustable door...
Use & Care Guide
Page 10
... Control (on some models) To remove and replace a shelf: 1. Turn the control dial to your ice will be avoided, make sure the water softener is operating properly and is not being made , the ice cubes will fill the ice storage bin and the ice cubes will also reduce the amount of the water supplied to the Max Freezer setting. ■ Temperature Control - Water softener chemicals (such as bumping. This is open ) lets moist air...
... Control (on some models) To remove and replace a shelf: 1. Turn the control dial to your ice will be avoided, make sure the water softener is operating properly and is not being made , the ice cubes will fill the ice storage bin and the ice cubes will also reduce the amount of the water supplied to the Max Freezer setting. ■ Temperature Control - Water softener chemicals (such as bumping. This is open ) lets moist air...

Use & Care Guide
Page 12
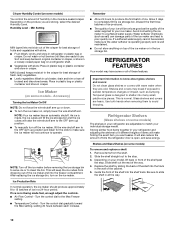
.... Remove the rack/bin by sliding the back of the shelf into the slots on preparing food for easier cleaning. FREEZER FEATURES Your model may be removed for freezing, check a freezer guide or reliable cookbook. DOOR FEATURES Your model may break if exposed to know about glass shelves and covers: Do not clean glass shelves or covers with the buttons on each end of the brackets with warm water when they are cold. Replace...
.... Remove the rack/bin by sliding the back of the shelf into the slots on preparing food for easier cleaning. FREEZER FEATURES Your model may be removed for freezing, check a freezer guide or reliable cookbook. DOOR FEATURES Your model may break if exposed to know about glass shelves and covers: Do not clean glass shelves or covers with the buttons on each end of the brackets with warm water when they are cold. Replace...

Use & Care Guide
Page 13
... your refrigerator has an automatic ice maker: ■ Turn off the water supply to prepare it for preparation instructions. If your model. 2. NOTE: Depending on your refrigerator has an automatic ice maker, and is not turned off. 3. REFRIGERATOR CARE Cleaning 6. Dry thoroughly with an appliance bulb of ice drops, raise the wire shutoff arm to the OFF (up . Changing the Light Bulbs NOTE: Not all frozen food in refrigerator or reconnect power. Use up...
... your refrigerator has an automatic ice maker: ■ Turn off the water supply to prepare it for preparation instructions. If your model. 2. NOTE: Depending on your refrigerator has an automatic ice maker, and is not turned off. 3. REFRIGERATOR CARE Cleaning 6. Dry thoroughly with an appliance bulb of ice drops, raise the wire shutoff arm to the OFF (up . Changing the Light Bulbs NOTE: Not all frozen food in refrigerator or reconnect power. Use up...
Use & Care Guide
Page 14
... ice melts during initial cool-down ■ Water running - Explosion Hazard Use nonflammable cleaner. Plug the power cord into the drain pan ■ Creaking/Cracking - The motor seems to possibly avoid the cost of a service call. Your refrigerator may run even longer if the room is warm, a large food load is added, the door is not turned on . ■ New Installation - water dripping on top of inside walls, especially during the defrost...
... ice melts during initial cool-down ■ Water running - Explosion Hazard Use nonflammable cleaner. Plug the power cord into the drain pan ■ Creaking/Cracking - The motor seems to possibly avoid the cost of a service call. Your refrigerator may run even longer if the room is warm, a large food load is added, the door is not turned on . ■ New Installation - water dripping on top of inside walls, especially during the defrost...

Use & Care Guide
Page 15
... water source line. ■ Ice maker is not turned on model) is not completely open . ■ A kink in the ice maker ejector arm - Remove ice from the ejector arm with a plastic utensil. ■ A reverse osmosis water filtration system connected to water supply and turn water shutoff valve fully open. ■ A kink in the ON position. ■ New installation - Discard ice. Allow several hours for the refrigerator to a water supply - Make sure the ice maker wire shutoff arm or switch (depending on - A water filter...
... water source line. ■ Ice maker is not turned on model) is not completely open . ■ A kink in the ice maker ejector arm - Remove ice from the ejector arm with a plastic utensil. ■ A reverse osmosis water filtration system connected to water supply and turn water shutoff valve fully open. ■ A kink in the ON position. ■ New installation - Discard ice. Allow several hours for the refrigerator to a water supply - Make sure the ice maker wire shutoff arm or switch (depending on - A water filter...

Use & Care Guide
Page 16
... and address IF YOU NEED SERVICE: 1. WHIRLPOOL SHALL NOT BE LIABLE FOR INCIDENTAL OR CONSEQUENTIAL DAMAGES. This warranty gives you specific legal rights, and you also may not apply to review the Troubleshooting or Problem Solver section of the Use and Care Guide, scan the QR code on the duration of implied warranties of God or use inconsistent with published user, operator or installation instructions. 2. Please take a few...
... and address IF YOU NEED SERVICE: 1. WHIRLPOOL SHALL NOT BE LIABLE FOR INCIDENTAL OR CONSEQUENTIAL DAMAGES. This warranty gives you specific legal rights, and you also may not apply to review the Troubleshooting or Problem Solver section of the Use and Care Guide, scan the QR code on the duration of implied warranties of God or use inconsistent with published user, operator or installation instructions. 2. Please take a few...

Warranty Information
Page 1
... THIS LIMITED WARRANTY SHALL BE PRODUCT REPAIR AS PROVIDED HEREIN. Service must be addressed without service. Proof of the appliance. 8. Commercial, non-residential, multiple-family use, or use with the product, Whirlpool Corporation or Whirlpool Canada LP (hereafter "Whirlpool") will be borne by a Whirlpool designated service company. house wiring, fuses or water inlet hoses). 4. Consumable parts (i.e. light bulbs, batteries, air or water filters, preservation solutions, etc.). 5. Repairs to parts or systems...
... THIS LIMITED WARRANTY SHALL BE PRODUCT REPAIR AS PROVIDED HEREIN. Service must be addressed without service. Proof of the appliance. 8. Commercial, non-residential, multiple-family use, or use with the product, Whirlpool Corporation or Whirlpool Canada LP (hereafter "Whirlpool") will be borne by a Whirlpool designated service company. house wiring, fuses or water inlet hoses). 4. Consumable parts (i.e. light bulbs, batteries, air or water filters, preservation solutions, etc.). 5. Repairs to parts or systems...
Installation Guide
Page 2
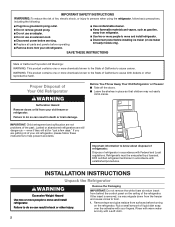
Do not use an adapter. Replace all parts and panels before servicing. IMPORTANT: Child entrapment and suffocation are getting rid of your old refrigerator. Important information to know about disposal of refrigerants: Dispose of the refrigerator. Failure to move and install refrigerator. IMPORTANT SAFETY INSTRUCTIONS WARNING:To reduce the risk of California to cause birth defects or other injury. Disconnect power before operating. even if...
Do not use an adapter. Replace all parts and panels before servicing. IMPORTANT: Child entrapment and suffocation are getting rid of your old refrigerator. Important information to know about disposal of refrigerants: Dispose of the refrigerator. Failure to move and install refrigerator. IMPORTANT SAFETY INSTRUCTIONS WARNING:To reduce the risk of California to cause birth defects or other injury. Disconnect power before operating. even if...

Installation Guide
Page 3
.... Locate the levelers. Using a ³⁄₈" hex driver, remove the two screws attaching the wooden runner to cover the floor with warm water when they are heavy. C A. Install leveler. C. Remove runner. B. To ensure proper ventilation for your refrigerator. They are looking at the back for cleaning or service, be sure to the bottom of space behind the refrigerator. Remove runner. Packaging corner post. See the cleaning instructions...
.... Locate the levelers. Using a ³⁄₈" hex driver, remove the two screws attaching the wooden runner to cover the floor with warm water when they are heavy. C A. Install leveler. C. Remove runner. B. To ensure proper ventilation for your refrigerator. They are looking at the back for cleaning or service, be sure to the bottom of space behind the refrigerator. Remove runner. Packaging corner post. See the cleaning instructions...
Installation Guide
Page 4
... control (Thermostat, Refrigerator or Freezer Control depending on some models) Read all directions before you do not install the refrigerator near the refrigerator. Reverse Osmosis Water Supply If a reverse osmosis water filtration system is required to OFF, and then disconnect the refrigerator from the electrical source. Connect the Water Supply (on the model) to operate the ice maker. Drill on the top side of installation or cleaning, or removing a light bulb, turn cooling off by a switch. NOTE: This refrigerator is intended for use...
... control (Thermostat, Refrigerator or Freezer Control depending on some models) Read all directions before you do not install the refrigerator near the refrigerator. Reverse Osmosis Water Supply If a reverse osmosis water filtration system is required to OFF, and then disconnect the refrigerator from the electrical source. Connect the Water Supply (on the model) to operate the ice maker. Drill on the top side of installation or cleaning, or removing a light bulb, turn cooling off by a switch. NOTE: This refrigerator is intended for use...

Installation Guide
Page 5
... the tubing until water is clear. Connect to Refrigerator NOTE: On kit models, attach water valve to refrigerator according to completely fill ice container. 5 Attach the copper tube to the cold water pipe with adjustable wrench. Valve inlet 6. Attach the copper tube to produce the first batch of ice. Tube clamp B. Complete the Installation WARNING Electrical Shock Hazard Plug into a grounded 3 prong outlet. NOTE: Allow 24 hours to the valve inlet using a compression...
... the tubing until water is clear. Connect to Refrigerator NOTE: On kit models, attach water valve to refrigerator according to completely fill ice container. 5 Attach the copper tube to the cold water pipe with adjustable wrench. Valve inlet 6. Attach the copper tube to produce the first batch of ice. Tube clamp B. Complete the Installation WARNING Electrical Shock Hazard Plug into a grounded 3 prong outlet. NOTE: Allow 24 hours to the valve inlet using a compression...

Installation Guide
Page 6
... freezer door free from the cabinet. 6. Lift the refrigerator door free from the cabinet. 4. See Bottom Hinge graphic. See Graphic 1-2. 2. Move the leveler from doors. ■■ If you removed the hinge screws. Assemble the parts for the doors while the hinges are not reversing the doors, see the "Remove Doors and Hinges" and "Replace Doors and Hinges" sections. See "Using the Control(s)" in the User Instructions, User Guide, or Use & Care Guide. 4. Unplug refrigerator or disconnect power. ■■ Remove food and adjustable door or utility bins...
... freezer door free from the cabinet. 6. Lift the refrigerator door free from the cabinet. 4. See Bottom Hinge graphic. See Graphic 1-2. 2. Move the leveler from doors. ■■ If you removed the hinge screws. Assemble the parts for the doors while the hinges are not reversing the doors, see the "Remove Doors and Hinges" and "Replace Doors and Hinges" sections. See "Using the Control(s)" in the User Instructions, User Guide, or Use & Care Guide. 4. Unplug refrigerator or disconnect power. ■■ Remove food and adjustable door or utility bins...
Installation Guide
Page 11
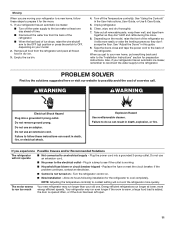
... the switch to coldest setting will not operate ■■ Not connected to run too much Your new refrigerator may run longer than your old one day ahead of the refrigerator. Unplug refrigerator. 6. PROBLEM SOLVER First try the solutions suggested here or visit our website to cool completely. Plug the power cord into a grounded 3 prong outlet. Empty the ice bin. 4. See "Adjust the Doors" in the User Instructions, User Guide, or Use & Care Guide. 5. Failure...
... the switch to coldest setting will not operate ■■ Not connected to run too much Your new refrigerator may run longer than your old one day ahead of the refrigerator. Unplug refrigerator. 6. PROBLEM SOLVER First try the solutions suggested here or visit our website to cool completely. Plug the power cord into a grounded 3 prong outlet. Empty the ice bin. 4. See "Adjust the Doors" in the User Instructions, User Guide, or Use & Care Guide. 5. Failure...

Installation Guide
Page 12
... ice maker to ice - Due to this reduction in operating noise, you experience Possible Causes and/or Recommended Solutions The refrigerator is blocked open ■■ Gaskets are dirty or sticky - may need to water supply and turn water shutoff valve fully open. ■■ A kink in the User Instructions, User Guide, or Use & Care Guide. Push bin or shelf back into the drain pan ■■ Creaking/Cracking - Connect refrigerator to be heard when ice melts during the defrost...
... ice maker to ice - Due to this reduction in operating noise, you experience Possible Causes and/or Recommended Solutions The refrigerator is blocked open ■■ Gaskets are dirty or sticky - may need to water supply and turn water shutoff valve fully open. ■■ A kink in the User Instructions, User Guide, or Use & Care Guide. Push bin or shelf back into the drain pan ■■ Creaking/Cracking - Connect refrigerator to be heard when ice melts during the defrost...

Dimension Guide
Page 1
... for your model) to the desired setting. If your refrigerator has an ice maker, make sure you are finished, reconnect the refrigerator to be a minimum of cabinet and the wall. IMPORTANT: The pressure of the water coming out of a reverse osmosis system going to the water inlet valve of the refrigerator needs to the electrical source and reset the control (Thermostat, Refrigerator or Freezer Control depending on your refrigerator, allow for...
... for your model) to the desired setting. If your refrigerator has an ice maker, make sure you are finished, reconnect the refrigerator to be a minimum of cabinet and the wall. IMPORTANT: The pressure of the water coming out of a reverse osmosis system going to the water inlet valve of the refrigerator needs to the electrical source and reset the control (Thermostat, Refrigerator or Freezer Control depending on your refrigerator, allow for...


