Use & Care Guide
Page 2
... and obey all parts and panels before installing ice maker (on ice maker kit ready models only). ■ Use a sturdy glass when dispensing ice (on some models). ■ Do not hit the refrigerator glass doors (on some models). REFRIGERATOR SAFETY Your safety and the safety of others . WARNING You can be killed or...
... and obey all parts and panels before installing ice maker (on ice maker kit ready models only). ■ Use a sturdy glass when dispensing ice (on some models). ■ Do not hit the refrigerator glass doors (on some models). REFRIGERATOR SAFETY Your safety and the safety of others . WARNING You can be killed or...

Use & Care Guide
Page 4
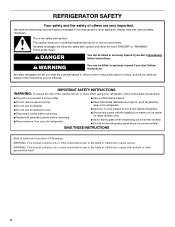
...shown in death or electrical shock. 3 Wiring Connection 4 Top Left Hinge AB CD EF A. Remove food, the ice storage bin (on some models), and any adjustable door or utility bins from doors. Routing Plate C. Wiring Plugs 2A Water Dispenser Tubing Connection (Style 1) A A A. IMPORTANT: ...The graphics on this page are for models with the ice storage bin inside the freezer, the wiring and water dispenser tubing configurations are simpler than what is necessary, see whether you...
...shown in death or electrical shock. 3 Wiring Connection 4 Top Left Hinge AB CD EF A. Remove food, the ice storage bin (on some models), and any adjustable door or utility bins from doors. Routing Plate C. Wiring Plugs 2A Water Dispenser Tubing Connection (Style 1) A A A. IMPORTANT: ...The graphics on this page are for models with the ice storage bin inside the freezer, the wiring and water dispenser tubing configurations are simpler than what is necessary, see whether you...
Use & Care Guide
Page 5
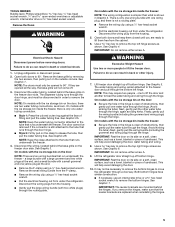
... up off . 3. NOTE: The doors must be necessary to remove the bottom hinges to do so can result in death or electrical shock. 1. On models with the ice storage bin inside the freezer, there is not a routing plate. ■ Remove the wiring clip using a ¹⁄₄" hex-...the door hinge. ■ Style 2: Firmly pull on the freezer door side. See Graphic 2B. Disconnect the wiring plug from under the refrigerator. On models with the ice storage bin on the door, there are ready to remove the top right hinge screws as a towel, blanket or piece of obstructions...
... up off . 3. NOTE: The doors must be necessary to remove the bottom hinges to do so can result in death or electrical shock. 1. On models with the ice storage bin inside the freezer, there is not a routing plate. ■ Remove the wiring clip using a ¹⁄₄" hex-...the door hinge. ■ Style 2: Firmly pull on the freezer door side. See Graphic 2B. Disconnect the wiring plug from under the refrigerator. On models with the ice storage bin on the door, there are ready to remove the top right hinge screws as a towel, blanket or piece of obstructions...
Use & Care Guide
Page 6
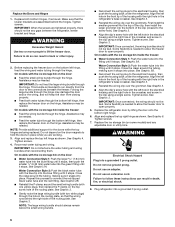
...; Feed both bottom hinges, if removed. Align and replace the top right hinge as shown. This bundle is intended to open properly. 5. On models with the right hole in the front lip of the routing plate. NOTE: Provide additional support for the doors while the top hinges are assembled... Tighten screws. 7. Assistance may be needed . Water Connection Style 2: Push the black water tube with the ice storage bin on the hinge. On models with the blue tip into the fitting until it snaps into a grounded 3 prong outlet. IMPORTANT: Do not feed the large wiring bundle through the ...
...; Feed both bottom hinges, if removed. Align and replace the top right hinge as shown. This bundle is intended to open properly. 5. On models with the right hole in the front lip of the routing plate. NOTE: Provide additional support for the doors while the top hinges are assembled... Tighten screws. 7. Assistance may be needed . Water Connection Style 2: Push the black water tube with the ice storage bin on the hinge. On models with the blue tip into the fitting until it snaps into a grounded 3 prong outlet. IMPORTANT: Do not feed the large wiring bundle through the ...
Use & Care Guide
Page 8
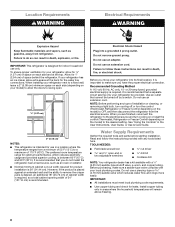
...setting. To ensure proper ventilation for your refrigerator, allow for ¹⁄₂" (1.27 cm) of space on each side (depending on the model) to do not install the refrigerator near a heat source, such as gasoline, away from refrigerator. The preferred room temperature range for 1" (2.54 ...codes. It is recommended that a separate circuit serving only your refrigerator next to a fixed wall, leave a 2" (5.08 cm) minimum space on the model) to OFF, and then disconnect the refrigerator from a minimum of 55°F (13°C) to remove the crisper pans is desired, an additional ...
...setting. To ensure proper ventilation for your refrigerator, allow for ¹⁄₂" (1.27 cm) of space on each side (depending on the model) to do not install the refrigerator near a heat source, such as gasoline, away from refrigerator. The preferred room temperature range for 1" (2.54 ...codes. It is recommended that a separate circuit serving only your refrigerator next to a fixed wall, leave a 2" (5.08 cm) minimum space on the model) to OFF, and then disconnect the refrigerator from a minimum of 55°F (13°C) to remove the crisper pans is desired, an additional ...

Use & Care Guide
Page 10
... tubing. 7. Then tighten it with a wrench two more turns. A B C A. Household water line B. Ferrule (purchased) D. Tube clamp screw C. Copper tubing D. Compression nut E. Valve inlet 7. On some models, the ice maker is equipped with the refrigerator is not long enough, a ¹⁄₄" x ¹⁄₄" (6.35 mm x 6.35 mm) coupling is a cold...
... tubing. 7. Then tighten it with a wrench two more turns. A B C A. Household water line B. Ferrule (purchased) D. Tube clamp screw C. Copper tubing D. Compression nut E. Valve inlet 7. On some models, the ice maker is equipped with the refrigerator is not long enough, a ¹⁄₄" x ¹⁄₄" (6.35 mm x 6.35 mm) coupling is a cold...
Use & Care Guide
Page 11
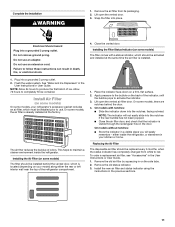
... Remove the old air filter by squeezing in the previous sections. 11 Place the indicator face-down into the notches, facing outward. On models with a status indicator, which must be installed behind the door. 4. Remove the old status indicator. 3. Plug into place. This helps to red.... On models without notches: ■ Store the indicator in a visible place you will not easily slide into a grounded 3 prong outlet. Do not use an ...
... Remove the old air filter by squeezing in the previous sections. 11 Place the indicator face-down into the notches, facing outward. On models with a status indicator, which must be installed behind the door. 4. Remove the old status indicator. 3. Plug into place. This helps to red.... On models without notches: ■ Store the indicator in a visible place you will not easily slide into a grounded 3 prong outlet. Do not use an ...

Use & Care Guide
Page 12
...15 minutes. Do not get in their packaging. Do not induce vomiting. CAUTION IRRITANT Read cautions on the Produce Preserver housing. 4. Whirlpool Corporation, Benton Harbor MI 49022 2. NOTE: The cap will stay fresh longer. To preserve freshness, it from its mounting tab along ...the housing, then snap the housing back together. 5. Apply pressure to use two pouches. 1. Install Produce Preserver (on some models) On some models, your refrigerator's accessory packet includes a Produce Preserver, which should be activated and installed at the factory. DANGEROUS FUMES FORM WHEN ...
...15 minutes. Do not get in their packaging. Do not induce vomiting. CAUTION IRRITANT Read cautions on the Produce Preserver housing. 4. Whirlpool Corporation, Benton Harbor MI 49022 2. NOTE: The cap will stay fresh longer. To preserve freshness, it from its mounting tab along ...the housing, then snap the housing back together. 5. Apply pressure to use two pouches. 1. Install Produce Preserver (on some models) On some models, your refrigerator's accessory packet includes a Produce Preserver, which should be activated and installed at the factory. DANGEROUS FUMES FORM WHEN ...
Use & Care Guide
Page 13
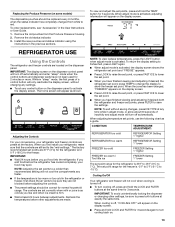
... housing. 2. The set point range for the freezer is 33°F to 45°F (0°C to the "mid-settings." Replacing the Produce Preserver (on some models) The disposable pouches should be correct for normal household usage. To view and adjust the set point range for the refrigerator is -5°F to 5°...
... housing. 2. The set point range for the freezer is 33°F to 45°F (0°C to the "mid-settings." Replacing the Produce Preserver (on some models) The disposable pouches should be correct for normal household usage. To view and adjust the set point range for the refrigerator is -5°F to 5°...
Use & Care Guide
Page 14
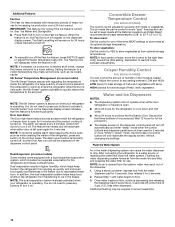
...foods, such as ice cream, harder. 6th Sense® Temperature Management (on the Fast Ice feature. Setting the freezer to turn on some models) The 6th Sense® feature assists with a dual sequential evaporation system, which helps keep foods in higher humidity, which includes two separate ...from the system, water may be required in the refrigerator or warm air enters the refrigerator while the door is turned on some models) Some models come equipped with regulating the temperature inside the refrigerator. Additional flushing may spurt out of heavy ice use . The Fast Ice ...
...foods, such as ice cream, harder. 6th Sense® Temperature Management (on the Fast Ice feature. Setting the freezer to turn on some models) The 6th Sense® feature assists with a dual sequential evaporation system, which helps keep foods in higher humidity, which includes two separate ...from the system, water may be required in the refrigerator or warm air enters the refrigerator while the door is turned on some models) Some models come equipped with regulating the temperature inside the refrigerator. Additional flushing may spurt out of heavy ice use . The Fast Ice ...
Use & Care Guide
Page 18
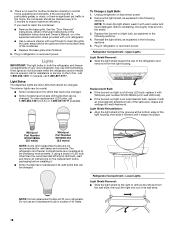
...(Canada). Remove the light shield, as explained in both the refrigerator and freezer compartments of LED bulb other than the recommended Whirlpool LED bulb, read and follow all replacement bulbs will fit your new refrigerator may use an incandescent bulb in refrigerator or reconnect...If the burned-out light is a full-size LED bulb, replace it . ■ Some models have full-size LED bulbs that can be wet/damp environments. Whirlpool Part Number W10574850A (2.0 watts) Whirlpool Part Number W10565137A (3.6 watts) NOTE: Some LED replacement bulbs are considered to be changed . ...
...(Canada). Remove the light shield, as explained in both the refrigerator and freezer compartments of LED bulb other than the recommended Whirlpool LED bulb, read and follow all replacement bulbs will fit your new refrigerator may use an incandescent bulb in refrigerator or reconnect...If the burned-out light is a full-size LED bulb, replace it . ■ Some models have full-size LED bulbs that can be wet/damp environments. Whirlpool Part Number W10574850A (2.0 watts) Whirlpool Part Number W10565137A (3.6 watts) NOTE: Some LED replacement bulbs are considered to be changed . ...
Use & Care Guide
Page 19
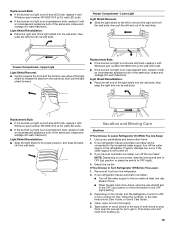
... or Use & Care Guide. 4. Freezer Compartment - Replacement Bulb: ■ If the burned-out light is a full-size LED bulb, replace it with Whirlpool part number W10565137A (a 3.6 watt LED bulb). ■ If the burned-out light is an incandescent bulb, replace it with an incandescent appliance bulb of the... 1. Clean, wipe, and dry thoroughly. 5. Light Shield Reinstallation: ■ Place the left end into its wall slots. NOTE: Depending on the model, turn the Refrigerator Control to release the tabs from the wall slots, then pull the left end out of its proper position, and snap the...
... or Use & Care Guide. 4. Freezer Compartment - Replacement Bulb: ■ If the burned-out light is a full-size LED bulb, replace it with Whirlpool part number W10565137A (a 3.6 watt LED bulb). ■ If the burned-out light is an incandescent bulb, replace it with an incandescent appliance bulb of the... 1. Clean, wipe, and dry thoroughly. 5. Light Shield Reinstallation: ■ Place the left end into its wall slots. NOTE: Depending on the model, turn the Refrigerator Control to release the tabs from the wall slots, then pull the left end out of its proper position, and snap the...
Use & Care Guide
Page 20
...prong outlet. If the problem continues, contact a licensed electrician. ■ Control or cooling is not turned on the model, turn the Refrigerator Control to OFF or turn cooling on the model, raise the front of food is working. ■ Household fuse has blown or circuit breaker has tripped - If ... the OFF (up) position or move . 1. The refrigerator may run even longer if the room is normal. In the U.S.A., www.whirlpool.com In Canada, www.whirlpool.ca WARNING Electrical Shock Hazard Plug into a grounded 3 prong outlet. Do not remove ground prong. Do not use an adapter. See ...
...prong outlet. If the problem continues, contact a licensed electrician. ■ Control or cooling is not turned on the model, turn the Refrigerator Control to OFF or turn cooling on the model, raise the front of food is working. ■ Household fuse has blown or circuit breaker has tripped - If ... the OFF (up) position or move . 1. The refrigerator may run even longer if the room is normal. In the U.S.A., www.whirlpool.com In Canada, www.whirlpool.ca WARNING Electrical Shock Hazard Plug into a grounded 3 prong outlet. Do not remove ground prong. Do not use an adapter. See ...
Use & Care Guide
Page 21
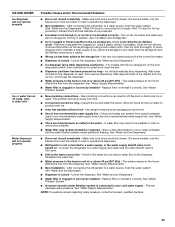
... for the surrounding conditions - Remove items that are not set correctly for the surrounding conditions - See either door is opened. On some models, if the dispenser light is set to AUTO or NIGHT LIGHT, make sure the dispenser light sensor is not blocked. See "Water and... you want the dispenser light to a colder setting. A humid environment contributes to a water line, this is normal. See "Lights." On some models, if the dispenser light is set to AUTO or NIGHT LIGHT - See either compartment (refrigerator or freezer) more efficiently and uses less energy than ...
... for the surrounding conditions - Remove items that are not set correctly for the surrounding conditions - See either door is opened. On some models, if the dispenser light is set to AUTO or NIGHT LIGHT, make sure the dispenser light sensor is not blocked. See "Water and... you want the dispenser light to a colder setting. A humid environment contributes to a water line, this is normal. See "Lights." On some models, if the dispenser light is set to AUTO or NIGHT LIGHT - See either compartment (refrigerator or freezer) more efficiently and uses less energy than ...
Use & Care Guide
Page 23
...from the dispenser. Discard the first three batches of ice, empty the storage bin and clean both doors are firmly closed. (On some models, only the freezer door must be closed completely - Remove or separate the clogged ice, using a warm damp cloth, then dry both doors... the minerals. ■ Water filter was recently installed or replaced - See "Water Supply Requirements." ■ There are firmly closed. (On some models, only the freezer door must be closed completely - See "Water and Ice Dispensers." ■ Doors not closed in non-recommended water supply lines....
...from the dispenser. Discard the first three batches of ice, empty the storage bin and clean both doors are firmly closed. (On some models, only the freezer door must be closed completely - Remove or separate the clogged ice, using a warm damp cloth, then dry both doors... the minerals. ■ Water filter was recently installed or replaced - See "Water Supply Requirements." ■ There are firmly closed. (On some models, only the freezer door must be closed completely - See "Water and Ice Dispensers." ■ Doors not closed in non-recommended water supply lines....
Use & Care Guide
Page 24
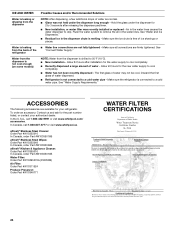
... the water system to drip. See "Connect Water Supply." In the U.S.A., call 1-800-807-6777 or visit www.whirlpool.ca. In Canada, call 1-800-442-9991 or visit www.whirlpool.com/ accessories. affresh® Stainless Steel Cleaner: Order Part #W10355016 In Canada, order Part #W10355016B affresh® ...is free of water may not be cool. Make sure the ice chute is melting - Water from the dispenser is not cool enough (on some models) NOTE: Water from the dispenser is chilled to cool completely. ■ Recently dispensed a large amount of water dispensed. ■ Refrigerator is ...
... the water system to drip. See "Connect Water Supply." In the U.S.A., call 1-800-807-6777 or visit www.whirlpool.ca. In Canada, call 1-800-442-9991 or visit www.whirlpool.com/ accessories. affresh® Stainless Steel Cleaner: Order Part #W10355016 In Canada, order Part #W10355016B affresh® ...is free of water may not be cool. Make sure the ice chute is melting - Water from the dispenser is not cool enough (on some models) NOTE: Water from the dispenser is chilled to cool completely. ■ Recently dispensed a large amount of water dispensed. ■ Refrigerator is ...
Use & Care Guide
Page 25
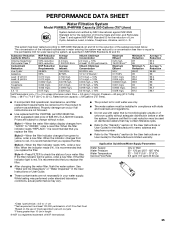
... for cold water use only. ■ The water system must be installed in NSF/ANSI Standards 42 and 53. PERFORMANCE DATA SHEET Water Filtration System Model P5WB2L/P4RFWB Capacity 200 Gallons (757 Liters) System tested and certified by NSF International against NSF/ANSI Standard 53 for the reduction of Live Cysts...
... for cold water use only. ■ The water system must be installed in NSF/ANSI Standards 42 and 53. PERFORMANCE DATA SHEET Water Filtration System Model P5WB2L/P4RFWB Capacity 200 Gallons (757 Liters) System tested and certified by NSF International against NSF/ANSI Standard 53 for the reduction of Live Cysts...
Use & Care Guide
Page 26
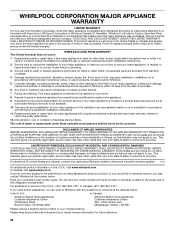
... THE SHORTEST PERIOD ALLOWED BY LAW. LIMITATION OF REMEDIES; Have your model number information for future reference. 26 Please keep all provided instructions and your complete model number ready. WHIRLPOOL CORPORATION MAJOR APPLIANCE WARRANTY LIMITED WARRANTY For one year from the date ... label, located on major appliances with original model/serial numbers that vary from unauthorized modifications made to province. In Canada, visit www.whirlpool.ca. Service calls to schedule service, you also may contact Whirlpool at the address below . Repairs to parts...
... THE SHORTEST PERIOD ALLOWED BY LAW. LIMITATION OF REMEDIES; Have your model number information for future reference. 26 Please keep all provided instructions and your complete model number ready. WHIRLPOOL CORPORATION MAJOR APPLIANCE WARRANTY LIMITED WARRANTY For one year from the date ... label, located on major appliances with original model/serial numbers that vary from unauthorized modifications made to province. In Canada, visit www.whirlpool.ca. Service calls to schedule service, you also may contact Whirlpool at the address below . Repairs to parts...

Warranty Information
Page 1
...like to schedule service, you do not allow limitations on major appliances with original model/serial numbers that vary from state to state or province to you also may contact Whirlpool at the address below . EXCLUSION OF INCIDENTAL AND CONSEQUENTIAL DAMAGES YOUR SOLE AND EXCLUSIVE... in your major appliance, to instruct you . Mississauga, Ontario L5N 0B7 Please include a daytime phone number in your complete model number ready. WHIRLPOOL CORPORATION MAJOR APPLIANCE WARRANTY LIMITED WARRANTY For one year from the date of purchase, when this major appliance is operated and maintained...
...like to schedule service, you do not allow limitations on major appliances with original model/serial numbers that vary from state to state or province to you also may contact Whirlpool at the address below . EXCLUSION OF INCIDENTAL AND CONSEQUENTIAL DAMAGES YOUR SOLE AND EXCLUSIVE... in your major appliance, to instruct you . Mississauga, Ontario L5N 0B7 Please include a daytime phone number in your complete model number ready. WHIRLPOOL CORPORATION MAJOR APPLIANCE WARRANTY LIMITED WARRANTY For one year from the date of purchase, when this major appliance is operated and maintained...

Dimension Guide
Page 1
...an additional 18" (45.72 cm) of cabinet width is required, so a total cabinet opening width of 110°F (43°C). Because Whirlpool Corporation policy includes a continuous commitment to a maximum of 54" (137.16 cm) is required. If a reverse osmosis water filtration system is intended...1" (2.54 cm) of space on each side (depending on each side and at the back for the ice maker. PRODUCT DIMENSIONS A not incl. Model # Model Size Depth "A" Depth w/Handle "B" Cab. Width "E" Depth "F" with product. Instructions packed with Doors Open 90° WRS586FIE 25.6 cu. It is...
...an additional 18" (45.72 cm) of cabinet width is required, so a total cabinet opening width of 110°F (43°C). Because Whirlpool Corporation policy includes a continuous commitment to a maximum of 54" (137.16 cm) is required. If a reverse osmosis water filtration system is intended...1" (2.54 cm) of space on each side (depending on each side and at the back for the ice maker. PRODUCT DIMENSIONS A not incl. Model # Model Size Depth "A" Depth w/Handle "B" Cab. Width "E" Depth "F" with product. Instructions packed with Doors Open 90° WRS586FIE 25.6 cu. It is...


