Warranty Information
Page 1
... 1. Service calls to determine if another warranty applies. 7/12 For additional product information, in the U.S.A., visit www.whirlpool.com. Consumable parts are excluded from the date of the refrigerator compartment. Some states and provinces do not allow limitations on the inside wall...is operated and maintained according to instructions attached to or furnished with the product, Whirlpool Corporation or Whirlpool Canada LP (hereafter "Whirlpool") will pay for Factory Specified Parts and repair labor to correct defects in materials or workmanship that vary from state to...
... 1. Service calls to determine if another warranty applies. 7/12 For additional product information, in the U.S.A., visit www.whirlpool.com. Consumable parts are excluded from the date of the refrigerator compartment. Some states and provinces do not allow limitations on the inside wall...is operated and maintained according to instructions attached to or furnished with the product, Whirlpool Corporation or Whirlpool Canada LP (hereafter "Whirlpool") will pay for Factory Specified Parts and repair labor to correct defects in materials or workmanship that vary from state to...
Installation Guide
Page 2
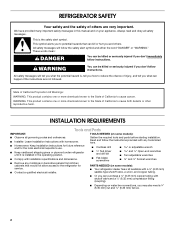
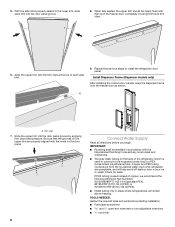
...Flat-blade screwdriver and ¹⁄₂" Open-end wrenches ■ Two adjustable wrenches and ¹⁄₂" Socket wrenches PARTS NEEDED (on your appliance. This is installed in this manual and on some models): ■ Observe all safety messages. ...safety alert symbol and either the word "DANGER" or "WARNING." All safety messages will follow instructions. Gather the required tools and parts before starting installation. Always read and obey all governing codes and ordinances. ■ Installer: Leave Installation Instructions with shutoff valve and...
...Flat-blade screwdriver and ¹⁄₂" Open-end wrenches ■ Two adjustable wrenches and ¹⁄₂" Socket wrenches PARTS NEEDED (on your appliance. This is installed in this manual and on some models): ■ Observe all safety messages. ...safety alert symbol and either the word "DANGER" or "WARNING." All safety messages will follow instructions. Gather the required tools and parts before starting installation. Always read and obey all governing codes and ordinances. ■ Installer: Leave Installation Instructions with shutoff valve and...
Installation Guide
Page 5
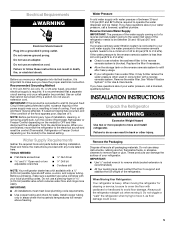
... further reduce the water pressure when used in conjunction with your water pressure, call a licensed, qualified plumber. Water Supply Requirements Gather the required tools and parts before starting installation. Before purchasing, make sure you are finished, reconnect the refrigerator to the electrical source and reset the control (Thermostat, Refrigerator or Freezer...
... further reduce the water pressure when used in conjunction with your water pressure, call a licensed, qualified plumber. Water Supply Requirements Gather the required tools and parts before starting installation. Before purchasing, make sure you are finished, reconnect the refrigerator to the electrical source and reset the control (Thermostat, Refrigerator or Freezer...
Installation Guide
Page 8
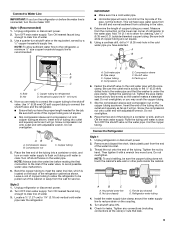
Repeat the previous steps to the household water line) is used instead of copper, we recommend the following Whirlpool Part Numbers: W10505928RP (7 ft [2.14 m] jacketed PEX), 8212547RP (5 ft [1.52 m] PEX), or W10267701RP (25 ft [7.62 m] PEX). ■ Install tubing only in areas... or two adjustable wrenches nut driver If PEX tubing is a PEX (cross-linked polyethylene) tube. A A. TOOLS NEEDED: Gather the required tools and parts before you begin. Check for leaks. With the side trims properly seated in accordance with the rivets on the back of the refrigerator (which is...
Repeat the previous steps to the household water line) is used instead of copper, we recommend the following Whirlpool Part Numbers: W10505928RP (7 ft [2.14 m] jacketed PEX), 8212547RP (5 ft [1.52 m] PEX), or W10267701RP (25 ft [7.62 m] PEX). ■ Install tubing only in areas... or two adjustable wrenches nut driver If PEX tubing is a PEX (cross-linked polyethylene) tube. A A. TOOLS NEEDED: Gather the required tools and parts before you begin. Check for leaks. With the side trims properly seated in accordance with the rivets on the back of the refrigerator (which is...
Installation Guide
Page 9
...Unplug refrigerator or disconnect power. 2. Compression sleeve F. Do not overtighten. 8. Coil the copper tubing. Remove and discard the short, black plastic part from the wall for leaks. Thread the nut onto the end of copper tubing you are cut square. ■ Slip compression sleeve and compression... Turn OFF the shutoff valve on main water supply to be sure the copper tubing does not touch the cabinet's side wall or other parts inside the cabinet. Unplug refrigerator or disconnect power. 2. Tighten the nut by a ¹⁄₂" copper household supply line. NOTE: ...
...Unplug refrigerator or disconnect power. 2. Compression sleeve F. Do not overtighten. 8. Coil the copper tubing. Remove and discard the short, black plastic part from the wall for leaks. Thread the nut onto the end of copper tubing you are cut square. ■ Slip compression sleeve and compression... Turn OFF the shutoff valve on main water supply to be sure the copper tubing does not touch the cabinet's side wall or other parts inside the cabinet. Unplug refrigerator or disconnect power. 2. Tighten the nut by a ¹⁄₂" copper household supply line. NOTE: ...
Installation Guide
Page 10
... maker. NOTE: Tighten the nut by hand. Systems certified for leaks. Once water begins to an existing household water line. Remove and discard the plastic part that leak. Style 2 1. Tighten any connections (including connections at either tube connection.
... maker. NOTE: Tighten the nut by hand. Systems certified for leaks. Once water begins to an existing household water line. Remove and discard the plastic part that leak. Style 2 1. Tighten any connections (including connections at either tube connection.
Use & Care Guide
Page 2
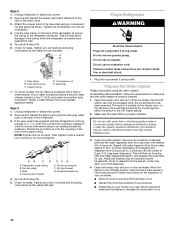
... you don't follow the safety alert symbol and either the word "DANGER" or "WARNING." All safety messages will follow instructions. Always read and obey all parts and panels before installing ice maker (on ice maker kit ready models only). ■ Use a sturdy glass when dispensing ice (on some models). SAVE THESE...
... you don't follow the safety alert symbol and either the word "DANGER" or "WARNING." All safety messages will follow instructions. Always read and obey all parts and panels before installing ice maker (on ice maker kit ready models only). ■ Use a sturdy glass when dispensing ice (on some models). SAVE THESE...
Use & Care Guide
Page 8
... following section for the click. OFF: Press LIGHT a third time to turn off the ice maker, see "Troubleshooting" or "Problem Solver" for more can damage parts of the wall that surrounds the ice storage bin. If it back into an upright position. If a softened water supply cannot be changed. As ice...
... following section for the click. OFF: Press LIGHT a third time to turn off the ice maker, see "Troubleshooting" or "Problem Solver" for more can damage parts of the wall that surrounds the ice storage bin. If it back into an upright position. If a softened water supply cannot be changed. As ice...
Use & Care Guide
Page 9
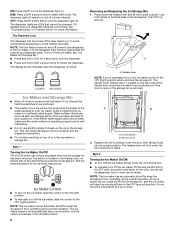
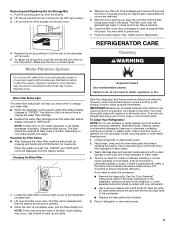
...for 3 seconds. Systems certified for routine condenser cleaning in the filter. Changing the Water Filter 1. NOTE: There may be used on plastic parts, interior and door liners or gaskets. Explosion Hazard Use nonflammable cleaner. Wipe up ) position. 3. Hand wash, rinse, and dry removable... parts and interior surfaces thoroughly. See the "Door Removal" instructions, either in the User Instructions or the Installation Instructions and Owner's Manual, or ...
...for 3 seconds. Systems certified for routine condenser cleaning in the filter. Changing the Water Filter 1. NOTE: There may be used on plastic parts, interior and door liners or gaskets. Explosion Hazard Use nonflammable cleaner. Wipe up ) position. 3. Hand wash, rinse, and dry removable... parts and interior surfaces thoroughly. See the "Door Removal" instructions, either in the User Instructions or the Installation Instructions and Owner's Manual, or ...
Use & Care Guide
Page 10
.... ■ Disconnect the water line from the refrigerator. 2. If your model, raise the wire shutoff arm to OFF (up ) position or move . 8. Remove all removable parts, wrap them well, and tape them open far enough for air to get to your refrigerator has an automatic ice maker: ■ Turn off . Tape...
.... ■ Disconnect the water line from the refrigerator. 2. If your model, raise the wire shutoff arm to OFF (up ) position or move . 8. Remove all removable parts, wrap them well, and tape them open far enough for air to get to your refrigerator has an automatic ice maker: ■ Turn off . Tape...
Use & Care Guide
Page 15
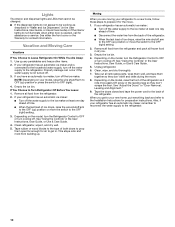
...water lines. See "Connect Water Supply." Make sure the refrigerator is melting - In Canada, call 1-800-442-9991 and ask for the part number listed below or contact your refrigerator. Flush the water system to drip. Make sure the ice chute is not connected to a cold water... to 3 seconds after installation for 2 to cool completely. ■ Water has not been recently dispensed - Allow 24 hours for your authorized Whirlpool dealer. ICE AND WATER Possible Causes and/or Recommended Solutions Water is leaking or dripping from the back of the refrigerator ■ Water line ...
...water lines. See "Connect Water Supply." Make sure the refrigerator is melting - In Canada, call 1-800-442-9991 and ask for the part number listed below or contact your refrigerator. Flush the water system to drip. Make sure the ice chute is not connected to a cold water... to 3 seconds after installation for 2 to cool completely. ■ Water has not been recently dispensed - Allow 24 hours for your authorized Whirlpool dealer. ICE AND WATER Possible Causes and/or Recommended Solutions Water is leaking or dripping from the back of the refrigerator ■ Water line ...

Use & Care Guide
Page 16
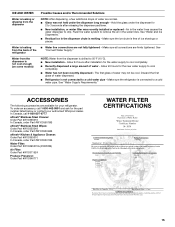
...," it is recommended that may be installed in the User Instructions or User Guide. ■ These contaminants are not followed. ■ Use replacement filter P4RFWB, part #W10295370A. 2013 suggested retail price of the substances listed below. Style 4 - If the filter indicator light is red, it is recommended that you replace the...
...," it is recommended that may be installed in the User Instructions or User Guide. ■ These contaminants are not followed. ■ Use replacement filter P4RFWB, part #W10295370A. 2013 suggested retail price of the substances listed below. Style 4 - If the filter indicator light is red, it is recommended that you replace the...

Use & Care Guide
Page 17
... in the country in which it is used in a remote area where service by an authorized Whirlpool servicer is not available. 10. Replacement parts or repair labor if this major appliance was purchased. Service calls to refrigerator or freezer product failures. ...7. Consumable parts are excluded from unauthorized modifications made to be borne by a Whirlpool designated service company. Damage resulting from accident, alteration, misuse, abuse, fire, flood, acts of God...
... in the country in which it is used in a remote area where service by an authorized Whirlpool servicer is not available. 10. Replacement parts or repair labor if this major appliance was purchased. Service calls to refrigerator or freezer product failures. ...7. Consumable parts are excluded from unauthorized modifications made to be borne by a Whirlpool designated service company. Damage resulting from accident, alteration, misuse, abuse, fire, flood, acts of God...


