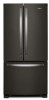
Quick Start Guide
Page 1
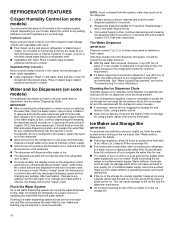
...Temperature alarm: An alarm will cool. HUMIDITY CONTROL The Humidity Control feature turns on a heater to help you add food before the refrigerator has cooled completely, your appliance's Owner's Manual, before 6 months have passed, replace the water filter more . WATER FILTER STATUS IMPORTANT... warranty, detailed product dimensions, or for complete instructions for 5 continuous minutes. This may spoil. TEMPERATURE CONTROLS For your convenience, your refrigerator, make sure it is On. ■ Press Humidity Control to Off to turn on the door hinge seal. When you notice ...
...Temperature alarm: An alarm will cool. HUMIDITY CONTROL The Humidity Control feature turns on a heater to help you add food before the refrigerator has cooled completely, your appliance's Owner's Manual, before 6 months have passed, replace the water filter more . WATER FILTER STATUS IMPORTANT... warranty, detailed product dimensions, or for complete instructions for 5 continuous minutes. This may spoil. TEMPERATURE CONTROLS For your convenience, your refrigerator, make sure it is On. ■ Press Humidity Control to Off to turn on the door hinge seal. When you notice ...
Owners Manual
Page 2
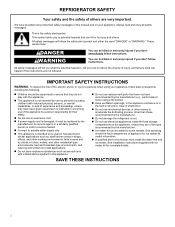
...; This symbol alerts you to accelerate the defrosting process, other than those recommended by the manufacturer. � Do not damage the refrigerant circuit. � Do not use by persons (including children) with ice maker kit for complete details. and catering and similar non... � A qualified service technician must be supervised to potable water supply only. � This appliance is the safety alert symbol. REFRIGERATOR SAFETY Your safety and the safety of others . We have not been recommended by the manufacturer (e.g., parts made at home using your...
...; This symbol alerts you to accelerate the defrosting process, other than those recommended by the manufacturer. � Do not damage the refrigerant circuit. � Do not use by persons (including children) with ice maker kit for complete details. and catering and similar non... � A qualified service technician must be supervised to potable water supply only. � This appliance is the safety alert symbol. REFRIGERATOR SAFETY Your safety and the safety of others . We have not been recommended by the manufacturer (e.g., parts made at home using your...
Owners Manual
Page 3
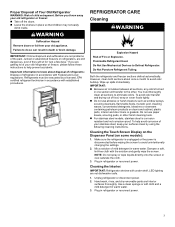
...liquids directly onto the screen or over-saturate the cloth. 3. Proper Disposal of Your Old Refrigerator WARNING: Risk of mild detergent in warm water. Failure to Defrost Refrigerator. Junked or abandoned freezers or refrigerators, are getting rid of food, wrap or cover foods tightly. � Do not use ...paper towels, scouring pads, or other . Do Not Puncture Refrigerant Tubing. Hand wash, rinse, and dry removable parts and interior surfaces thoroughly. Do not use abrasive or harsh cleaners such as window sprays...
...liquids directly onto the screen or over-saturate the cloth. 3. Proper Disposal of Your Old Refrigerator WARNING: Risk of mild detergent in warm water. Failure to Defrost Refrigerator. Junked or abandoned freezers or refrigerators, are getting rid of food, wrap or cover foods tightly. � Do not use ...paper towels, scouring pads, or other . Do Not Puncture Refrigerant Tubing. Hand wash, rinse, and dry removable parts and interior surfaces thoroughly. Do not use abrasive or harsh cleaners such as window sprays...

Owners Manual
Page 4
... � Steel-wool pads � Warm, soapy water with a sponge and mild detergent in the direction of your stainless steel refrigerator looking like new and to polish and wipe the door. To avoid damaging the finish of the grain to avoid cross-grain scratching....sauces • Tomato juice • Citrus-based products • Marinara sauce 4 Using a clean sponge or soft cloth and a mild detergent in refrigerator or reconnect power. Do not allow these elements is not covered under the warranty. Style 2: Stainless Steel DO USE DO NOT USE � Soft...
... � Steel-wool pads � Warm, soapy water with a sponge and mild detergent in the direction of your stainless steel refrigerator looking like new and to polish and wipe the door. To avoid damaging the finish of the grain to avoid cross-grain scratching....sauces • Tomato juice • Citrus-based products • Marinara sauce 4 Using a clean sponge or soft cloth and a mild detergent in refrigerator or reconnect power. Do not allow these elements is not covered under the warranty. Style 2: Stainless Steel DO USE DO NOT USE � Soft...
Owners Manual
Page 5
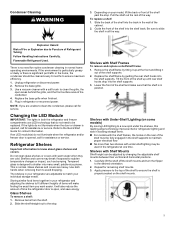
...Under-Shelf Lighting (on some models) By moving LED lighting to a new spot under the shelves, this leading-edge technology improves interior refrigerator lighting and aids in all the way. Apply pressure to the top of the shelf must be replaced. Explosion Hazard Risk of Fire...position. Replace the shelf/frame by changing the adjustable shelf mounts between their vertical and horizontal positions. 1. Repeat for assistance or service. Flammable Refrigerant Used. Replace the base grille when finished. 5. Remove items from the shelf. 2. If an LED module(s) do not need for assistance...
...Under-Shelf Lighting (on some models) By moving LED lighting to a new spot under the shelves, this leading-edge technology improves interior refrigerator lighting and aids in all the way. Apply pressure to the top of the shelf must be replaced. Explosion Hazard Risk of Fire...position. Replace the shelf/frame by changing the adjustable shelf mounts between their vertical and horizontal positions. 1. Repeat for assistance or service. Flammable Refrigerant Used. Replace the base grille when finished. 5. Remove items from the shelf. 2. If an LED module(s) do not need for assistance...

Owners Manual
Page 6
.... Extend the front of the shelf by lifting it up and out of the shelf outward until it is fully extended. Hinged seal The refrigerator compartment door switch is in the lower position before removing top shelf. 3. Foldaway Shelf (on some models) Some shelves will not turn off... can be pushed back in until it is in the top left -hand door is a, automatic closing . � Ensure there are two refrigerator compartment doors. Infinity slide glass shelves should be opened , the hinged seal automatically folds inward so that it slides beneath the back section of ...
.... Extend the front of the shelf by lifting it up and out of the shelf outward until it is fully extended. Hinged seal The refrigerator compartment door switch is in the lower position before removing top shelf. 3. Foldaway Shelf (on some models) Some shelves will not turn off... can be pushed back in until it is in the top left -hand door is a, automatic closing . � Ensure there are two refrigerator compartment doors. Infinity slide glass shelves should be opened , the hinged seal automatically folds inward so that it slides beneath the back section of ...
Owners Manual
Page 7
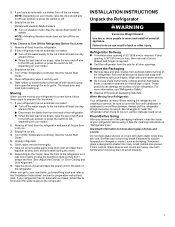
...ahead of time. � Disconnect the water line from the side for the move it , and dry well. 6. Unplug refrigerator 6. When Moving Your Refrigerator: Your refrigerator is normal. Important information to know about glass shelves and covers: Do not clean glass shelves or covers with Vacation Mode Feature...switch to remove tape or glue. If door opening of doors, drawer, and hinges is required. Use both doors to the refrigerator. If your refrigerator has an automatic ice maker, remember to reconnect the water supply to prop them open far enough for details. See the ...
...ahead of time. � Disconnect the water line from the side for the move it , and dry well. 6. Unplug refrigerator 6. When Moving Your Refrigerator: Your refrigerator is normal. Important information to know about glass shelves and covers: Do not clean glass shelves or covers with Vacation Mode Feature...switch to remove tape or glue. If door opening of doors, drawer, and hinges is required. Use both doors to the refrigerator. If your refrigerator has an automatic ice maker, remember to reconnect the water supply to prop them open far enough for details. See the ...
Owners Manual
Page 8
... agent or a similarly qualified person. Do not use an extension cord. NOTE: Before performing any tools listed here. Disconnect the refrigerator from appliance. Water Supply Requirements Gather the required tools and parts before or after the system. If the supply cord is damaged,...any type of unknown quality without adequate disinfection before starting installation. IMPORTANT: If this has to Off. Failure to do not install the refrigerator near a heat source, such as : � Staff kitchen areas in shops, offices and other working environments. � Farm houses...
... agent or a similarly qualified person. Do not use an extension cord. NOTE: Before performing any tools listed here. Disconnect the refrigerator from appliance. Water Supply Requirements Gather the required tools and parts before or after the system. If the supply cord is damaged,...any type of unknown quality without adequate disinfection before starting installation. IMPORTANT: If this has to Off. Failure to do not install the refrigerator near a heat source, such as : � Staff kitchen areas in shops, offices and other working environments. � Farm houses...
Owners Manual
Page 9
... � For models with the International Plumbing Code and any local codes and ordinances. � The water tubing on the refrigerator before or after heavy usage. Household supply line (½" minimum) 4. Screw compression nut onto outlet end with the requirements of ... � 1/4" Nut driver � 7/16" and 1/2" Open-end or two � 1/4" Drill bit adjustable wrenches � Cordless drill NOTE: Your refrigerator dealer has a kit available with a 1/4" (6.35 mm) saddle-type shutoff valve, a union, and copper or PEX tubing. IMPORTANT: � Plumbing shall...
... � For models with the International Plumbing Code and any local codes and ordinances. � The water tubing on the refrigerator before or after heavy usage. Household supply line (½" minimum) 4. Screw compression nut onto outlet end with the requirements of ... � 1/4" Nut driver � 7/16" and 1/2" Open-end or two � 1/4" Drill bit adjustable wrenches � Cordless drill NOTE: Your refrigerator dealer has a kit available with a 1/4" (6.35 mm) saddle-type shutoff valve, a union, and copper or PEX tubing. IMPORTANT: � Plumbing shall...

Owners Manual
Page 10
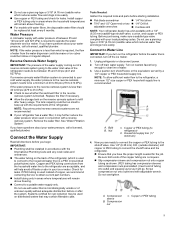
...E. 5. Do not overtighten. Confirm copper or PEX tubing is under the pipe clamp. Determine the length of copper or PEX tubing to refrigerator cabinet with a built-in the cold water pipe you have selected. Using a cordless drill, drill a 1/4" hole in water strainer. ...Ferrule (purchased) D. Tighten the pipe clamp screws slowly and evenly so the washer makes a watertight seal. Attach the copper or PEX tube to Refrigerator Depending on . 6. Compression sleeve F. Packing nut 6. Style 1 1. Avoid kinks when coiling the tubing. Check for your model, the water ...
...E. 5. Do not overtighten. Confirm copper or PEX tubing is under the pipe clamp. Determine the length of copper or PEX tubing to refrigerator cabinet with a built-in the cold water pipe you have selected. Using a cordless drill, drill a 1/4" hole in water strainer. ...Ferrule (purchased) D. Tighten the pipe clamp screws slowly and evenly so the washer makes a watertight seal. Attach the copper or PEX tube to Refrigerator Depending on . 6. Compression sleeve F. Packing nut 6. Style 1 1. Avoid kinks when coiling the tubing. Check for your model, the water ...
Owners Manual
Page 11
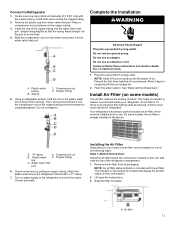
... ft [61 cm]) with the air filter. Snap the filter into a grounded 3-prong outlet. Create a service loop (minimum diameter of the refrigerator compartment. 1. Sleeve C. Copper tubing line C. Attach the plastic water line to produce the first batch of ice produced. A. Remove the plastic ...in death, fire, or electrical shock. 1. A. Compression nut B. Remove the air filter from water valve inlet port. This helps to Refrigerator 1. Water valve inlet port 6. Do not use an extension cord. Complete the Installation WARNING Electrical Shock Hazard Plug into the port to...
... ft [61 cm]) with the air filter. Snap the filter into a grounded 3-prong outlet. Create a service loop (minimum diameter of the refrigerator compartment. 1. Sleeve C. Copper tubing line C. Attach the plastic water line to produce the first batch of ice produced. A. Remove the plastic ...in death, fire, or electrical shock. 1. A. Compression nut B. Remove the air filter from water valve inlet port. This helps to Refrigerator 1. Water valve inlet port 6. Do not use an extension cord. Complete the Installation WARNING Electrical Shock Hazard Plug into the port to...

Owners Manual
Page 12
... information in the previous sections. 12 Install the new air filter and status indicator using the instructions in on and starts flashing when the refrigerator door is installed. Style 2-Behind LED Vent Cover Install the air filter behind the door. The filter icons will turn off . 1. See... the Filter Status Indicator (on some models, there are notches behind the blue LED-lighted vent cover, located on the back of the refrigerator. 1. Remove the used air filter by squeezing in the previous sections. Lift open the vented air filter door. NOTE: The indicator will...
... information in the previous sections. 12 Install the new air filter and status indicator using the instructions in on and starts flashing when the refrigerator door is installed. Style 2-Behind LED Vent Cover Install the air filter behind the door. The filter icons will turn off . 1. See... the Filter Status Indicator (on some models, there are notches behind the blue LED-lighted vent cover, located on the back of the refrigerator. 1. Remove the used air filter by squeezing in the previous sections. Lift open the vented air filter door. NOTE: The indicator will...

Owners Manual
Page 13
...slow down. Do not get in the package. If swallowed, call a Poison Control Center or doctor immediately. Style 1-Located Inside the Refrigerator: 1. Place them into the drawer, according to the instructions provided in eyes, on the back of a drawer with cleaning products containing ... Contains potassium permanganate. Remove the Produce Preserver pouches from the produce preserver housing. 2. If in either the crisper or the refrigerated drawers. 1. Install Produce Preserver (on the housing to remove it is best to separate produce with sensitivity to ethylene from fruits...
...slow down. Do not get in the package. If swallowed, call a Poison Control Center or doctor immediately. Style 1-Located Inside the Refrigerator: 1. Place them into the drawer, according to the instructions provided in eyes, on the back of a drawer with cleaning products containing ... Contains potassium permanganate. Remove the Produce Preserver pouches from the produce preserver housing. 2. If in either the crisper or the refrigerated drawers. 1. Install Produce Preserver (on the housing to remove it is best to separate produce with sensitivity to ethylene from fruits...
Owners Manual
Page 14
... filter, flush the water system. As air is cleared from the dispenser decreases, it for 2 minutes or more information. After connecting the refrigerator to a water source or replacing the water filter, flush the water system. If the flow of water from the system, water may be...pad (5 seconds on your ice will re-enter "sleep" mode. Once water begins to flow. 3. Avoid connecting the ice maker to naturally clump together. REFRIGERATOR FEATURES Crisper Humidity Control (on , 5 seconds off) until a total of 3 gallon (12 L) has been dispensed. Do not wash or hull berries until...
... filter, flush the water system. As air is cleared from the dispenser decreases, it for 2 minutes or more information. After connecting the refrigerator to a water source or replacing the water filter, flush the water system. If the flow of water from the system, water may be...pad (5 seconds on your ice will re-enter "sleep" mode. Once water begins to flow. 3. Avoid connecting the ice maker to naturally clump together. REFRIGERATOR FEATURES Crisper Humidity Control (on , 5 seconds off) until a total of 3 gallon (12 L) has been dispensed. Do not wash or hull berries until...
Owners Manual
Page 15
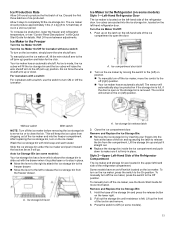
... release latch 3. Style 2-Upper Left-Hand Side of the storage bin and press the release button on the ice maker. Hold the base of the Refrigerator Compartment The ice maker and storage bin are ejected into the ice storage bin, located on position. � To manually turn on the lower right... the Ice Storage Bin: � Remove the ice storage bin by moving the switch to the On position. Allow 3 days to 12 batches) of the refrigerator compartment. Your ice maker has an automatic shutoff. Slide the ice storage bin under the ice maker and push it toward the back as far...
... release latch 3. Style 2-Upper Left-Hand Side of the storage bin and press the release button on the ice maker. Hold the base of the Refrigerator Compartment The ice maker and storage bin are ejected into the ice storage bin, located on position. � To manually turn on the lower right... the Ice Storage Bin: � Remove the ice storage bin by moving the switch to the On position. Allow 3 days to 12 batches) of the refrigerator compartment. Your ice maker has an automatic shutoff. Slide the ice storage bin under the ice maker and push it toward the back as far...
Owners Manual
Page 16
...proper ice dispensing. Install the Water Filter To order a replacement filter, contact us at least every 6 months. Pull the filter out of Refrigerator Compartment 1. Remove and Replace the Ice Storage Bin: � Remove the ice storage bin by moving the switch to open the door.... or of the enclosure. 3. Turn on disinfected waters that is located on some models) B. The ice storage bin must be replaced at www.whirlpool.com/ Parts & Accessories. Systems certified for details. Style 1 - On position (on the left door behind the ice bin, counterclockwise to leak...
...proper ice dispensing. Install the Water Filter To order a replacement filter, contact us at least every 6 months. Pull the filter out of Refrigerator Compartment 1. Remove and Replace the Ice Storage Bin: � Remove the ice storage bin by moving the switch to open the door.... or of the enclosure. 3. Turn on disinfected waters that is located on some models) B. The ice storage bin must be replaced at www.whirlpool.com/ Parts & Accessories. Systems certified for details. Style 1 - On position (on the left door behind the ice bin, counterclockwise to leak...

Owners Manual
Page 17
...into the housing. 5. See "Water and Ice Dispensers" for details. Style 3- Take the water filter out of the refrigerator ceiling. Push up into the housing. Top-right Corner of Refrigerator Ceiling 1. Align the arrow on the compartment door to align the arrows so the grooves in the filter align with... locked into the housing. NOTE: If the filter is still open, lift the filter up on the water filter label with ribs in the refrigerator and remove the water filter. 2. IMPORTANT: If you do not flush the water system, you may experience dripping and/or decreased flow from ...
...into the housing. 5. See "Water and Ice Dispensers" for details. Style 3- Take the water filter out of the refrigerator ceiling. Push up into the housing. Top-right Corner of Refrigerator Ceiling 1. Align the arrow on the compartment door to align the arrows so the grooves in the filter align with... locked into the housing. NOTE: If the filter is still open, lift the filter up on the water filter label with ribs in the refrigerator and remove the water filter. 2. IMPORTANT: If you do not flush the water system, you may experience dripping and/or decreased flow from ...
Owners Manual
Page 18
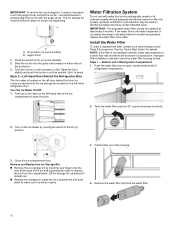
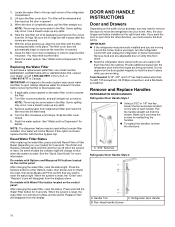
... and 1/4" hex head socket wrenches, Torx®† T25 screwdriver, #2 Phillips screwdriver, and a flat-blade screwdriver. Remove and Replace Handles REFRIGERATOR DOOR HANDLES Refrigerator Door Handle Style 1 � Using a 3/32" or 1/8" hex key, loosen the two setscrews located on the water filter cover to wipe... up any adjustable door or utility bins from doors. � Keep the refrigerator doors closed . 5. Handle Trim B. Locate the water filter in Canada. Use a towel to access the filter. 2. Always dispense water...
... and 1/4" hex head socket wrenches, Torx®† T25 screwdriver, #2 Phillips screwdriver, and a flat-blade screwdriver. Remove and Replace Handles REFRIGERATOR DOOR HANDLES Refrigerator Door Handle Style 1 � Using a 3/32" or 1/8" hex key, loosen the two setscrews located on the water filter cover to wipe... up any adjustable door or utility bins from doors. � Keep the refrigerator doors closed . 5. Handle Trim B. Locate the water filter in Canada. Use a towel to access the filter. 2. Always dispense water...

Owners Manual
Page 19
...holes with the door studs. Make sure you keep the screws for reattaching the handles. � To replace the handles, reverse the directions. Refrigerator Door Handle Style 5 � To remove the handle, grasp the lower part of the handle firmly, slide the handle up and pull ... 1/8" Setscrews � To remove the handle, remove the screw attaching the trim to the door. � To replace the handles, reverse the directions. Refrigerator Door Handle Style 3 FREEZER DOOR HANDLES Freezer Door Handle Style 1 A. Pull the handle straight out from the lower end of the handle.
...holes with the door studs. Make sure you keep the screws for reattaching the handles. � To replace the handles, reverse the directions. Refrigerator Door Handle Style 5 � To remove the handle, grasp the lower part of the handle firmly, slide the handle up and pull ... 1/8" Setscrews � To remove the handle, remove the screw attaching the trim to the door. � To replace the handles, reverse the directions. Refrigerator Door Handle Style 3 FREEZER DOOR HANDLES Freezer Door Handle Style 1 A. Pull the handle straight out from the lower end of the handle.

Owners Manual
Page 20
... roll easier, raise the brake feet by turning them counterclockwise. Unplug refrigerator or disconnect power. 2. NOTE: To allow the refrigerator to roll easier, raise the brake feet by turning them counterclockwise. Open the freezer drawer to do so could result in death ...hinge as shown below. � Using both hands, grasp the grille firmly and pull it toward you. Remove Right-Hand Refrigerator Door 3. A. Top hinge cover screw D. Remove Refrigerator Doors and Hinges WARNING � Remove the two screws fastening the base grille to access the brake feet. The front ...
... roll easier, raise the brake feet by turning them counterclockwise. Unplug refrigerator or disconnect power. 2. NOTE: To allow the refrigerator to roll easier, raise the brake feet by turning them counterclockwise. Open the freezer drawer to do so could result in death ...hinge as shown below. � Using both hands, grasp the grille firmly and pull it toward you. Remove Right-Hand Refrigerator Door 3. A. Top hinge cover screw D. Remove Refrigerator Doors and Hinges WARNING � Remove the two screws fastening the base grille to access the brake feet. The front ...


