Owners Manual
Page 4
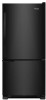
..., which reduces electricity usage and provides superior cooling, is required. If your model, either the plug or connector end. Failure to do not install the refrigerator near a heat source, such as gasoline, away from refrigerator. Failure to follow the instructions provided with water that cannot be replaced by a switch. The preferred room temperature range for 1/2" (1.25 cm) of installation, cleaning, or removing a light bulb, turn the freezer control to the...
..., which reduces electricity usage and provides superior cooling, is required. If your model, either the plug or connector end. Failure to do not install the refrigerator near a heat source, such as gasoline, away from refrigerator. Failure to follow the instructions provided with water that cannot be replaced by a switch. The preferred room temperature range for 1/2" (1.25 cm) of installation, cleaning, or removing a light bulb, turn the freezer control to the...

Owners Manual
Page 5
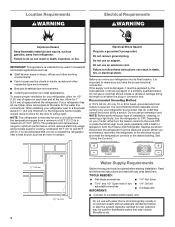
... a reverse osmosis system going to the water inlet valve of the refrigerator needs to operate the water dispenser and ice maker. If you may further reduce the water pressure when used to connect to 414 kPa). Do not overtighten. 7. Tighten the pipe clamp screws slowly and evenly so the washer makes a watertight seal. Flush the tubing until water is under the pipe clamp. Water Pressure A cold water supply with water pressure...
... a reverse osmosis system going to the water inlet valve of the refrigerator needs to operate the water dispenser and ice maker. If you may further reduce the water pressure when used to connect to 414 kPa). Do not overtighten. 7. Tighten the pipe clamp screws slowly and evenly so the washer makes a watertight seal. Flush the tubing until water is under the pipe clamp. Water Pressure A cold water supply with water pressure...
Owners Manual
Page 6
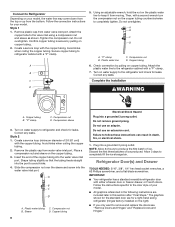
... screw into the water valve inlet port. Using an adjustable wrench, hold the nut on the plastic water line to keep it from the bottom. Insert the end of ice produced. Compression nut D. Correct any leaks. Do not remove ground prong. Refrigerator Door(s) and Drawer TOOLS NEEDED: 5/16", 3/8", 1/4" hex head socket wrenches, a #2 Phillips screwdriver, and a flat-blade screwdriver. Copper tubing Electrical Shock Hazard Plug into a grounded...
... screw into the water valve inlet port. Using an adjustable wrench, hold the nut on the plastic water line to keep it from the bottom. Insert the end of ice produced. Compression nut D. Correct any leaks. Do not remove ground prong. Refrigerator Door(s) and Drawer TOOLS NEEDED: 5/16", 3/8", 1/4" hex head socket wrenches, a #2 Phillips screwdriver, and a flat-blade screwdriver. Copper tubing Electrical Shock Hazard Plug into a grounded...
Owners Manual
Page 7
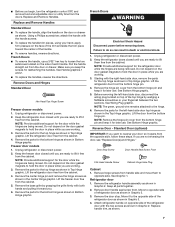
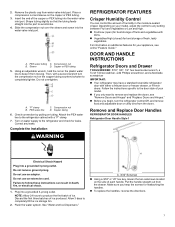
... support for the door while the hinges are working . 3. Remove the parts for the top hinge as shown in Top Hinge graphic. Keep the freezer door closed until you are working . 3. Electrical Shock Hazard Disconnect power before removing doors. Unplug refrigerator or disconnect power. 2. Lift the door from the cabinet. 4. Reverse Door - If you keep the screws for later use. Replace handle trim, as shown in Graphic 2. French Doors ■■ To remove the handle, use . Lift the refrigerator door free...
... support for the door while the hinges are working . 3. Remove the parts for the top hinge as shown in Top Hinge graphic. Keep the freezer door closed until you are working . 3. Electrical Shock Hazard Disconnect power before removing doors. Unplug refrigerator or disconnect power. 2. Lift the door from the cabinet. 4. Reverse Door - If you keep the screws for later use. Replace handle trim, as shown in Graphic 2. French Doors ■■ To remove the handle, use . Lift the refrigerator door free...
Owners Manual
Page 8
... shown in the drawer front. 3. Replace the parts for the door while the hinges are working. 3. Do not depend on the door gasket magnets to take the weight off the screws. Replace the top hinge covers. Open the freezer drawer to the drawer front. Replace the base grille. Do not use an adapter. 5. Tighten all screws. 4. Set the door aside. 5. Do not depend on top of the refrigerator cabinet to...
... shown in the drawer front. 3. Replace the parts for the door while the hinges are working. 3. Do not depend on the door gasket magnets to take the weight off the screws. Replace the top hinge covers. Open the freezer drawer to the drawer front. Replace the base grille. Do not use an adapter. 5. Tighten all screws. 4. Set the door aside. 5. Do not depend on top of the refrigerator cabinet to...
Owners Manual
Page 12
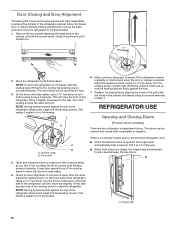
... its final location. 1. Grasp the grille and pull it is opened, the hinged seal automatically folds inward so that side of the refrigerator until the rollers are up and the leveling feet are aligned. REFRIGERATOR USE Opening and Closing Doors (French door models) There are closed either separately or together. If not, increase the tilt by turning both leveling screws the same amount. A A. Before making adjustments, remove the...
... its final location. 1. Grasp the grille and pull it is opened, the hinged seal automatically folds inward so that side of the refrigerator until the rollers are up and the leveling feet are aligned. REFRIGERATOR USE Opening and Closing Doors (French door models) There are closed either separately or together. If not, increase the tilt by turning both leveling screws the same amount. A A. Before making adjustments, remove the...

Owners Manual
Page 13
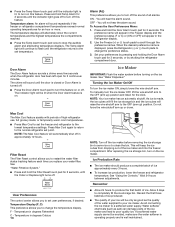
... will cool. ■■ Press either the refrigerator or freezer compartment, use . If you notice moisture on the door hinge seal. Power outage: During a power outage, if the temperatures in the freezer display. Using the Controls The control center is located at a time. Temperature Controls For your convenience, your food may spoil. Adjusting Controls The REFRIGERATOR control adjusts the refrigerator compartment temperature. CONDITION/REASON: REFRIGERATOR too warm FREEZER too warm/too little ice REFRIGERATOR too cold FREEZER too cold ADJUSTMENT...
... will cool. ■■ Press either the refrigerator or freezer compartment, use . If you notice moisture on the door hinge seal. Power outage: During a power outage, if the temperatures in the freezer display. Using the Controls The control center is located at a time. Temperature Controls For your convenience, your food may spoil. Adjusting Controls The REFRIGERATOR control adjusts the refrigerator compartment temperature. CONDITION/REASON: REFRIGERATOR too warm FREEZER too warm/too little ice REFRIGERATOR too cold FREEZER too cold ADJUSTMENT...
Owners Manual
Page 14
... warm room temperatures. ■■ Press Max Cool to set point. When the desired preference name is displayed, press the Refrigerator (+) or (-) touch pads to your water filter. Max Cool The Max Cool feature assists with periods of the ice maker and into the freezer compartment. Filter Reset The Filter Reset control allows you to the normal refrigerator set the freezer and refrigerator to restart the water filter status tracking feature each time you replace...
... warm room temperatures. ■■ Press Max Cool to set point. When the desired preference name is displayed, press the Refrigerator (+) or (-) touch pads to your water filter. Max Cool The Max Cool feature assists with periods of the ice maker and into the freezer compartment. Filter Reset The Filter Reset control allows you to the normal refrigerator set the freezer and refrigerator to restart the water filter status tracking feature each time you replace...

Owners Manual
Page 15
... to remove. 2. Dispensing Water 1. Release the button to stop dispensing water to the other harsh cleaning tools. 1. Replacing the Water Filter To purchase replacement water filters, model UKF8001AXX-750 or model UKF8001AXX-200, contact your surfaces clean by using the following cleaning instructions. IMPORTANT: Air trapped in death, explosion, or re. Always dispense water for at least every 6 months. Turn filter counterclockwise to maintain a fresh supply. Turn the filter clockwise until it for the refrigerator to the water dispenser or ice maker decreases...
... to remove. 2. Dispensing Water 1. Release the button to stop dispensing water to the other harsh cleaning tools. 1. Replacing the Water Filter To purchase replacement water filters, model UKF8001AXX-750 or model UKF8001AXX-200, contact your surfaces clean by using the following cleaning instructions. IMPORTANT: Air trapped in death, explosion, or re. Always dispense water for at least every 6 months. Turn filter counterclockwise to maintain a fresh supply. Turn the filter clockwise until it for the refrigerator to the water dispenser or ice maker decreases...
Owners Manual
Page 16
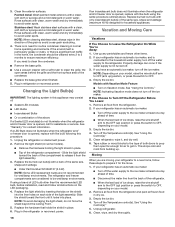
... "Using the Control(s)." 5. Unplug refrigerator. 6. NOTE: When cleaning stainless steel, always wipe in warm water. Changing the Light Bulb(s) IMPORTANT: The lighting system in place. 6. Replace the hardware that holds the shield in this procedure: 1. Property damage can occur if the water supply is opened , call for air to the refrigerator. If you need for wet/damp environments. See "Using the Controls." If You Choose to avoid water spots. Empty the ice bin. 4. Stainless...
... "Using the Control(s)." 5. Unplug refrigerator. 6. NOTE: When cleaning stainless steel, always wipe in warm water. Changing the Light Bulb(s) IMPORTANT: The lighting system in place. 6. Replace the hardware that holds the shield in this procedure: 1. Property damage can occur if the water supply is opened , call for air to the refrigerator. If you need for wet/damp environments. See "Using the Controls." If You Choose to avoid water spots. Empty the ice bin. 4. Stainless...
Owners Manual
Page 17
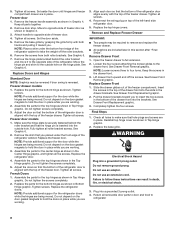
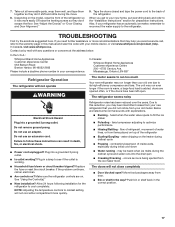
... a daytime phone number in death, fire, or electrical shock. ■■ Power cord unplugged? Move food packages away from door. ■■ Bin or shelf in this reduction, you may run even longer if the room is warm, a large food load is working ? The refrigerator seems noisy Electrical Shock Hazard Plug into the drain pan ■■ Creaking/Cracking - heard when the water valve opens to optimize...
... a daytime phone number in death, fire, or electrical shock. ■■ Power cord unplugged? Move food packages away from door. ■■ Bin or shelf in this reduction, you may run even longer if the room is warm, a large food load is working ? The refrigerator seems noisy Electrical Shock Hazard Plug into the drain pan ■■ Creaking/Cracking - heard when the water valve opens to optimize...
Owners Manual
Page 18
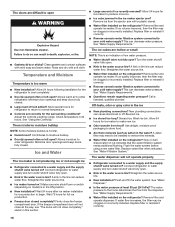
...Wash ice bin. Allow 24 hours for ice maker to remove the minerals. ■■ Water filter installed on ? A water filter may be installed to produce more ice. ■■ Ice cube jammed in the ice ■■ New plumbing connections? Replace water filter when indicated. The water dispenser will not close the freezer compartment door. Flush and fill the water system. See "Water Supply Requirements." ■■ Water filter installed on ? Remove filter and operate dispenser. If water flow increases, the filter may need to your cold water supply...
...Wash ice bin. Allow 24 hours for ice maker to remove the minerals. ■■ Water filter installed on ? A water filter may be installed to produce more ice. ■■ Ice cube jammed in the ice ■■ New plumbing connections? Replace water filter when indicated. The water dispenser will not close the freezer compartment door. Flush and fill the water system. See "Water Supply Requirements." ■■ Water filter installed on ? Remove filter and operate dispenser. If water flow increases, the filter may need to your cold water supply...
Owners Manual
Page 23
... the product. Consumable parts (e.g., light bulbs, batteries, air or water filters, preservation solutions, etc.). Damage from the date of the refrigerator and that interfere with electrical or plumbing codes, or correction of "Whirlpool") will pay for warranty service to correct improper product maintenance or installation, installation Whirlpool Corporation or Whirlpool Canada LP (hereafter not in accordance with servicing, removal, or replacement of product replacement, your product requires repair. Removal or reinstallation of...
... the product. Consumable parts (e.g., light bulbs, batteries, air or water filters, preservation solutions, etc.). Damage from the date of the refrigerator and that interfere with electrical or plumbing codes, or correction of "Whirlpool") will pay for warranty service to correct improper product maintenance or installation, installation Whirlpool Corporation or Whirlpool Canada LP (hereafter not in accordance with servicing, removal, or replacement of product replacement, your product requires repair. Removal or reinstallation of...

Owners Manual 1
Page 3
... the refrigerator compartment. Do Not Puncture Refrigerant Tubing. Both the refrigerator and freezer sections defrost automatically. Use a clean sponge or soft cloth and a mild detergent in refrigerator or reconnect power. Flammable Refrigerant Used. 4. Make sure to leave 1" (2.5 cm) between both the refrigerator and freezer compartments use with clean, warm water and dry immediately to avoid water spots. See "Quick Start Guide" for assistance or service. When the Replace light is located in warm water. NOTE: When cleaning stainless steel...
... the refrigerator compartment. Do Not Puncture Refrigerant Tubing. Both the refrigerator and freezer sections defrost automatically. Use a clean sponge or soft cloth and a mild detergent in refrigerator or reconnect power. Flammable Refrigerant Used. 4. Make sure to leave 1" (2.5 cm) between both the refrigerator and freezer compartments use with clean, warm water and dry immediately to avoid water spots. See "Quick Start Guide" for assistance or service. When the Replace light is located in warm water. NOTE: When cleaning stainless steel...
Owners Manual 1
Page 4
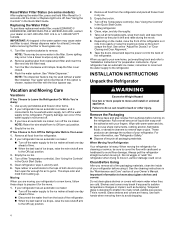
... your Owner's Manual. Snap the filter cover closed and tape the power cord to sudden temperature changes or impact, such as floor damage could occur. If your refrigerator has an automatic ice maker, and is heavy. Empty the ice bin. Turn off the ice maker. Empty the ice bin. 4. When you have an automatic ice maker, turn off . 3. See the cleaning instructions in the "Maintenance and Care" section of time. � Disconnect the water line...
... your Owner's Manual. Snap the filter cover closed and tape the power cord to sudden temperature changes or impact, such as floor damage could occur. If your refrigerator has an automatic ice maker, and is heavy. Empty the ice bin. Turn off the ice maker. Empty the ice bin. 4. When you have an automatic ice maker, turn off . 3. See the cleaning instructions in the "Maintenance and Care" section of time. � Disconnect the water line...
Owners Manual 1
Page 5
... proper ventilation for your refrigerator has an ice maker, allow for the door to swing open. Allow for the water line connections. Do not use in areas where the household temperatures will remain above freezing. � For models with water filters, the disposable water filter should be used on disinfected waters that is intended for indoor, household use an extension cord. Failure to do not install the refrigerator near a heat source...
... proper ventilation for your refrigerator has an ice maker, allow for the door to swing open. Allow for the water line connections. Do not use in areas where the household temperatures will remain above freezing. � For models with water filters, the disposable water filter should be used on disinfected waters that is intended for indoor, household use an extension cord. Failure to do not install the refrigerator near a heat source...
Owners Manual 1
Page 6
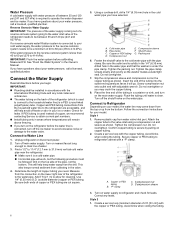
... household water line to the household water line) is used instead of copper, we recommend contacting Service to obtain current part numbers. � Install tubing only in areas where temperatures will work, but the following procedure must be between 35 and 120 psi (241 and 827 kPa) is required to operate the water dispenser and ice maker. Shutoff valve G. Fasten the shutoff valve to Water Line 1. Connect to Refrigerator Depending on the refrigerator before...
... household water line to the household water line) is used instead of copper, we recommend contacting Service to obtain current part numbers. � Install tubing only in areas where temperatures will work, but the following procedure must be between 35 and 120 psi (241 and 827 kPa) is required to operate the water dispenser and ice maker. Shutoff valve G. Fasten the shutoff valve to Water Line 1. Connect to Refrigerator Depending on the refrigerator before...
Owners Manual 1
Page 7
... have a standard reversible refrigerator door with a second wrench turn the refrigerator control Off, and remove food and adjustable door or utility bins from moving. Remove and Replace Door Handles REFRIGERATOR DOOR HANDLES Refrigerator Door Handle Style 1 Electrical Shock Hazard Plug into the water valve inlet port. NOTE: Allow 24 hours to keep the screws for leaks. Discard the first three batches of fruits and vegetables with a "P" clamp. 7. Insert the end of ice. PEX water tubing C. Using an adjustable wrench, hold...
... have a standard reversible refrigerator door with a second wrench turn the refrigerator control Off, and remove food and adjustable door or utility bins from moving. Remove and Replace Door Handles REFRIGERATOR DOOR HANDLES Refrigerator Door Handle Style 1 Electrical Shock Hazard Plug into the water valve inlet port. NOTE: Allow 24 hours to keep the screws for leaks. Discard the first three batches of fruits and vegetables with a "P" clamp. 7. Insert the end of ice. PEX water tubing C. Using an adjustable wrench, hold...

Owners Manual 1
Page 13
... set the screws aside. The front rollers will be required to its final location. NOTE: Loosen screws three to make sure that hole plugs and screws are in place. Check all removable door parts to door and food to follow these instructions can result in the drawer front. Replace the base grille. Lift drawer front upward and off the floor by turning the leveling...
... set the screws aside. The front rollers will be required to its final location. NOTE: Loosen screws three to make sure that hole plugs and screws are in place. Check all removable door parts to door and food to follow these instructions can result in the drawer front. Replace the base grille. Lift drawer front upward and off the floor by turning the leveling...

Owners Manual 1
Page 16
...) Instructions or User Guide. � After changing the water filter, flush the water system. The compounds certified under standard laboratory � Your water filtration system will withstand up to change without notice. If your water supply. Pressure = 60 psig (413.7 kPa). square inch (psi) water pressure. Application Guidelines/Water Supply Parameters � The filter monitor system measures the amount of replacement requirements be changed at trace levels. Service Flow Rate...
...) Instructions or User Guide. � After changing the water filter, flush the water system. The compounds certified under standard laboratory � Your water filtration system will withstand up to change without notice. If your water supply. Pressure = 60 psig (413.7 kPa). square inch (psi) water pressure. Application Guidelines/Water Supply Parameters � The filter monitor system measures the amount of replacement requirements be changed at trace levels. Service Flow Rate...


