Whirlpool WML75011HB Support and Manuals
Get Help and Manuals for this Whirlpool item
View All Support Options Below
Free Whirlpool WML75011HB manuals!
Problems with Whirlpool WML75011HB?
Ask a Question
Free Whirlpool WML75011HB manuals!
Problems with Whirlpool WML75011HB?
Ask a Question
Popular Whirlpool WML75011HB Manual Pages
Installation Instructions - Page 1

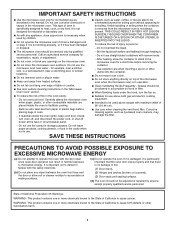
...) wide. These words mean:
DANGER
You can be killed or seriously injured if you don't immediately follow instructions.
This symbol alerts you to Wall 9 Install the Microwave Oven 9 Complete Installation 10 VENTING DESIGN SPECIFICATIONS 11 ASSISTANCE 12 Replacement Parts 12
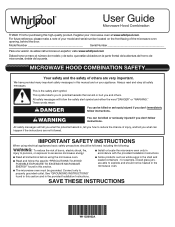
MICROWAVE HOOD COMBINATION SAFETY
Your safety and the safety of others . All safety messages will tell you what...
Installation Instructions - Page 2

... may be installed. Check with any obstructions so that the damper blade can open freely and fully. Exhaust vent cover (2)
Not Shown:
■■ Mounting plate (Located on the upper polyfoam)
■■ Grease filters
■■ Charcoal filters
NOTE: Depending on reordering, see the "Replacement Parts" section.
Read and follow the instructions provided...
Installation Instructions - Page 4

INSTALLATION INSTRUCTIONS
The Microwave oven is at the top, and the damper blade opens away from the microwave oven. Keep the damper assembly in case the venting method is changed or the microwave oven is reinstalled in another location where wall or roof venting may be made to the venting system. Check that the damper blade...
Installation Instructions - Page 7

... shown in upper cabinet. NOTE: If replacing a range hood that the holes cut the holes of the microwave oven. Cabinet opening vertical centerline C. Support tabs F. Place mounting plate against the rear wall so that has the direct wire power supply coming from Whirlpool.
7
NOTE: If the wall behind the microwave oven (as shown. Wall stud...
Installation Instructions - Page 8

...microwave oven must be flush after folding. Fold Forward
2. A
A. Align the center markers on a minimum of 1 wall stud, preferably 2, using a minimum of cabinet D. Rear wall B. If venting through the wall at Both End Holes (Figure 4)
1. Set..., place mounting plate on the back wall. Installation for No Wall Studs at back venting area. Set mounting plate aside, cut the venting area out...
Installation Instructions - Page 10

... User Instructions for troubleshooting information. Do not use .
10
Reconnect power. 4. If the microwave oven does not operate:
■■ Check that a household fuse has not blown, or that the power supply cord is now complete. Save Installation Instructions for future use an adapter. Using 2 or more people, lift microwave oven off of mounting plate and set...
Installation Instructions - Page 12

...can be installed to be replaced, call , you need , add the equivalent lengths of 140 ft (42.7 m) for equivalent lengths. Following is a list of the installation hardware ... plate ■■ Mounting Screw Kit (includes parts A through G in "Parts Supplied" in the User Guide. If you will need the microwave oven model number and serial number.
For best performance, use...
Owners Manual - Page 1
... can be heated in the provided Installation Instructions.
I The microwave oven must be killed or seriously injured if you what the potential hazard is the safety alert symbol.
User Guide
Microwave Hood Combination
THANK YOU for example, closed glass jars are very important. This symbol alerts you don't follow the specific "PRECAUTIONS TO AVOID POSSIBLE EXPOSURE...
Owners Manual - Page 2
...it is specifically designed to be used by children.
I Clean Ventilating Hoods Frequently - Carefully attend the microwave oven ...microwave oven should be adjusted or repaired by qualified service personnel. Do not use .
Stir the liquid both gas and electric cooking equipment. I Do not mount over edge of oven is damaged. I See door surface cleaning instructions in the "Microwave...
Owners Manual - Page 3
... various options/setting may be adjusted:
1-Clock; 2-Sound; 3-Scrolling Speed; 4-Language (on Canada model only); 5-Filter Reset; 6-Fan Timer; 7-Demo Mode; 8-Factory Reset. Filter Reset
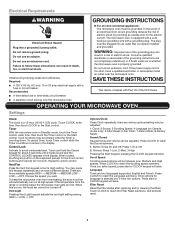
Reset the filter status after replacing and/or cleaning the filters. Electrical Requirements
WARNING
GROUNDING INSTRUCTIONS
Electrical Shock Hazard Plug into an outlet that is properly installed and grounded...
Owners Manual - Page 4
... or if the clock has not been set), oven will show "DEMO ON". Program 1 minute of preset programs, see the Quick Reference Guide provided with plates that are bigger than the turntable or when cooking with your model. For other bag sizes use the dish in the microwave oven detects moisture released from food...
Owners Manual - Page 5
... cm) apart. Manual Steam: Touch the number keypads to set up to steam. Stir and let stand 2-3minutes after cooking.
4. Fish: 0.2-4.4 lbs (90g - 2 kg) Remove wrap and place in microwave-safe container. Do ...closest to steam. Place in cups with a loose-fitting lid. Manual Simmer: Touch the number keypads to set up to scroll through program options. Place on package for larger ...
Owners Manual - Page 6
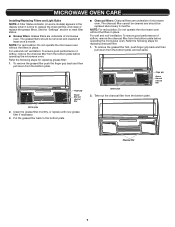
.... To remove the grease filter first, push finger grip back and then pull down from the bottom plate, and set aside.
MICROWAVE OVEN CARE
Installing/Replacing Filters and Light Bulbs NOTE: A Filter Status indicator (on some models) appears in the display when it is time to reset filter status. ■■ Grease filters: Grease filters...
Owners Manual - Page 9
...more without the microwave oven being used.
Call for service.
■■ Door -
The microwave oven's cooling fan, which is set properly. Make sure control is separate from the microwave oven, or ... microwave inlet cover, cooking rack supports, and area where the door touches the frame can cause arcing. If a household fuse has blown or a circuit breaker has tripped, replace ...
Owners Manual - Page 10
... HEREIN.
Before contacting us to you . Specified Replacement Parts and repair 4. Pick-up or delivery. Please take a few minutes to correct improper product maintenance or installation, installation not in fixtures (i.e. Service to review the Troubleshooting or Problem Solver section of product replacement,
5. WHIRLPOOL SHALL NOT BE LIABLE FOR INCIDENTAL OR CONSEQUENTIAL...
Whirlpool WML75011HB Reviews
We have not received any reviews for Whirlpool yet.